Learn the Science of Mummification with Apple Mummies
Posted on Published: October 4, 2019 - Last updated: July 23, 2021
Learn about mummification by making apple mummies with the Ancient Egypt science experiment!
It’s Halloween time and we just finished reading Mummies in the Morning from the Magic Tree House book series by Mary Pope Osborne.
This apple mummy activity is a great way to observe how Ancient Egyptians made mummies by comparing and contrasting different desiccants and methods to preserve bodies and remove moisture from objects.
This post contains affiliate links. As an Amazon Associate, Our Family Code earns from qualifying purchases. Please see our Disclosure Policy for more details.
This activity is part of our Magic Tree House book activity series . In the story, Mummies in the Morning , Jack and Annie find a mummified body in a gold coffin inside of a pyramid.
In his book, Jack reads how the Ancient Egyptians preserved dead bodies with salt and covered them with oil before removing the brains. These facts disgust Annie and she runs away!
In this science experiment, we sought to figure out the best way to remove moisture from apples in the same way that Ancient Egyptians removed moisture from bodies in order to make mummies!
Our hypothesis: We believed that the 1/2 baking soda, 1/2 salt, and gauze apple mummy would be the most effective way to remove moisture and preserve our mummies!


Apple Mummy Science
Desiccants are chemicals that pull water out of things, speed the drying process, and kill microbes that cause decay. Salt is a well known desiccant.
Ancient Egyptians used natron, a naturally occurring desiccant to mummify bodies. Mummies were dried for approximately 40 days before they were entombed!
Make Apple Mummies with These Supplies!
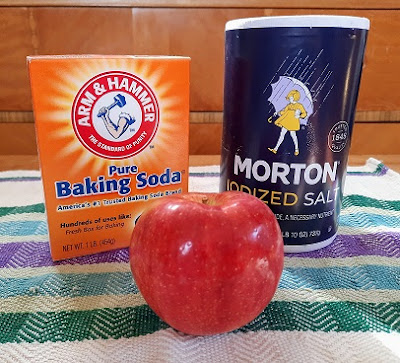
- Baking Soda
- Measuring Cup
- Plastic Bags
- Rolled Gauze
- Pumpkin carving tools or peeler
- Box or a dark space to entomb some mummies!
How to Make Apple Mummies – Stage One
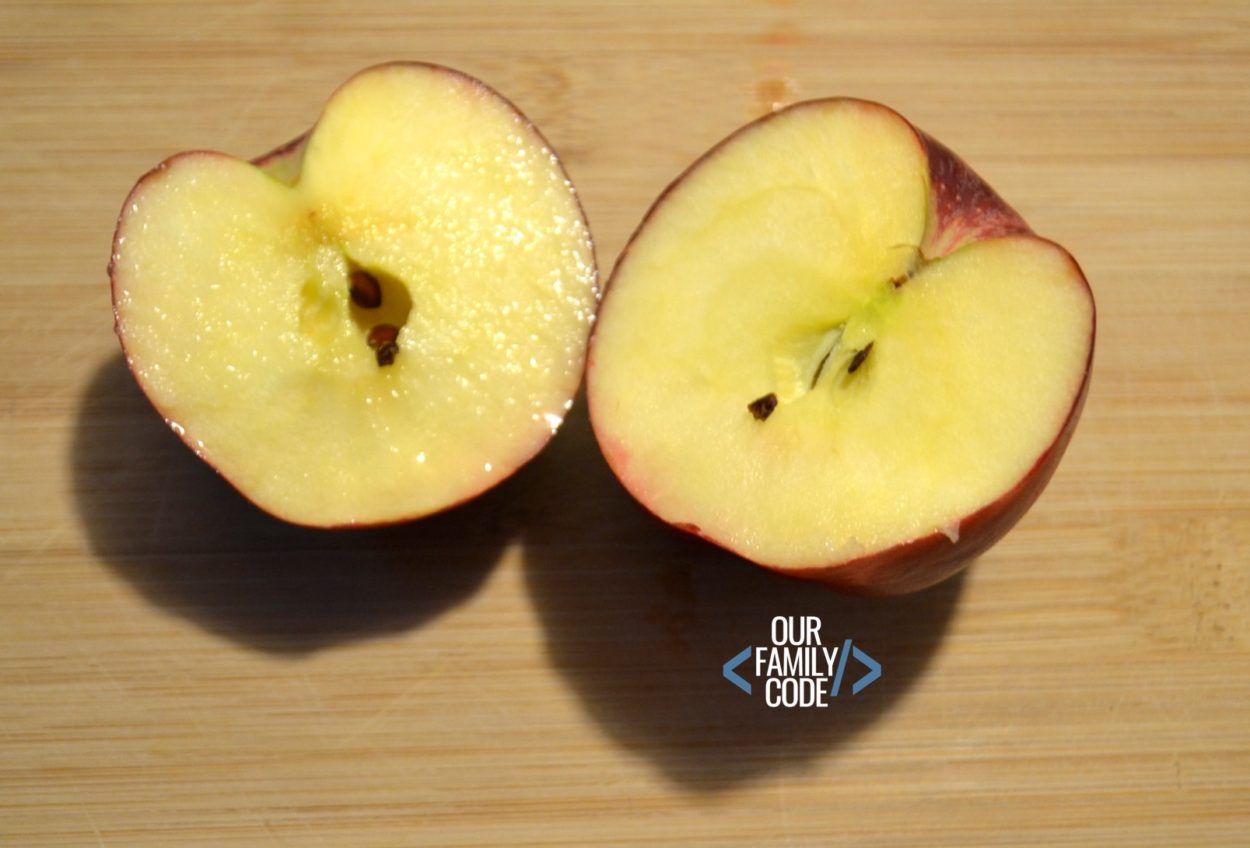
We chose to cut our apples in half because it’s the perfect time of year to turn our apples into shrunken heads with science!
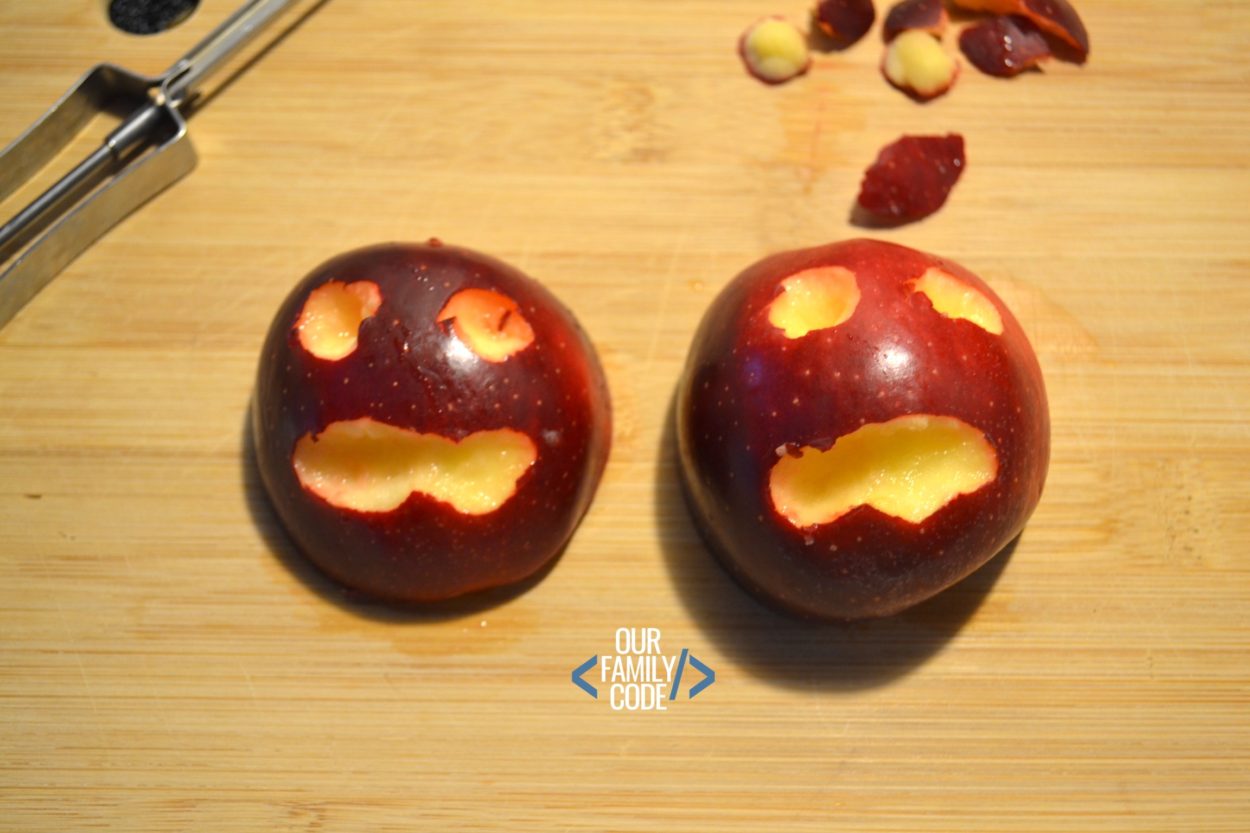
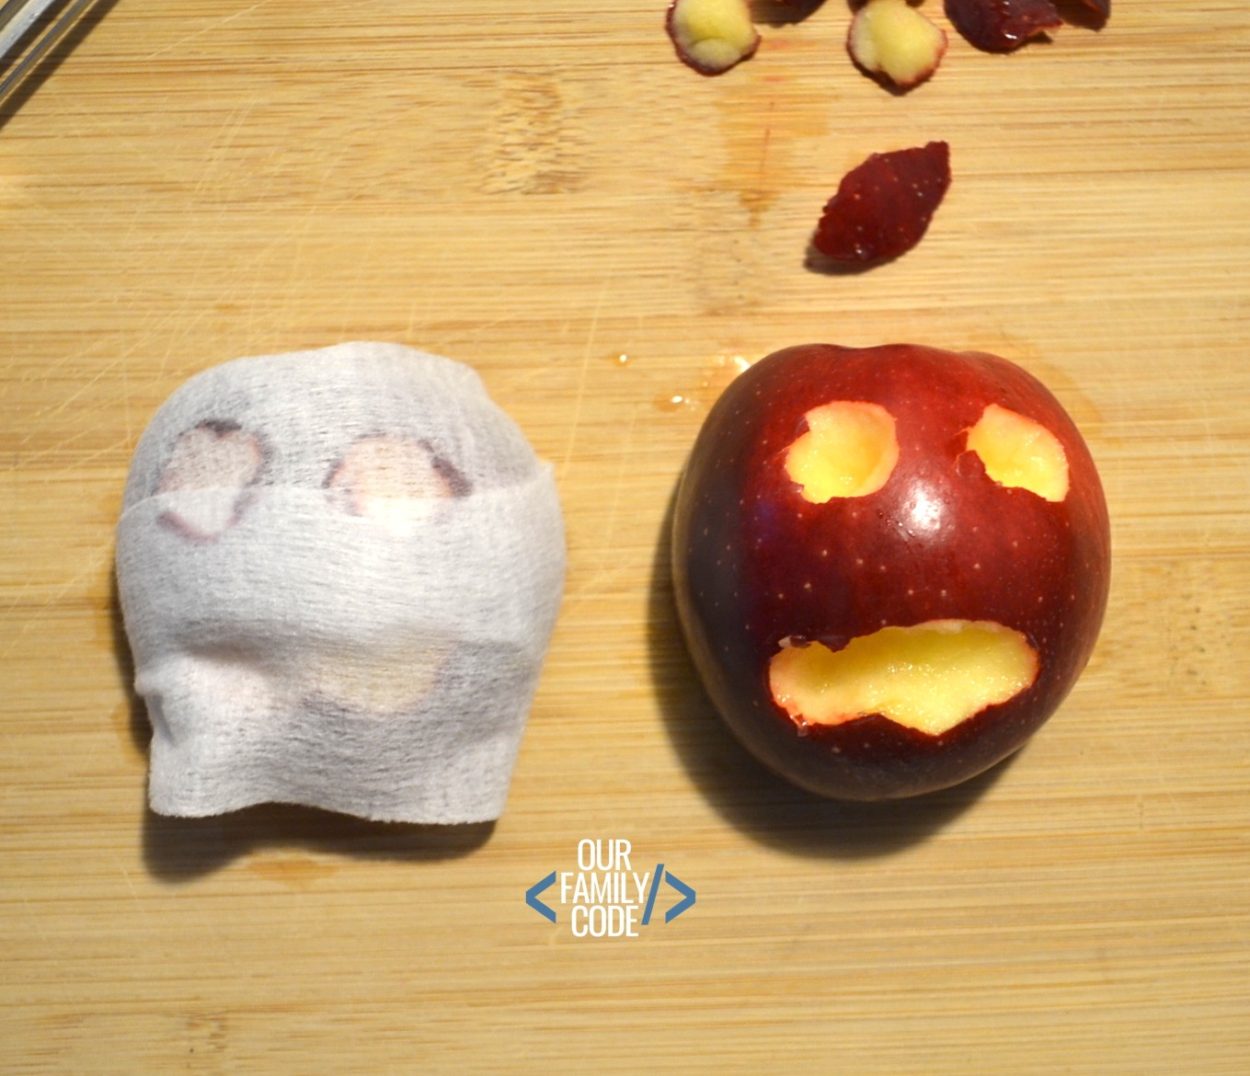
Use a regular peeler or pumpkin carving tools to carve faces in your apple halves.
Weigh your apples mummy halves with a kitchen scale. We chose to measure our apples in grams and we recorded the starting weight on our plastic tomb bags.
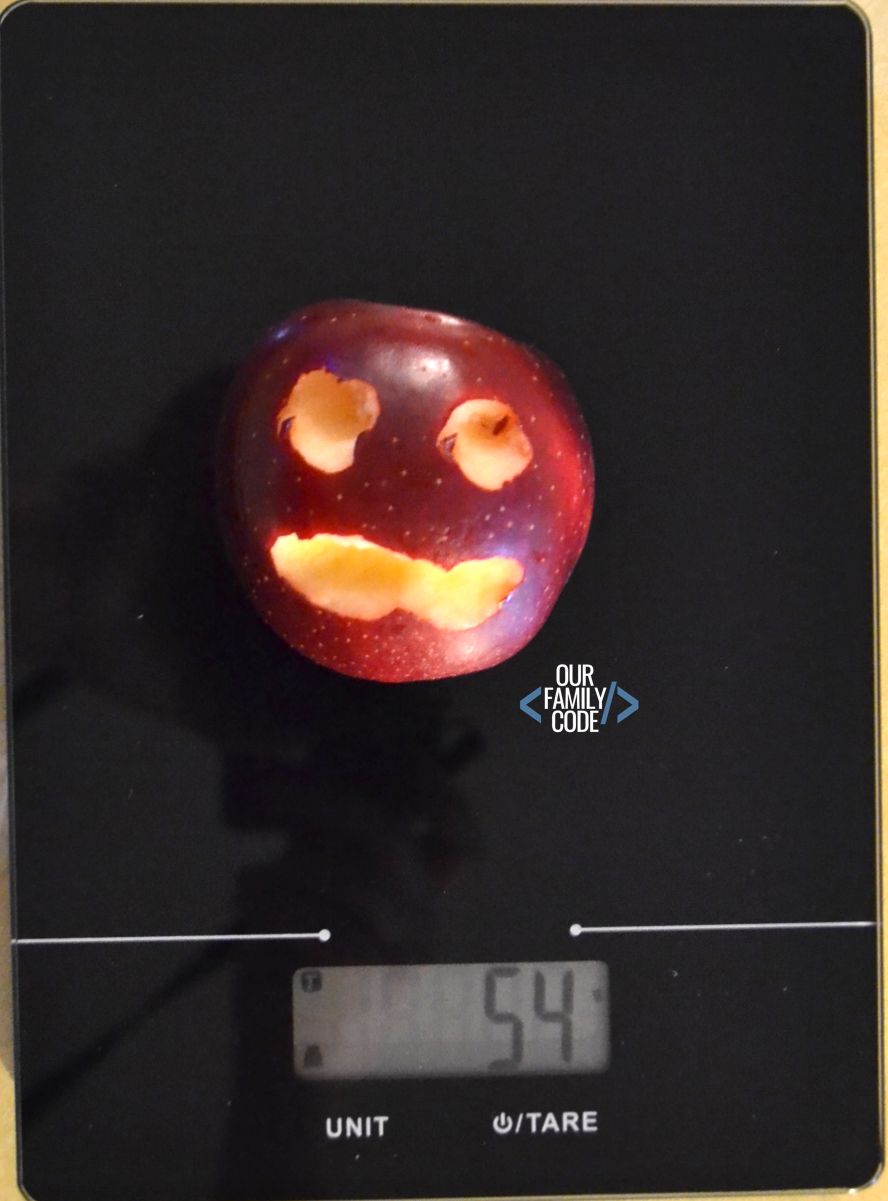
You will use two halves for each substance. One apple will be wrapped in gauze and the other will be without gauze.
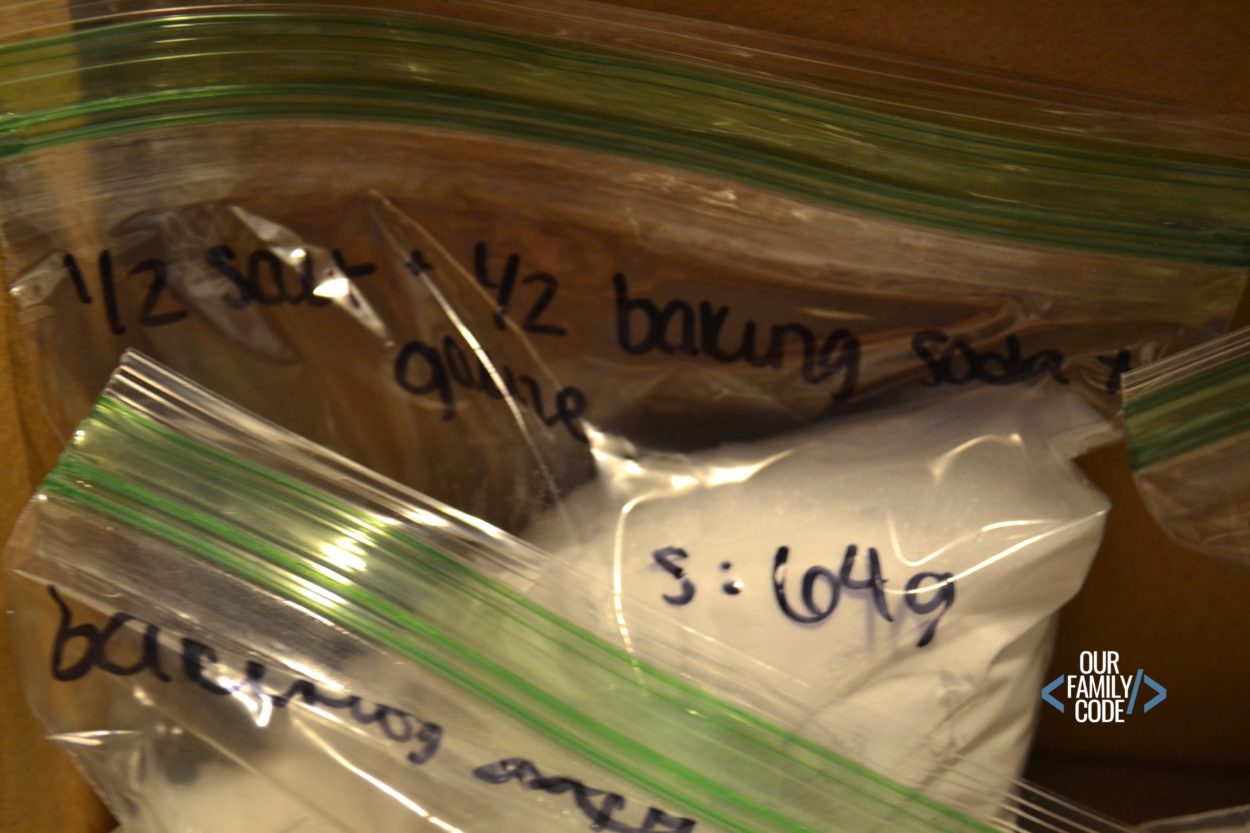
Notice how we wrote exactly what was used to preserve the apple mummy half in each bag. We used an “S” to designate our starting weight.
This will be different for every apple half unless you are the best apple magician in the world, you probably won’t end up with the same weight for each apple mummy half.
We used 1 cup for each baggie. For the 1/2 salt and 1/2 baking soda mixture, we used a 1/2 cup each so the total in the bag remained 1 cup.
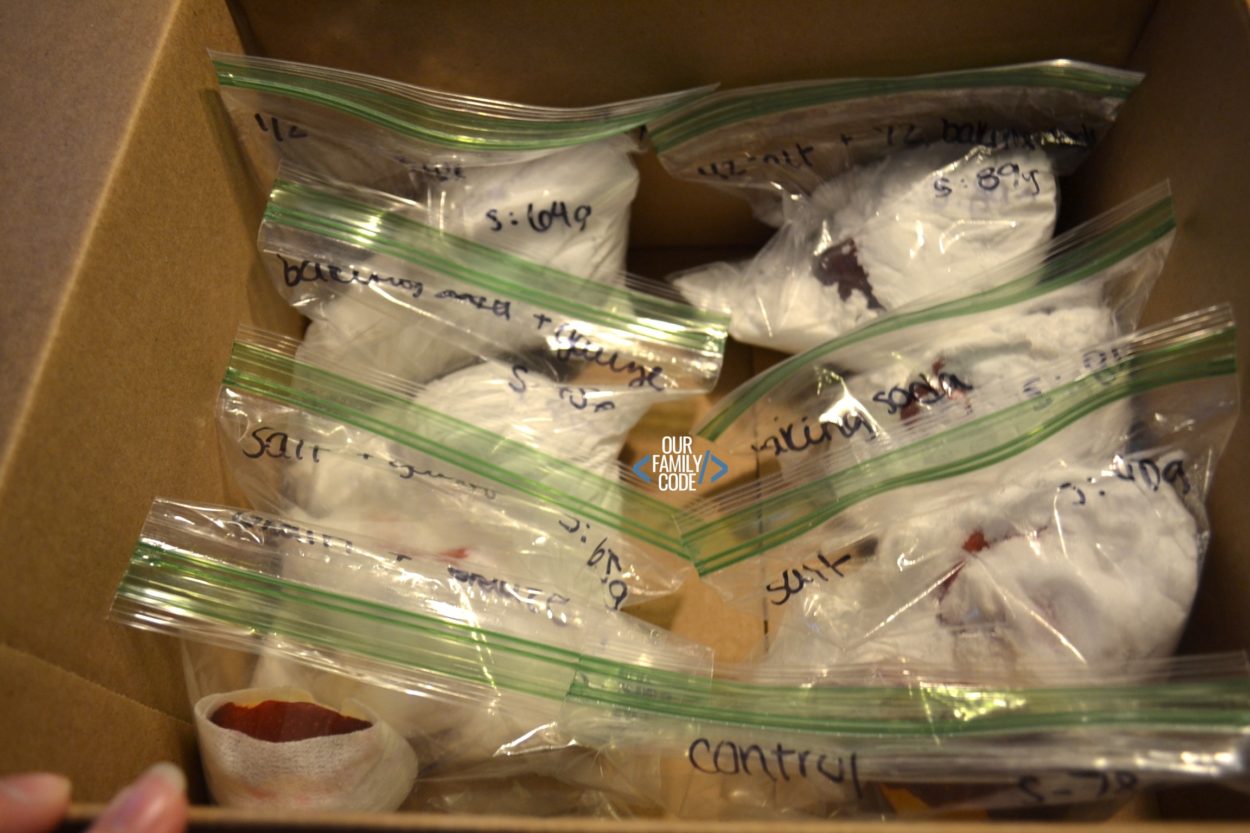
We arranged our apple mummy tomb bags by placing all of the apple mummies wrapped in gauze along the left side of the box and all of the plain apple mummies along the right side.
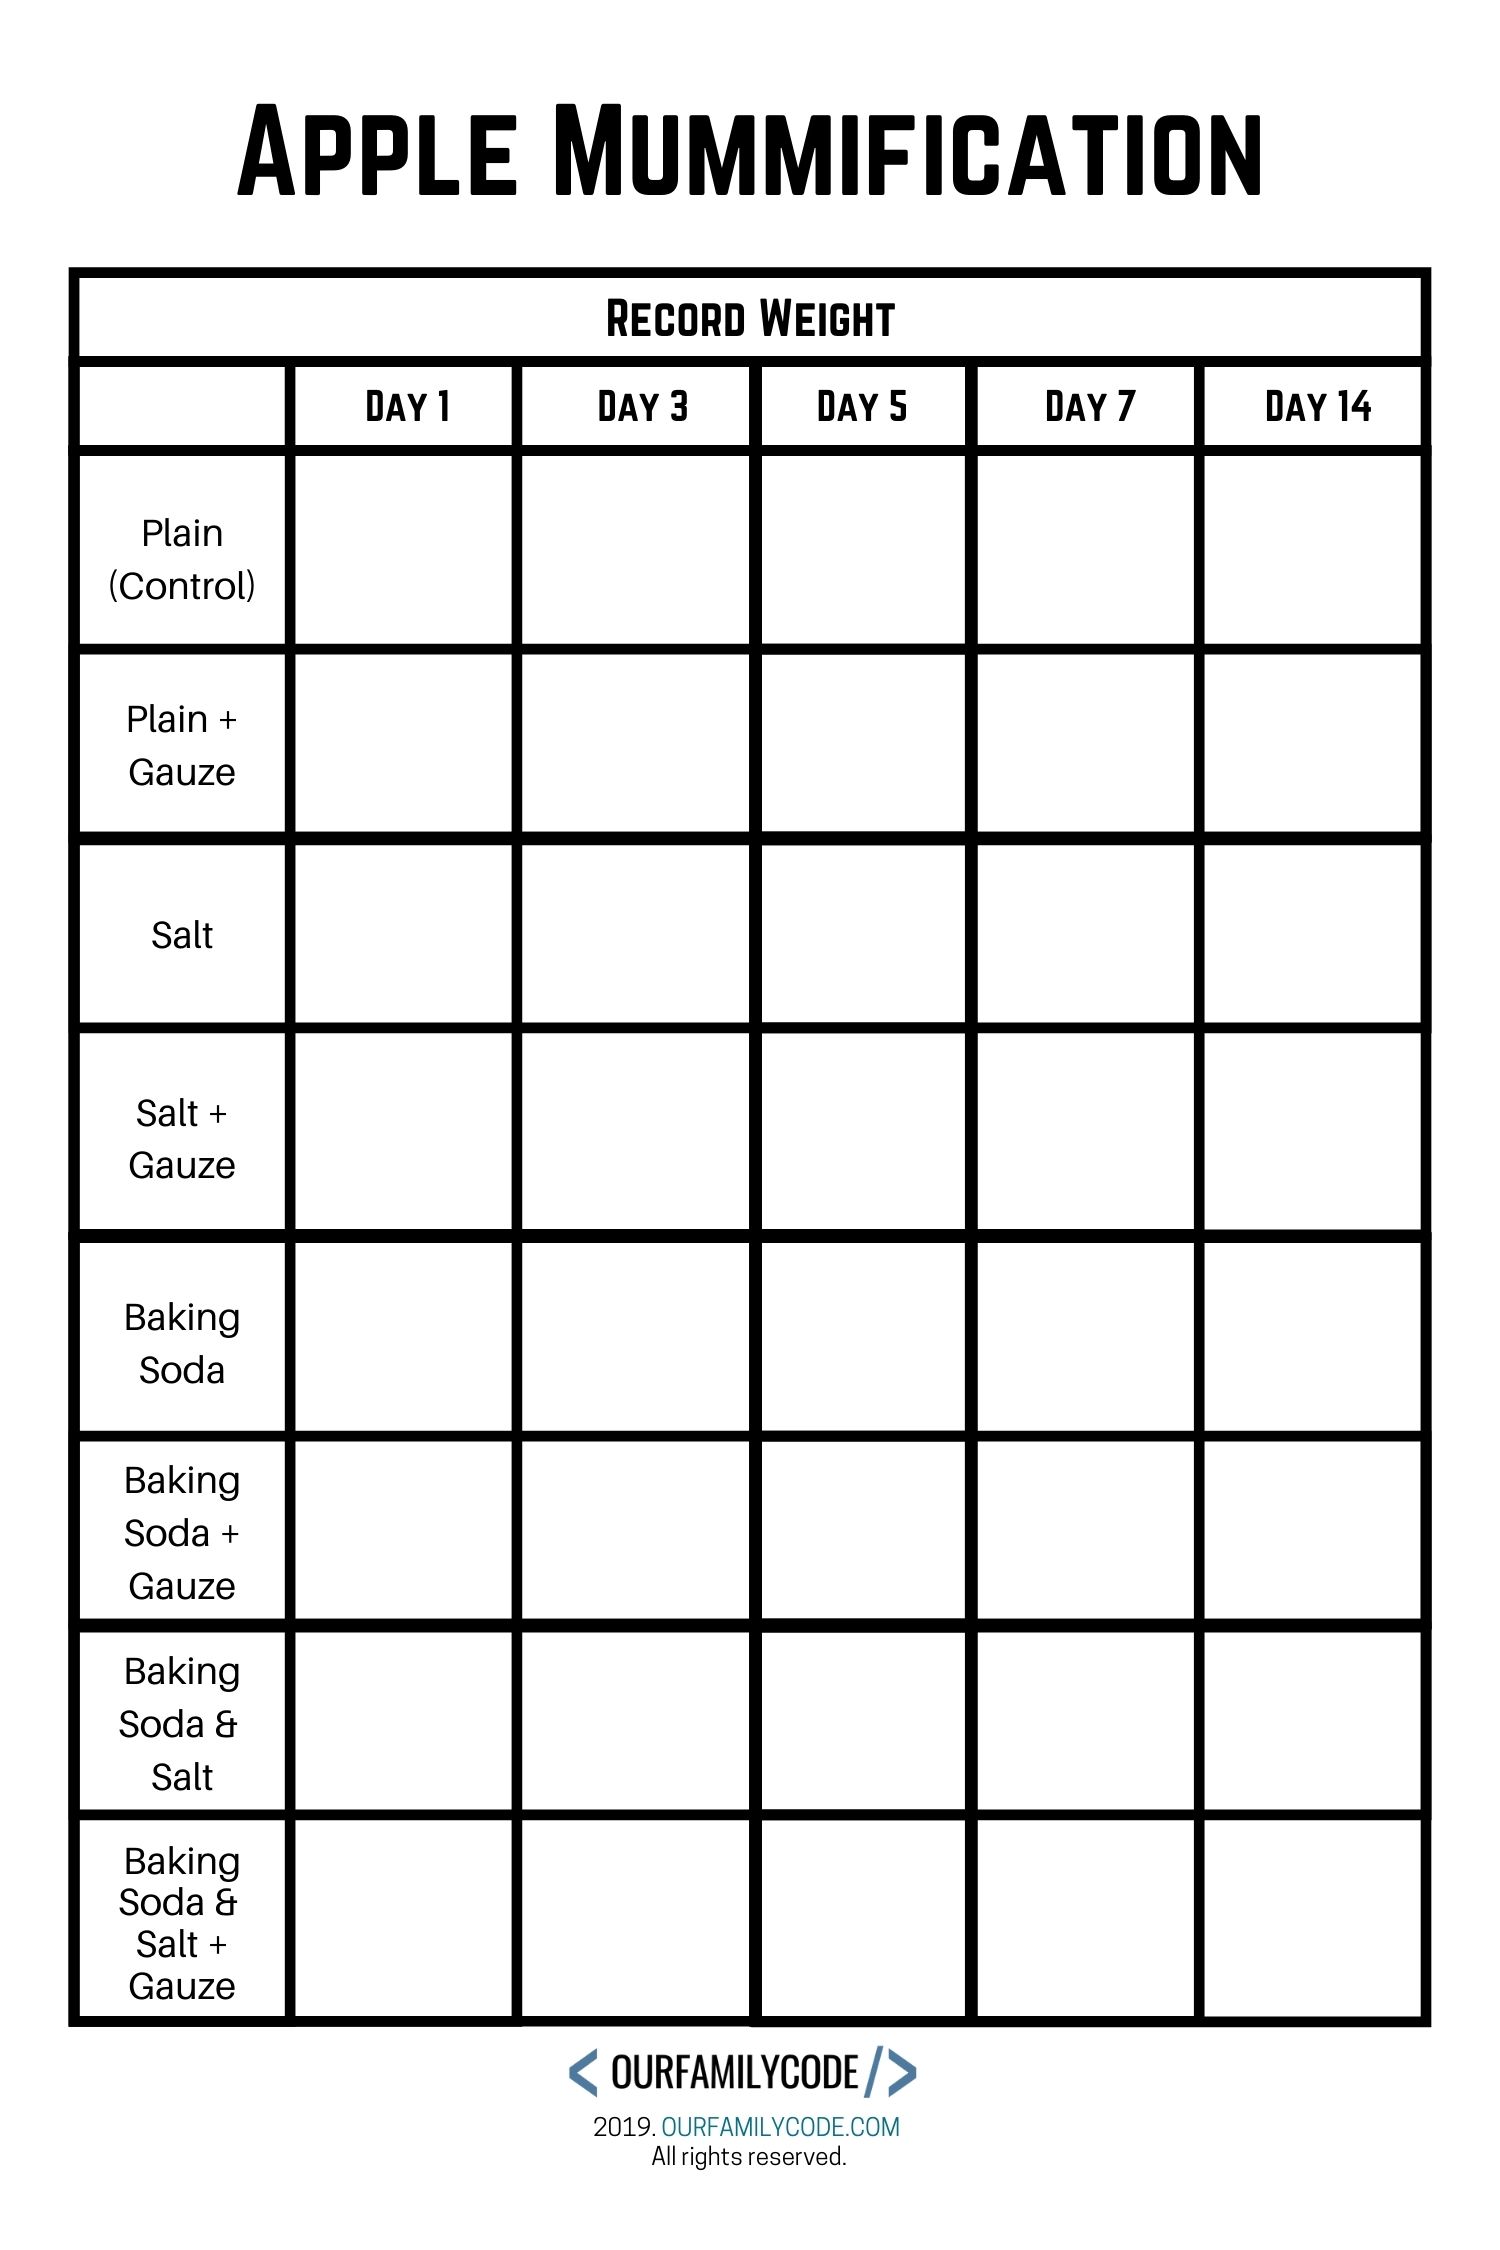
Our bags followed the order listed on the Apple Mummification worksheet (grab your free copy at the end of this post!)
How to Make Apple Mummies – Stage Two
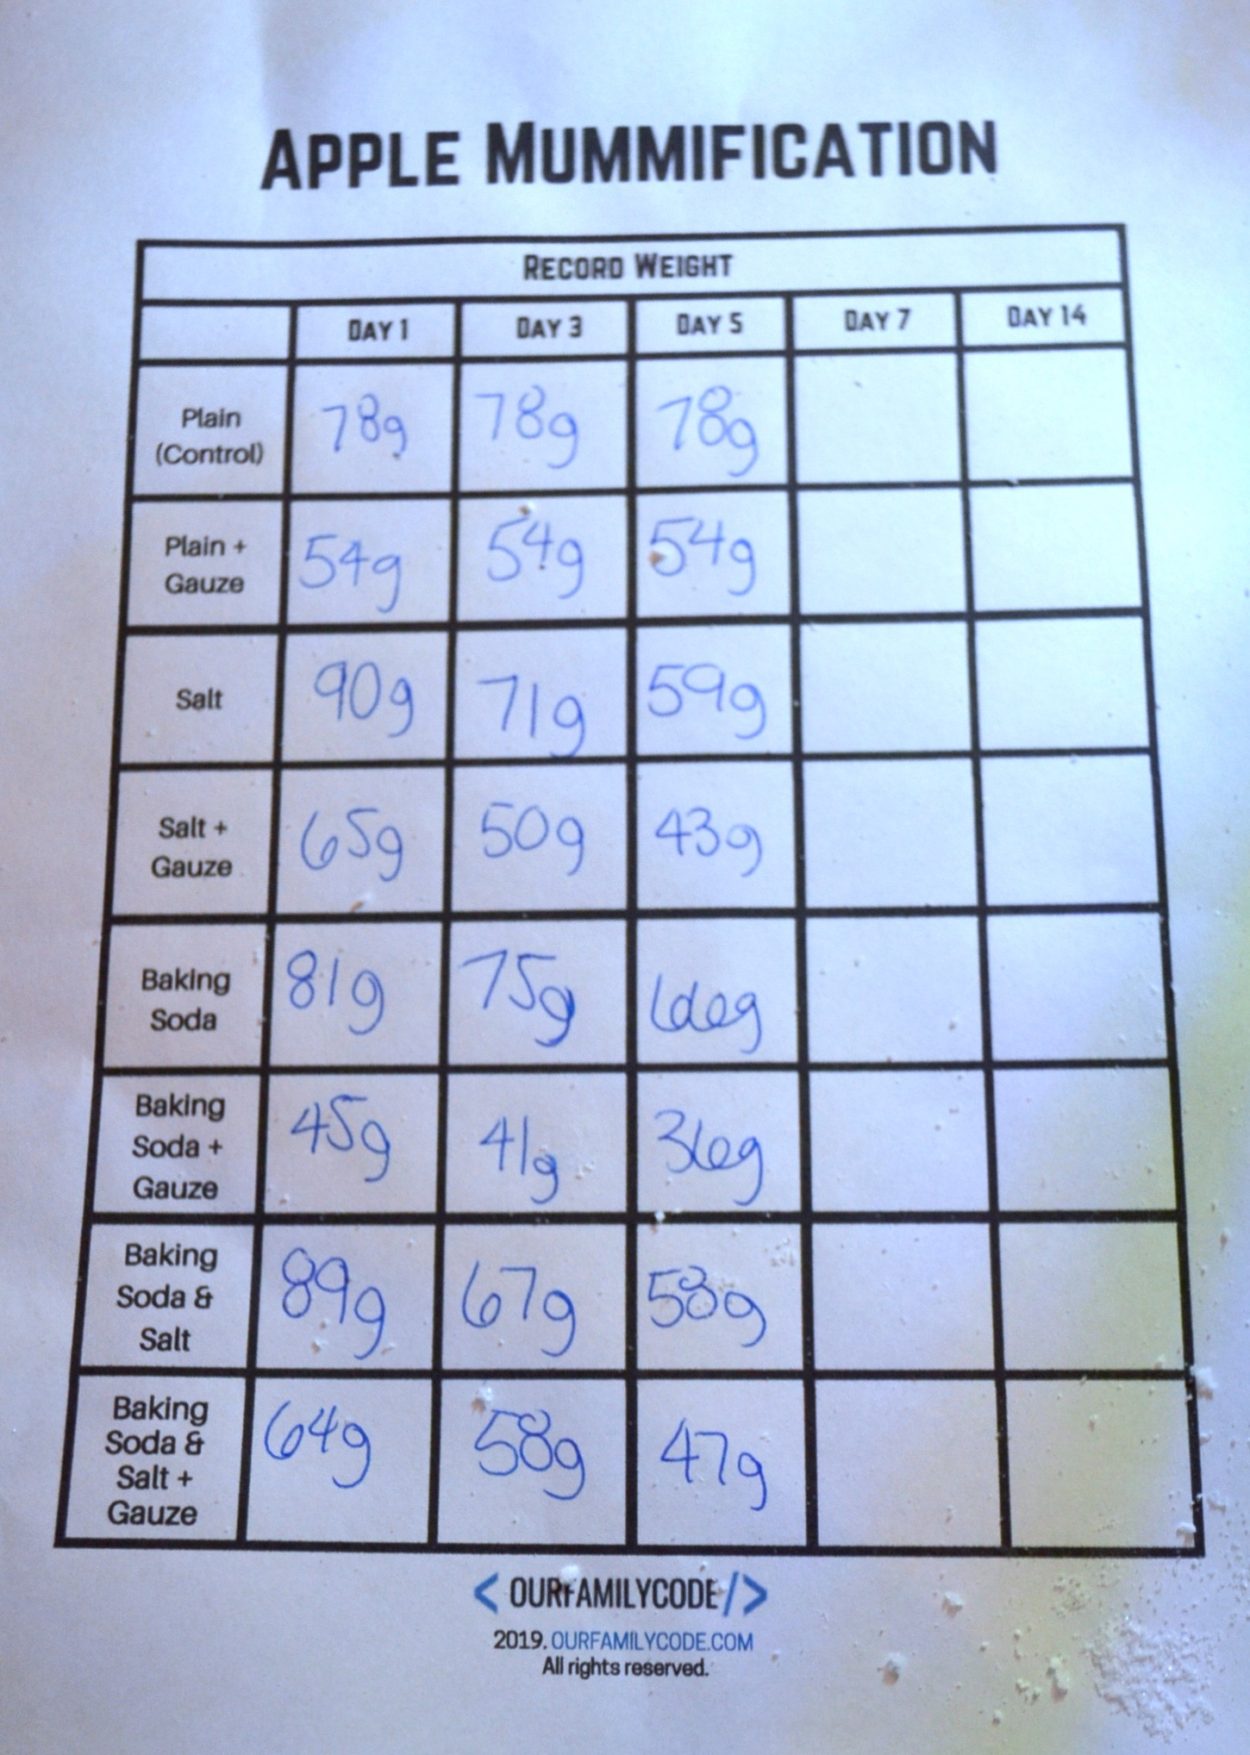
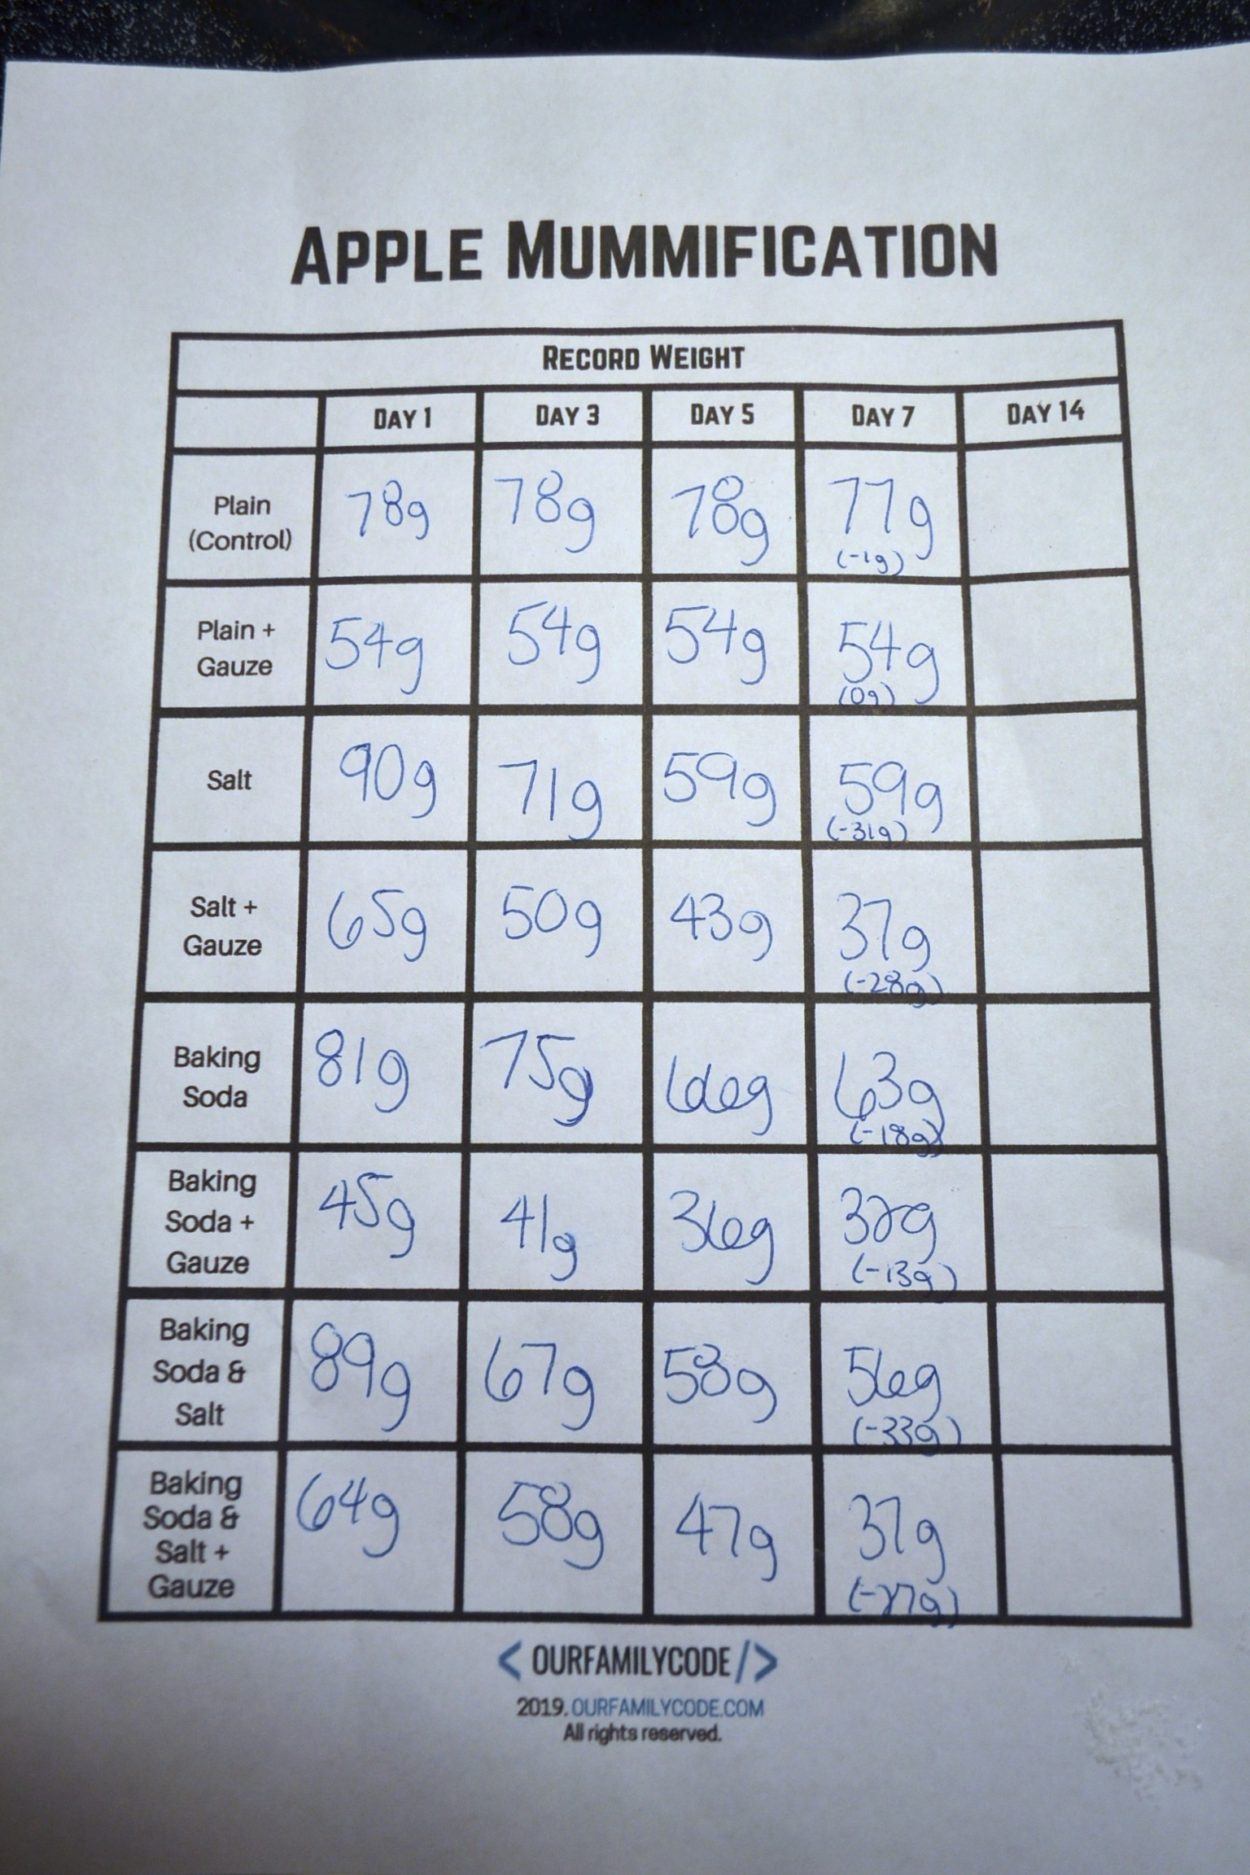
Starting on Day 3, remove your apples one by one following the order listed on the Apple Mummification worksheet (download your copy below!) Record the weight (we recorded ours in grams) on your worksheet.
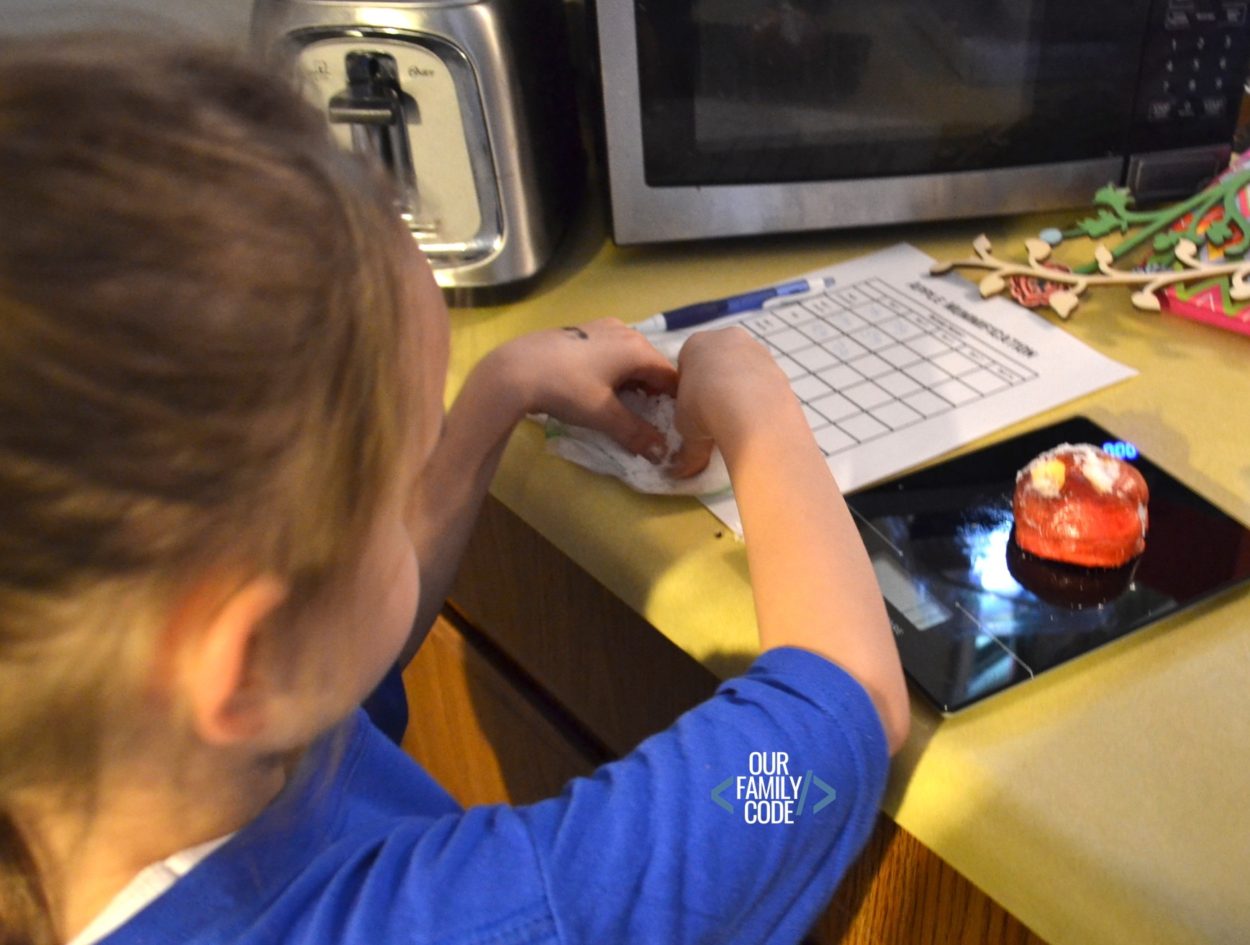
Observe the physical changes that have occurred for each apple. We observed that some of our apples already felt lighter and more wrinkled than others. Do these changes correlate with a change in weight?
This is what our salt apple mummy looked like after 3 days in its tomb!
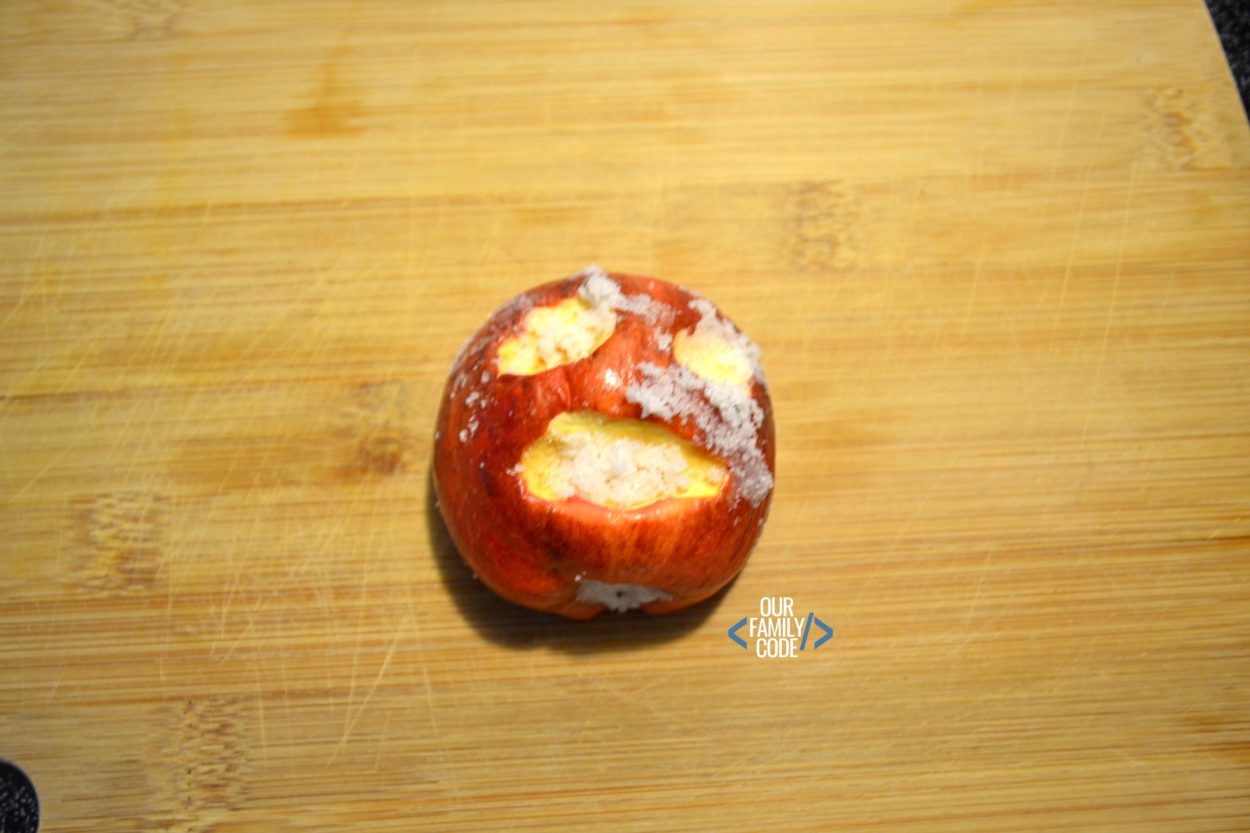
This is what our baking soda apple mummy looked like after 3 days in its tomb!
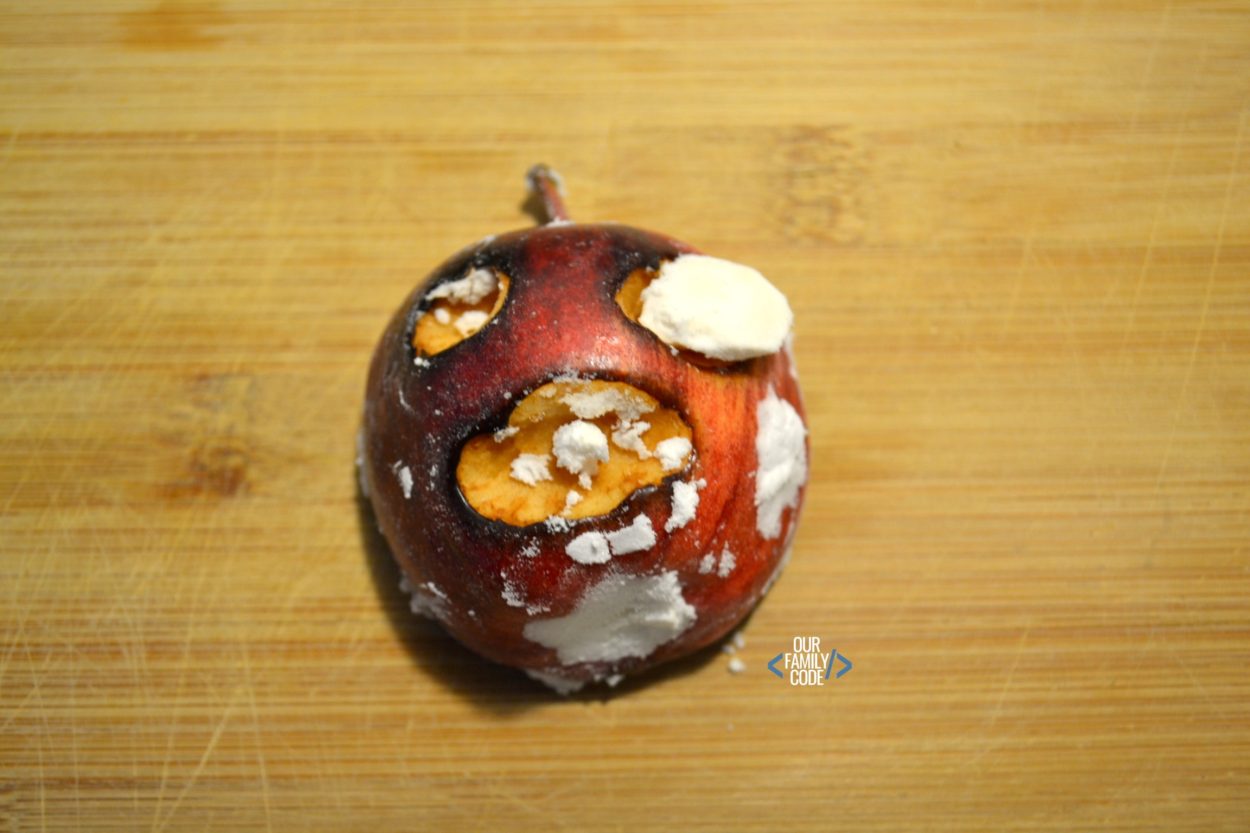
Repeat this procedure for Day 5, Day 7, and Day 14! Record the changes on your Apple Mummification worksheet ( grab your free download below! )
Apple Mummies – Day 5
We had some considerable results on day 5! This is what our salt apple mummy looked like after 5 days in its tomb!
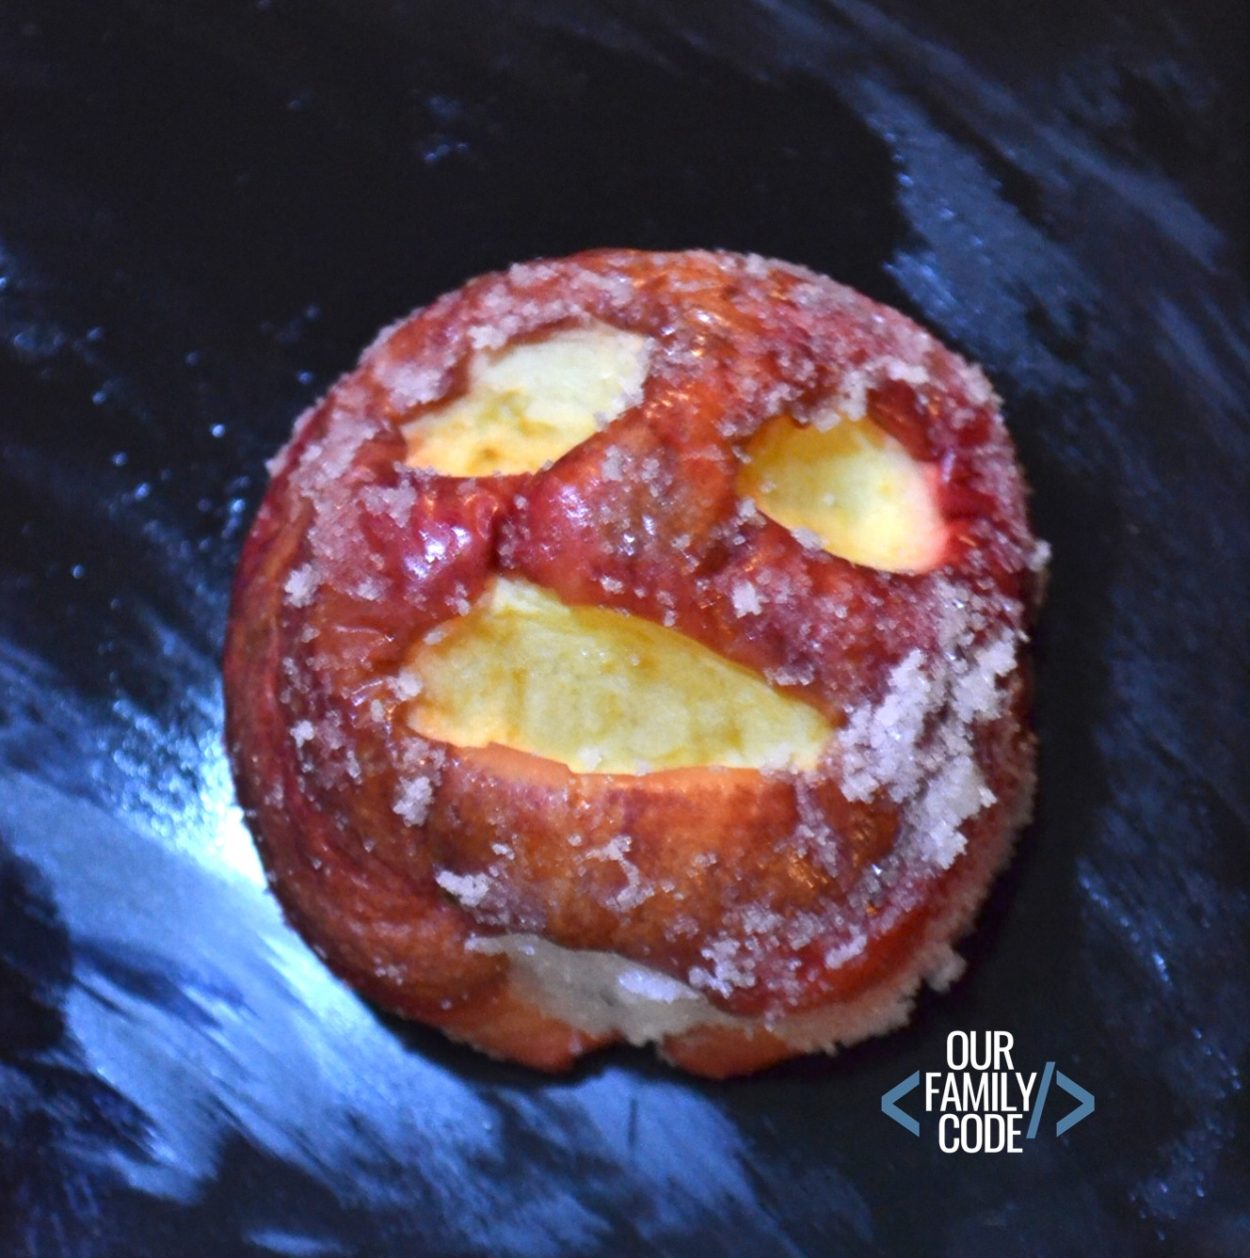
This is what our baking soda apple mummy looked like after 5 days in its tomb!
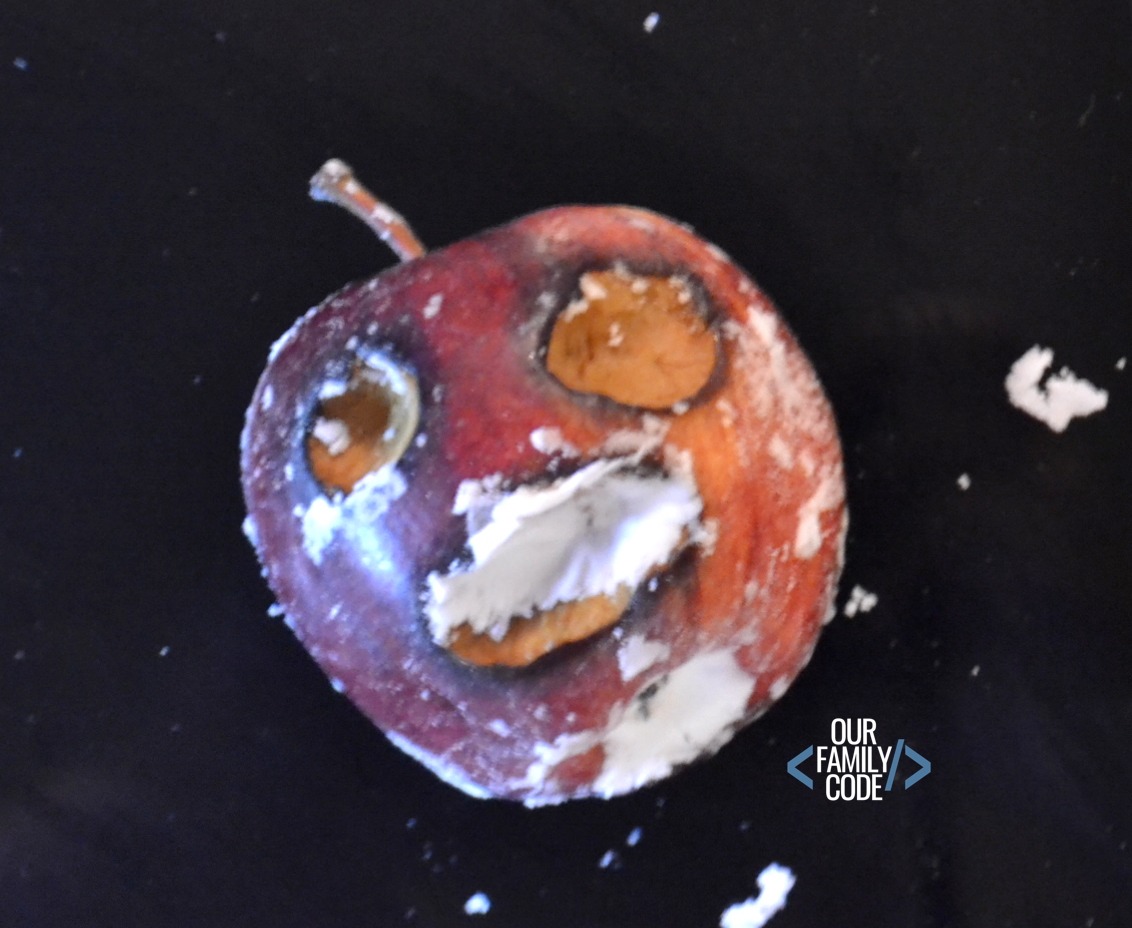
This is what our 1/2 salt 1/2 baking soda apple looked like after 5 days in its tomb!
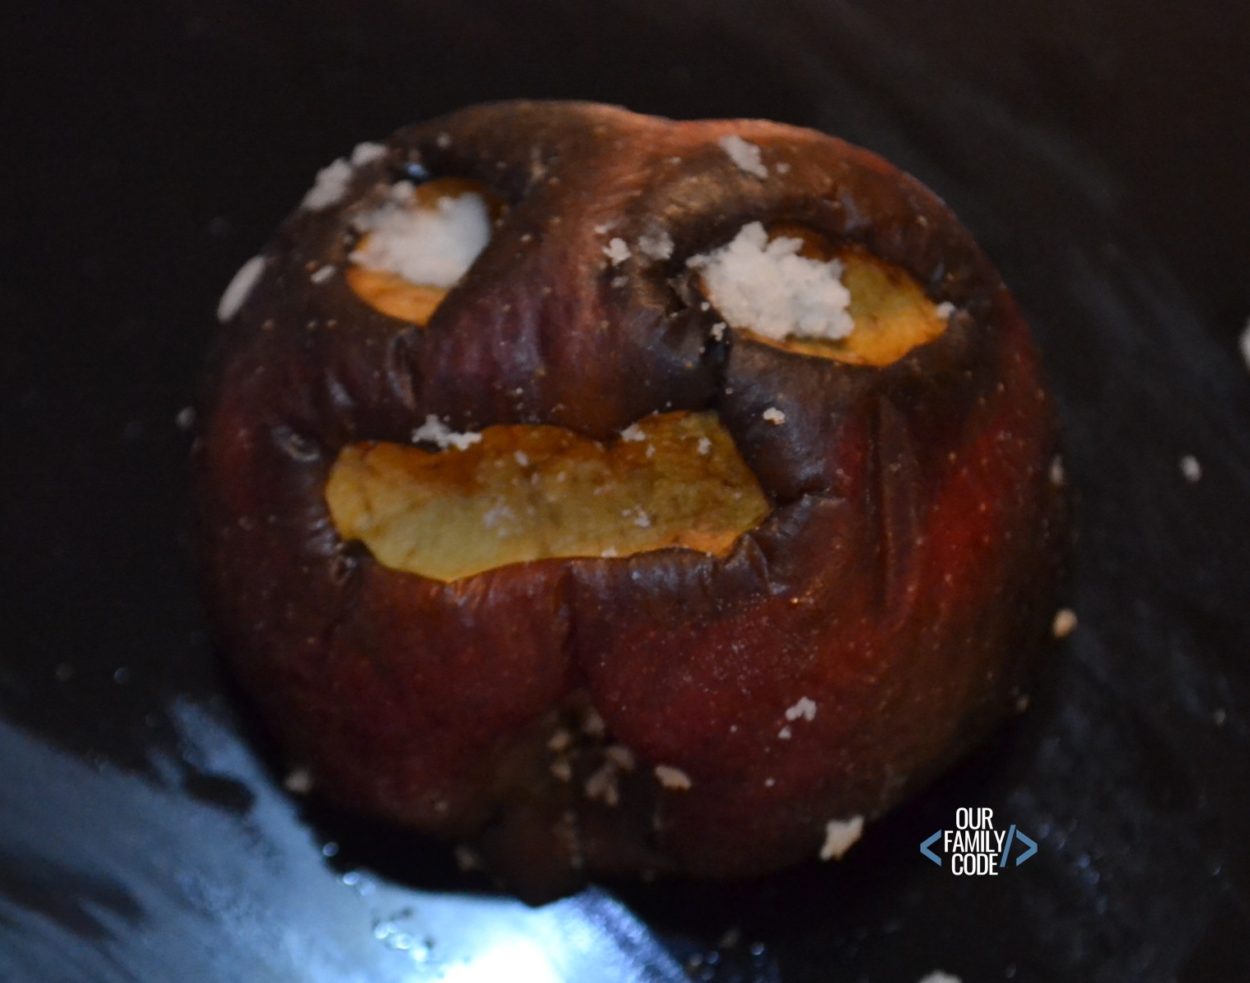
Repeat this procedure for Day 7 and Day 14! Record the changes on your Apple Mummification worksheet (grab your free download below!)
Apple Mummies – Day 7
On Day 7, we were still having some doubts about our hypothesis, but we started noticing some changes that had occurred that led us to believe that we might see a favorable result in another week. Check out our results below!
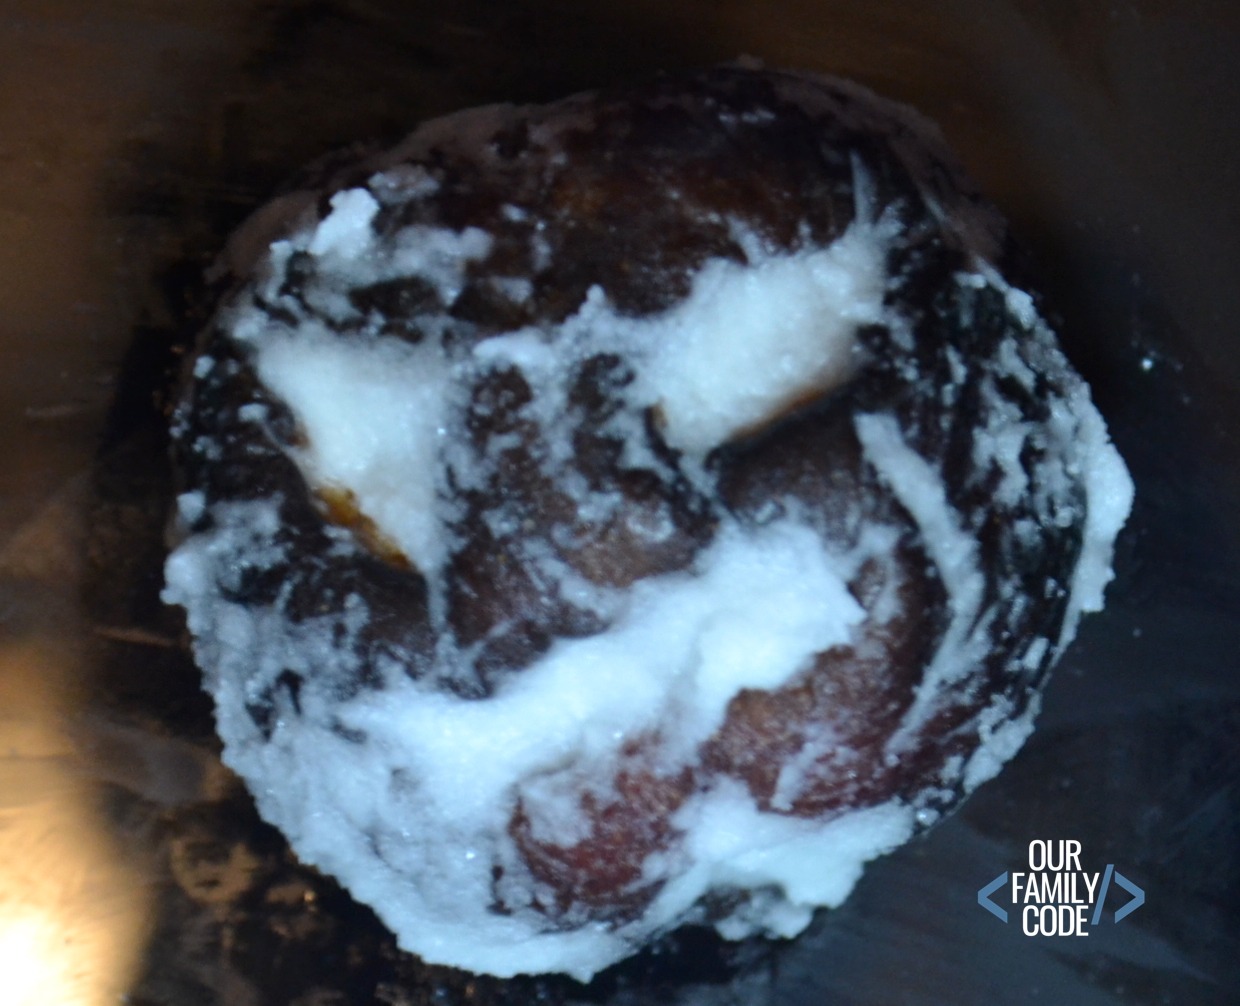
Check out what our salt apple mummy looked like after 7 days in its tomb!
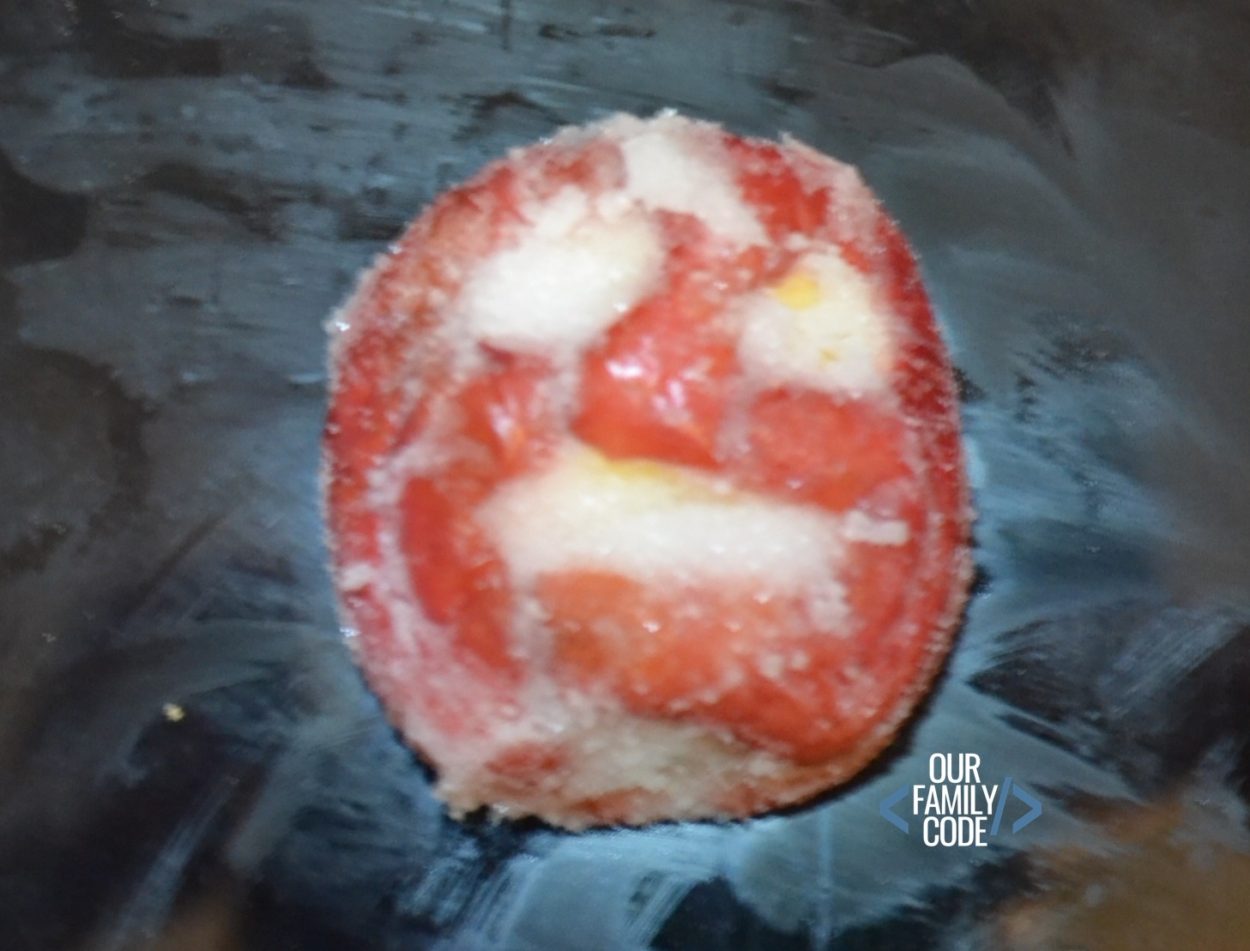
This is what our baking soda and salt apple mummy looked like after 7 days in its tomb!
Repeat this procedure for Day 14! Record the changes on your Apple Mummification worksheet (grab your free download below!)
Apple Mummies – Day 14
It was pretty exciting to see the whole experiment come together on day 14! Check out our results below!
This is what our salt apple looked like after 14 days in its tomb!
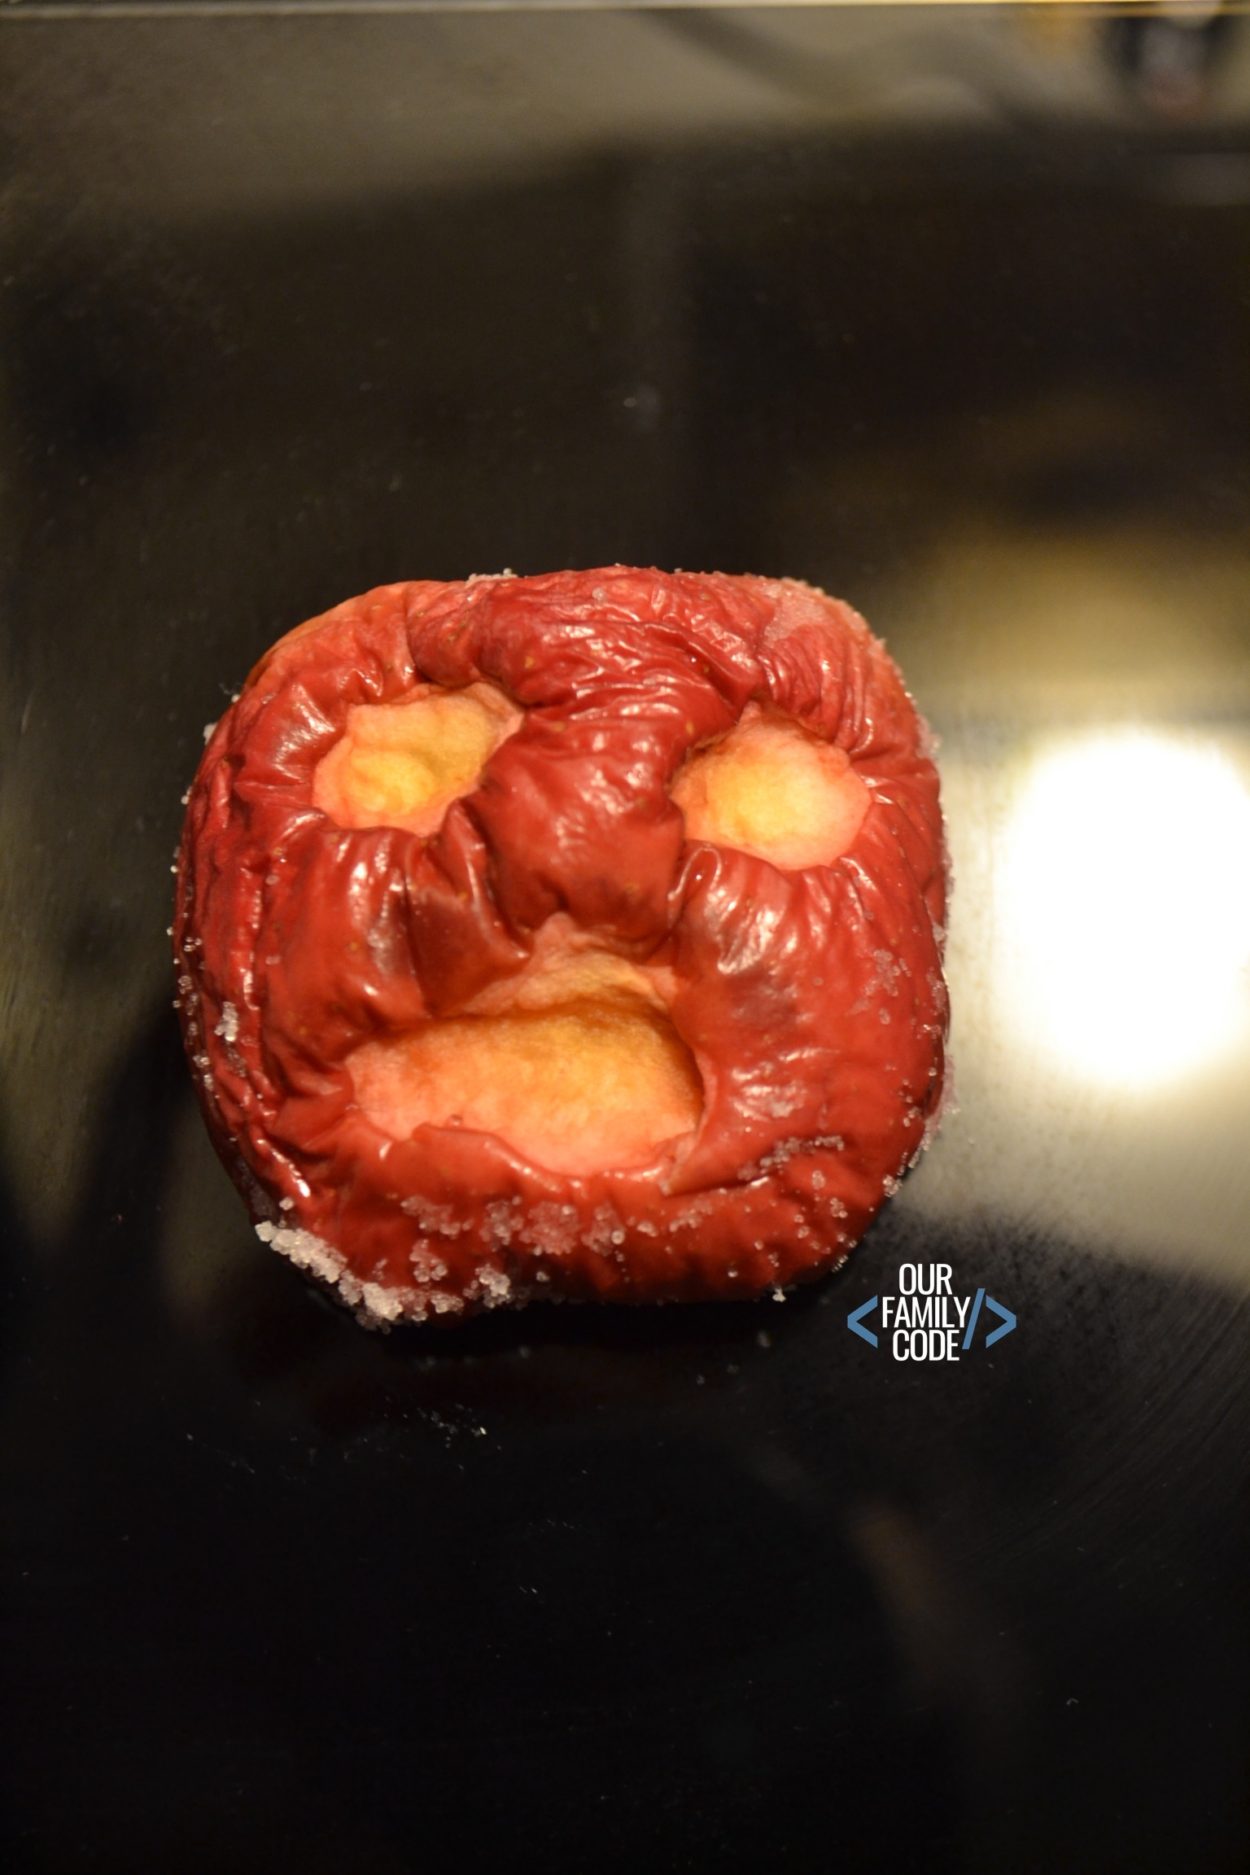
Check out what our baking soda apple mummy looked like after 14 days in its tomb!
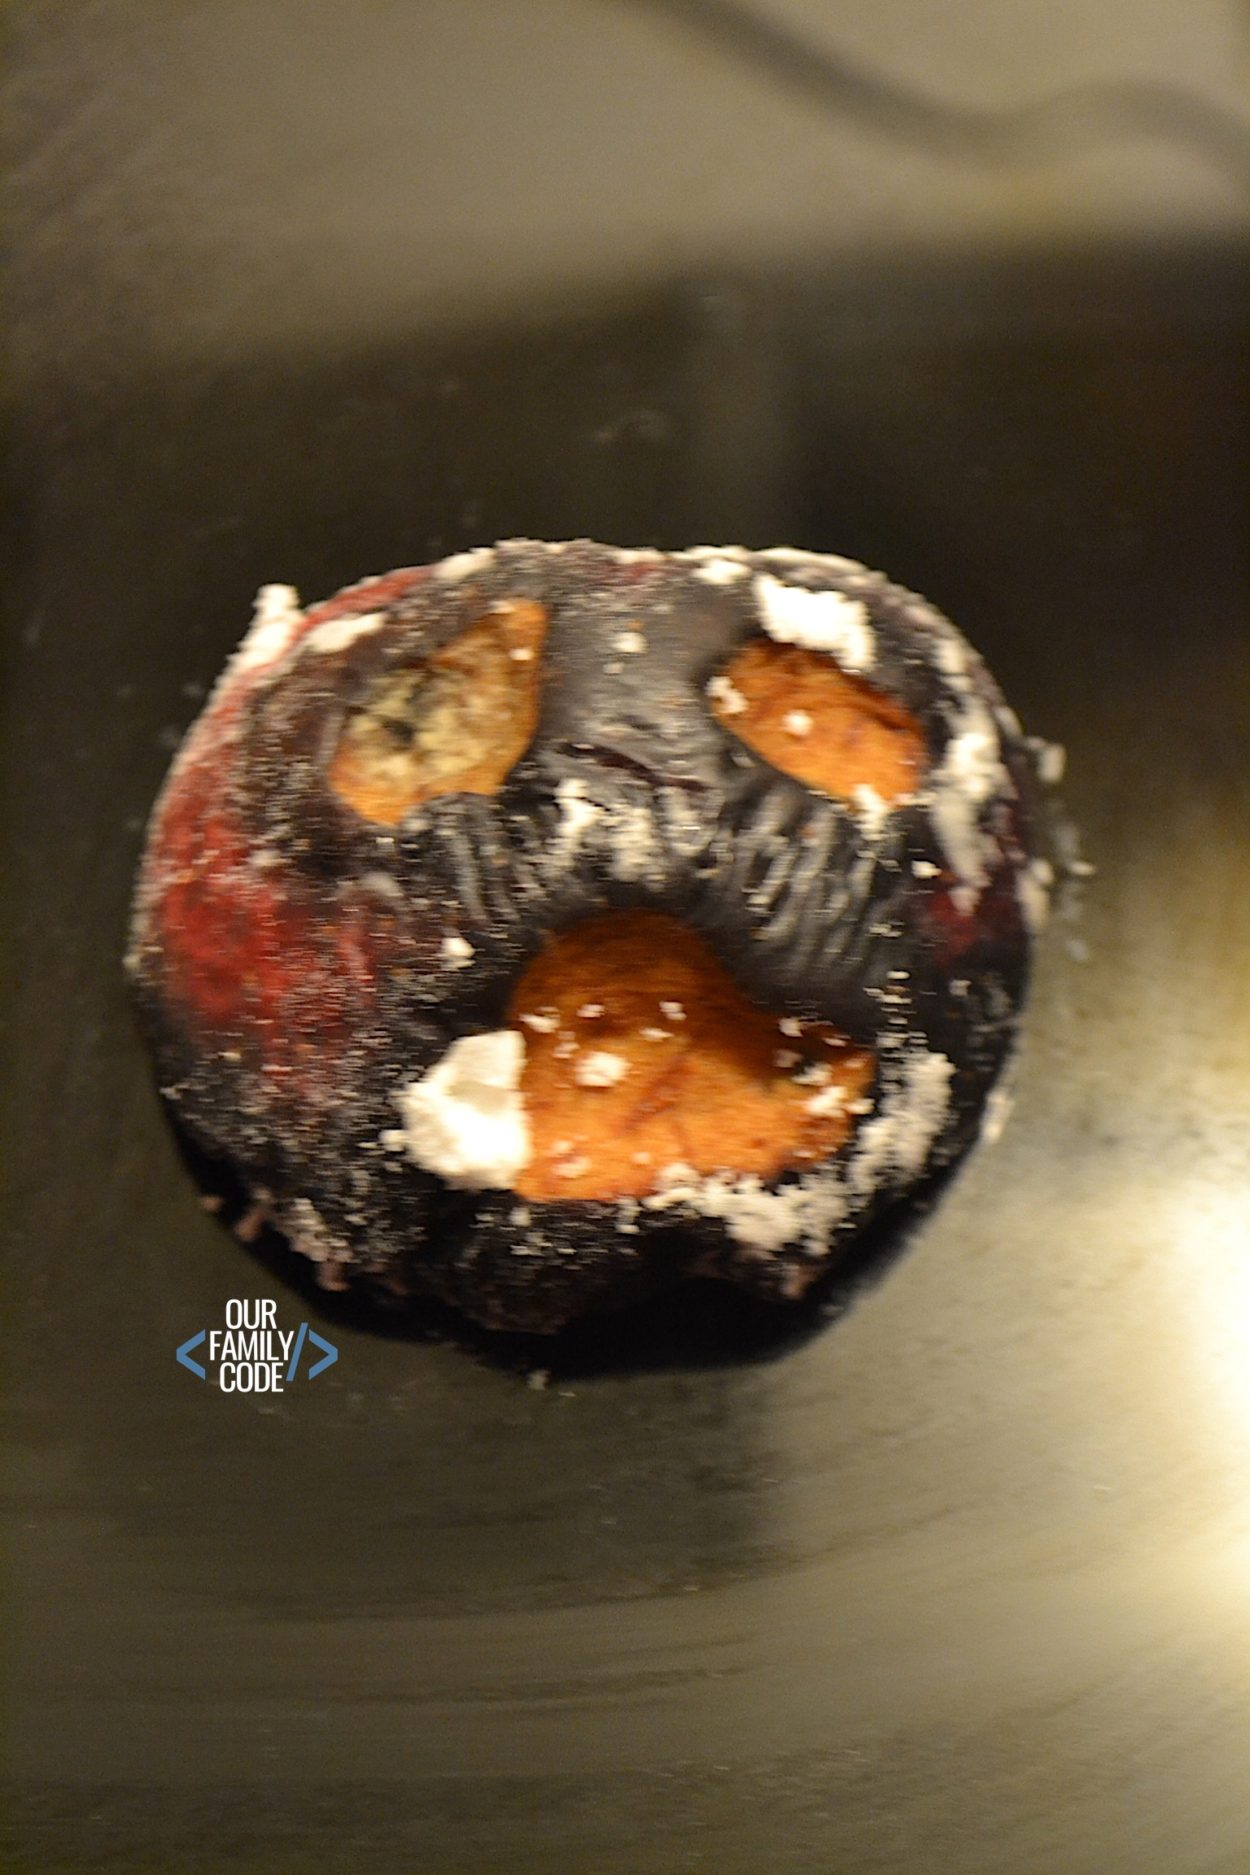
Here what our 1/2 baking soda + 1/2 salt apple mummy looked like after 14 days in its tomb!
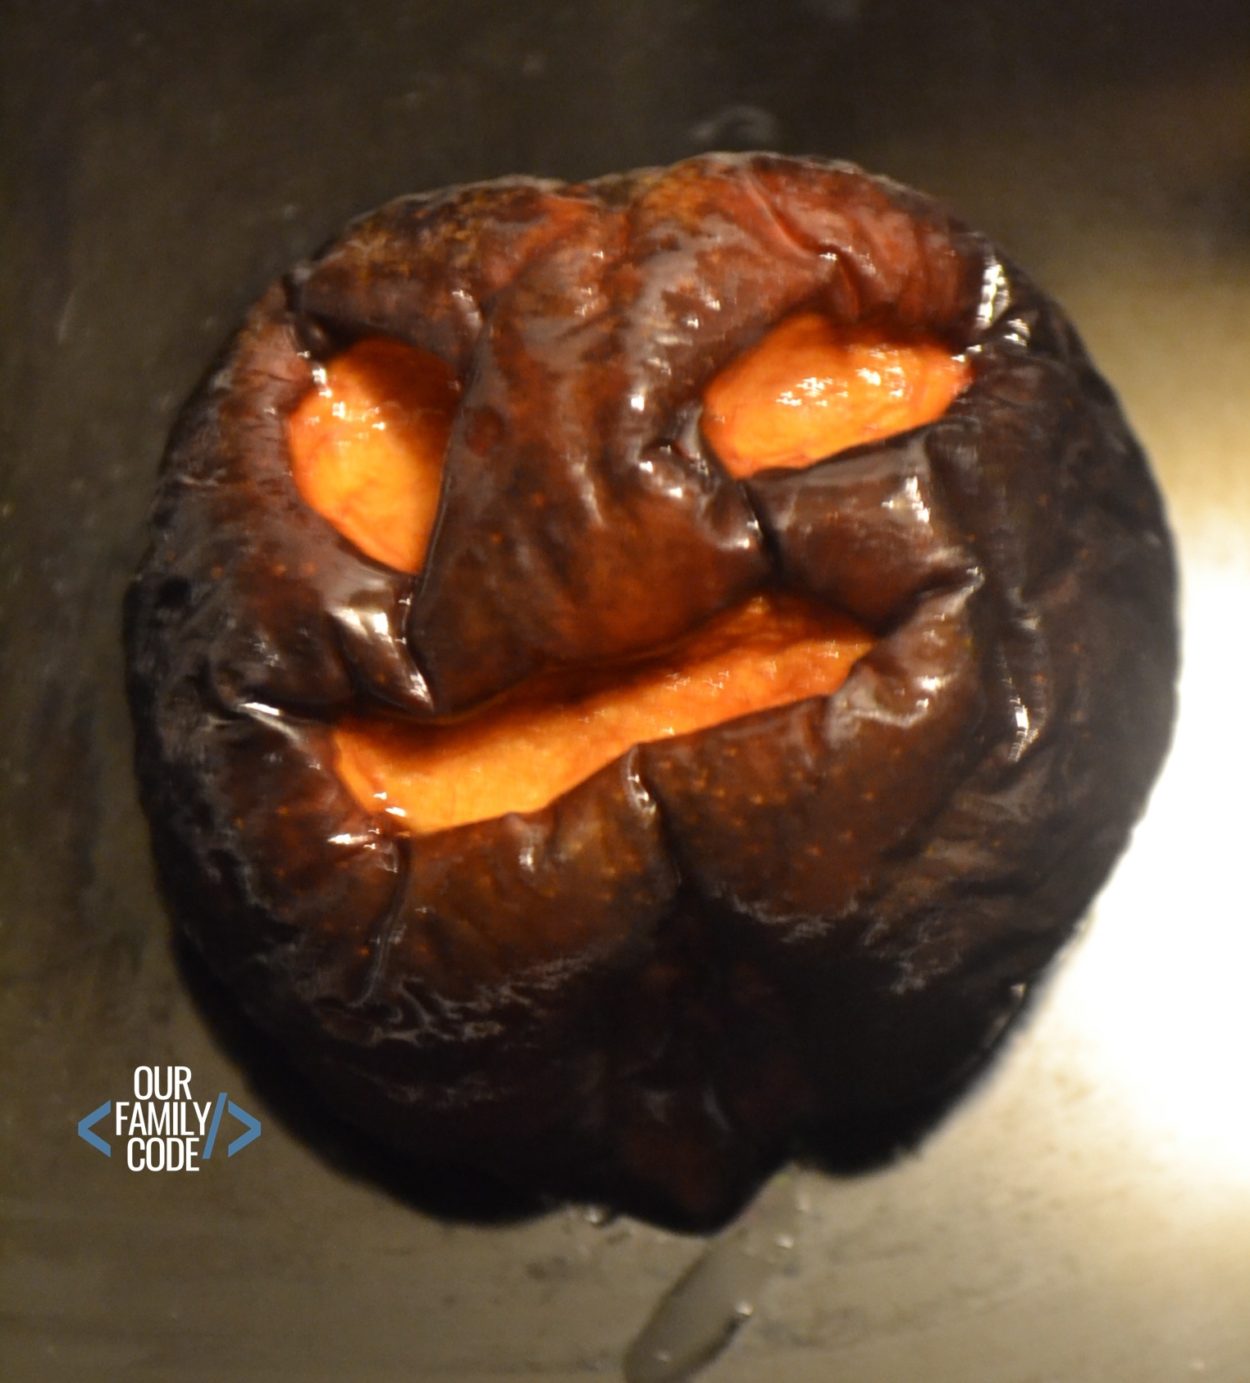
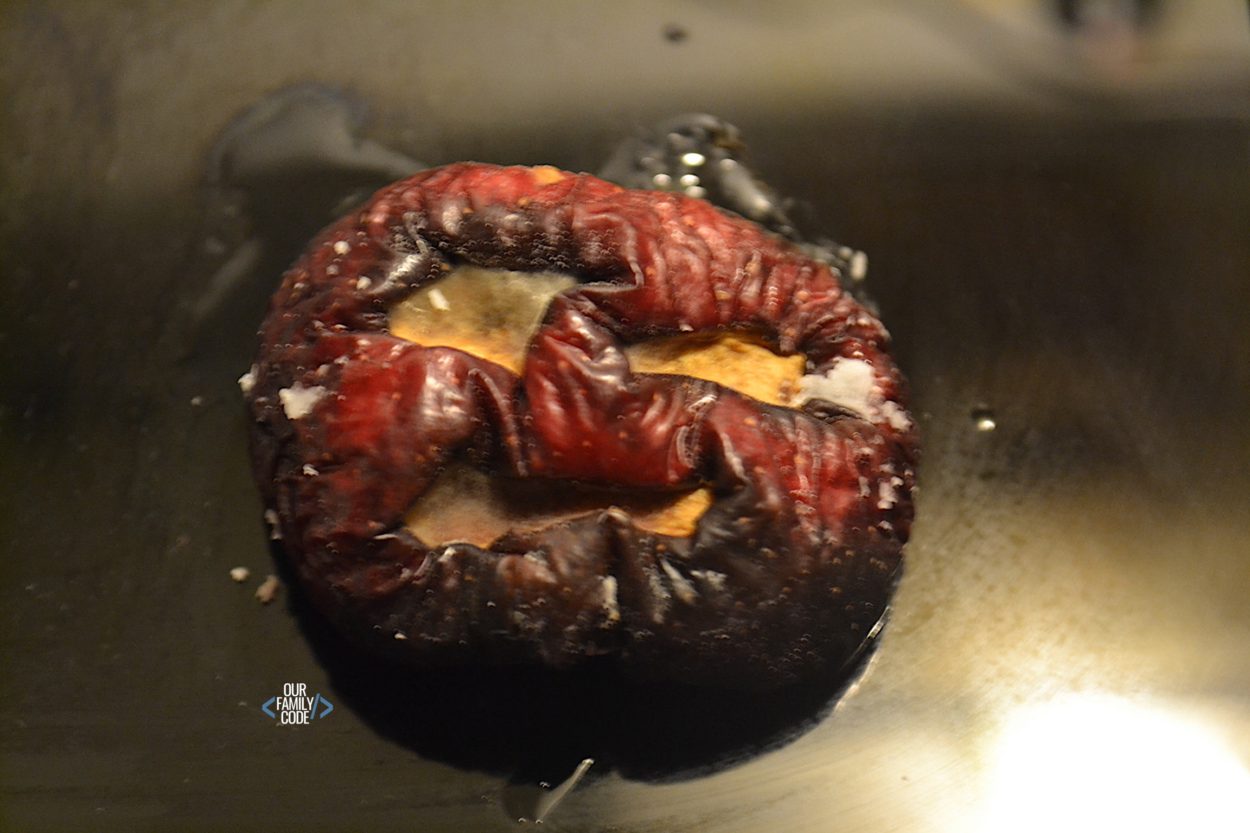
This is what our 1/2 baking soda, 1/2 salt, and gauze apple mummy looked like after 14 days in its tomb!
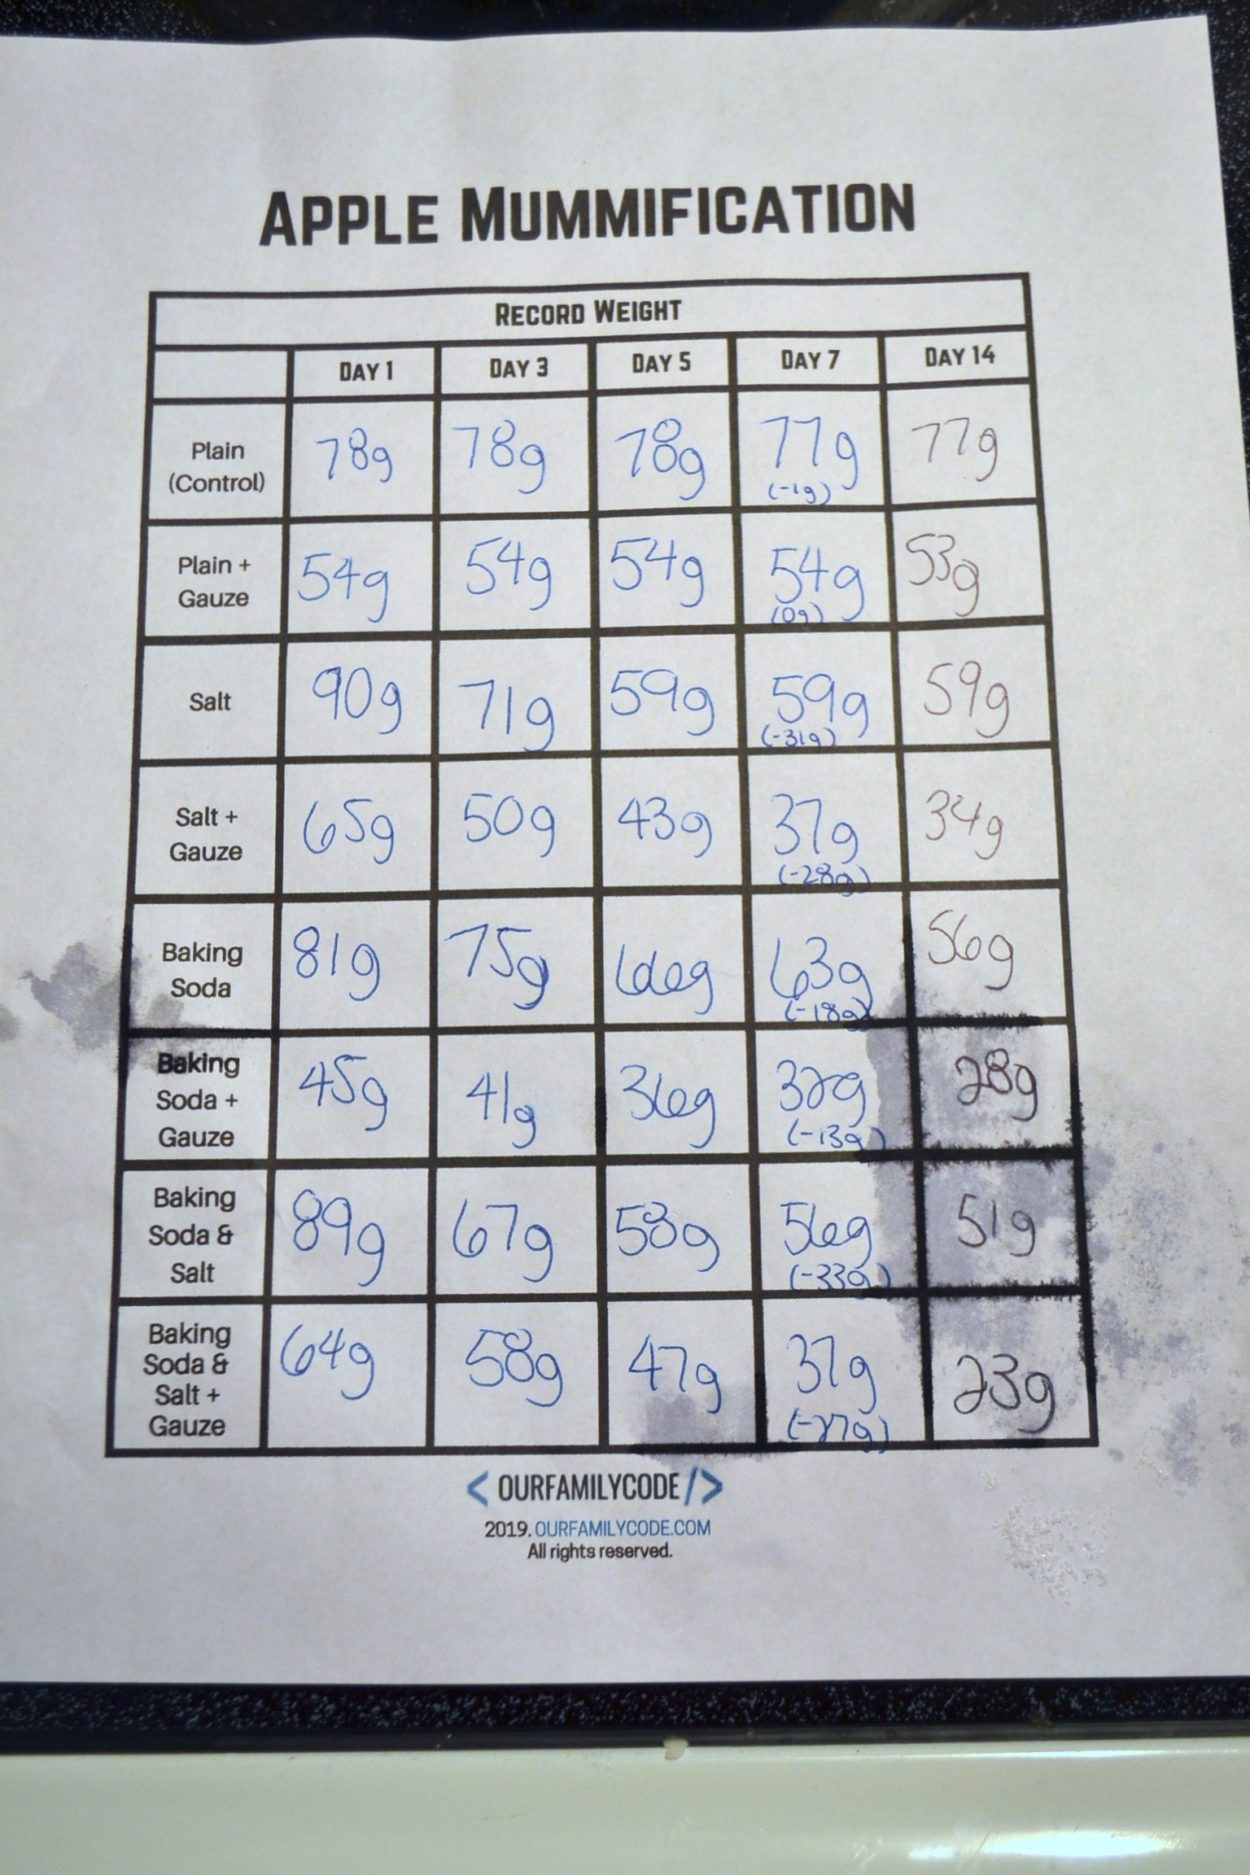
Record your results on your Apple Mummification worksheet (grab your free download below!)
Apple Mummy Math
We decided to put more math into our activity and calculate the amount of apple weight lost during the experiment period in order to mathematically determine the most effective way to preserve our apple mummies.
To calculate this, divide Day 14 by Day 7 and then subtract 1 to get the percentage lost.
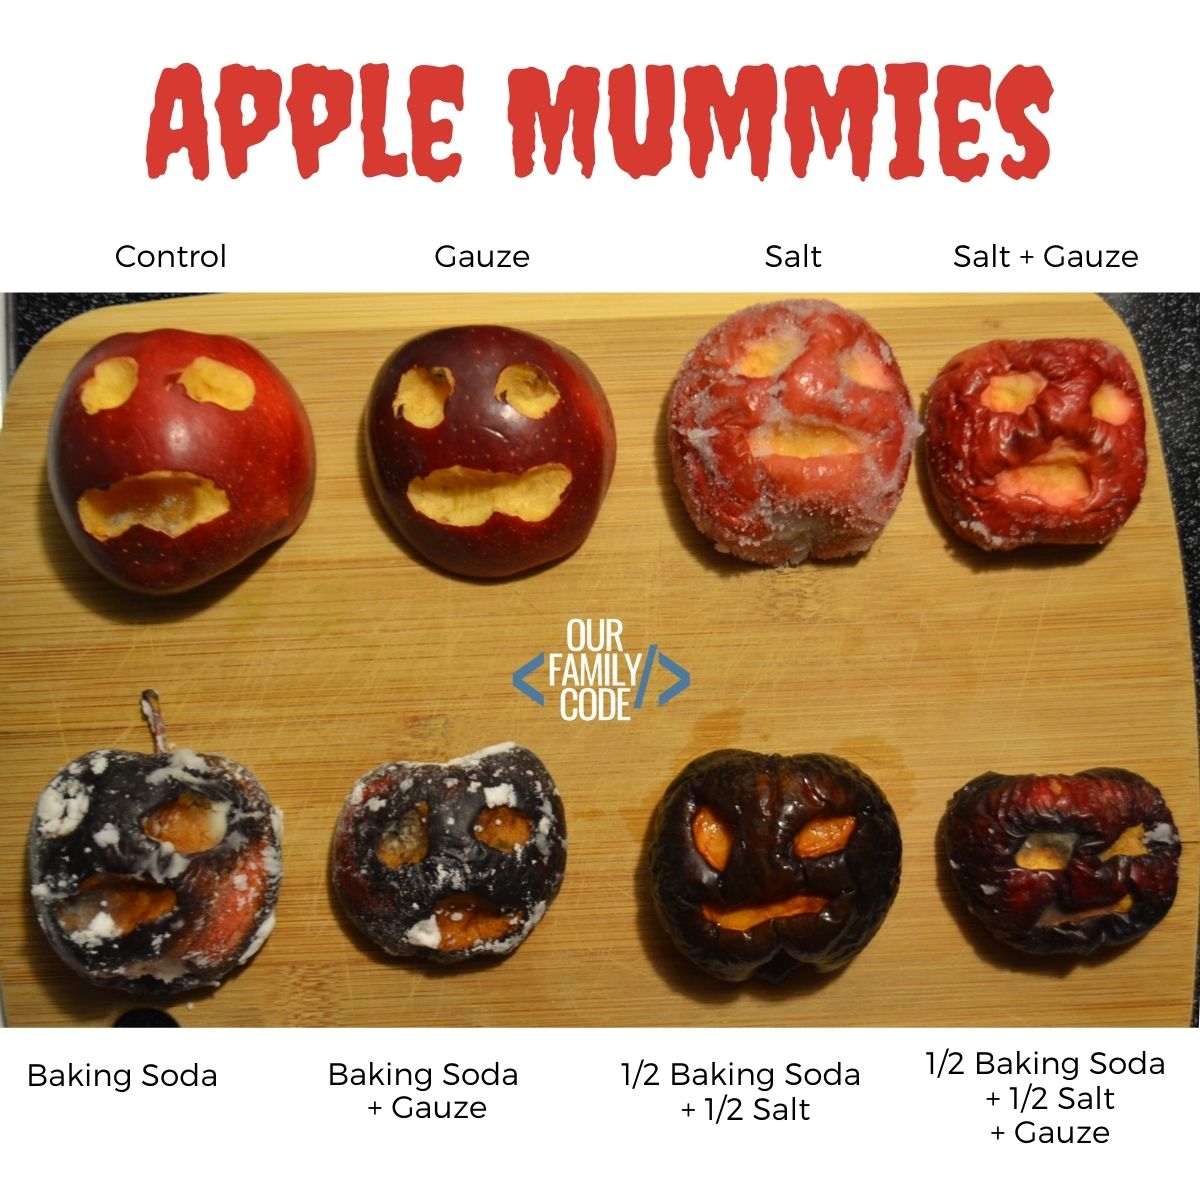
What method worked best to preserve your apple mummy?
CLICK HERE TO DOWNLOAD THE FREE APPLE MUMMIFICATION WORKSHEET
Find more Magic Tree House Activities!
- Can You Build a Working Drawbridge? Castle STEAM Challenge
- Deciphering Dinosaur Names with Greek and Latin Words
- Ahoy Algorithms Treasure Hunt Unplugged Coding Activity

Find more Halloween Activities!
- 13 Nights of Halloween STEAM Activities!
- How to Make Spooky Ghost Sounds STEM Activity
- Learn about Static Electricity with this Zombie Crossing Activity!
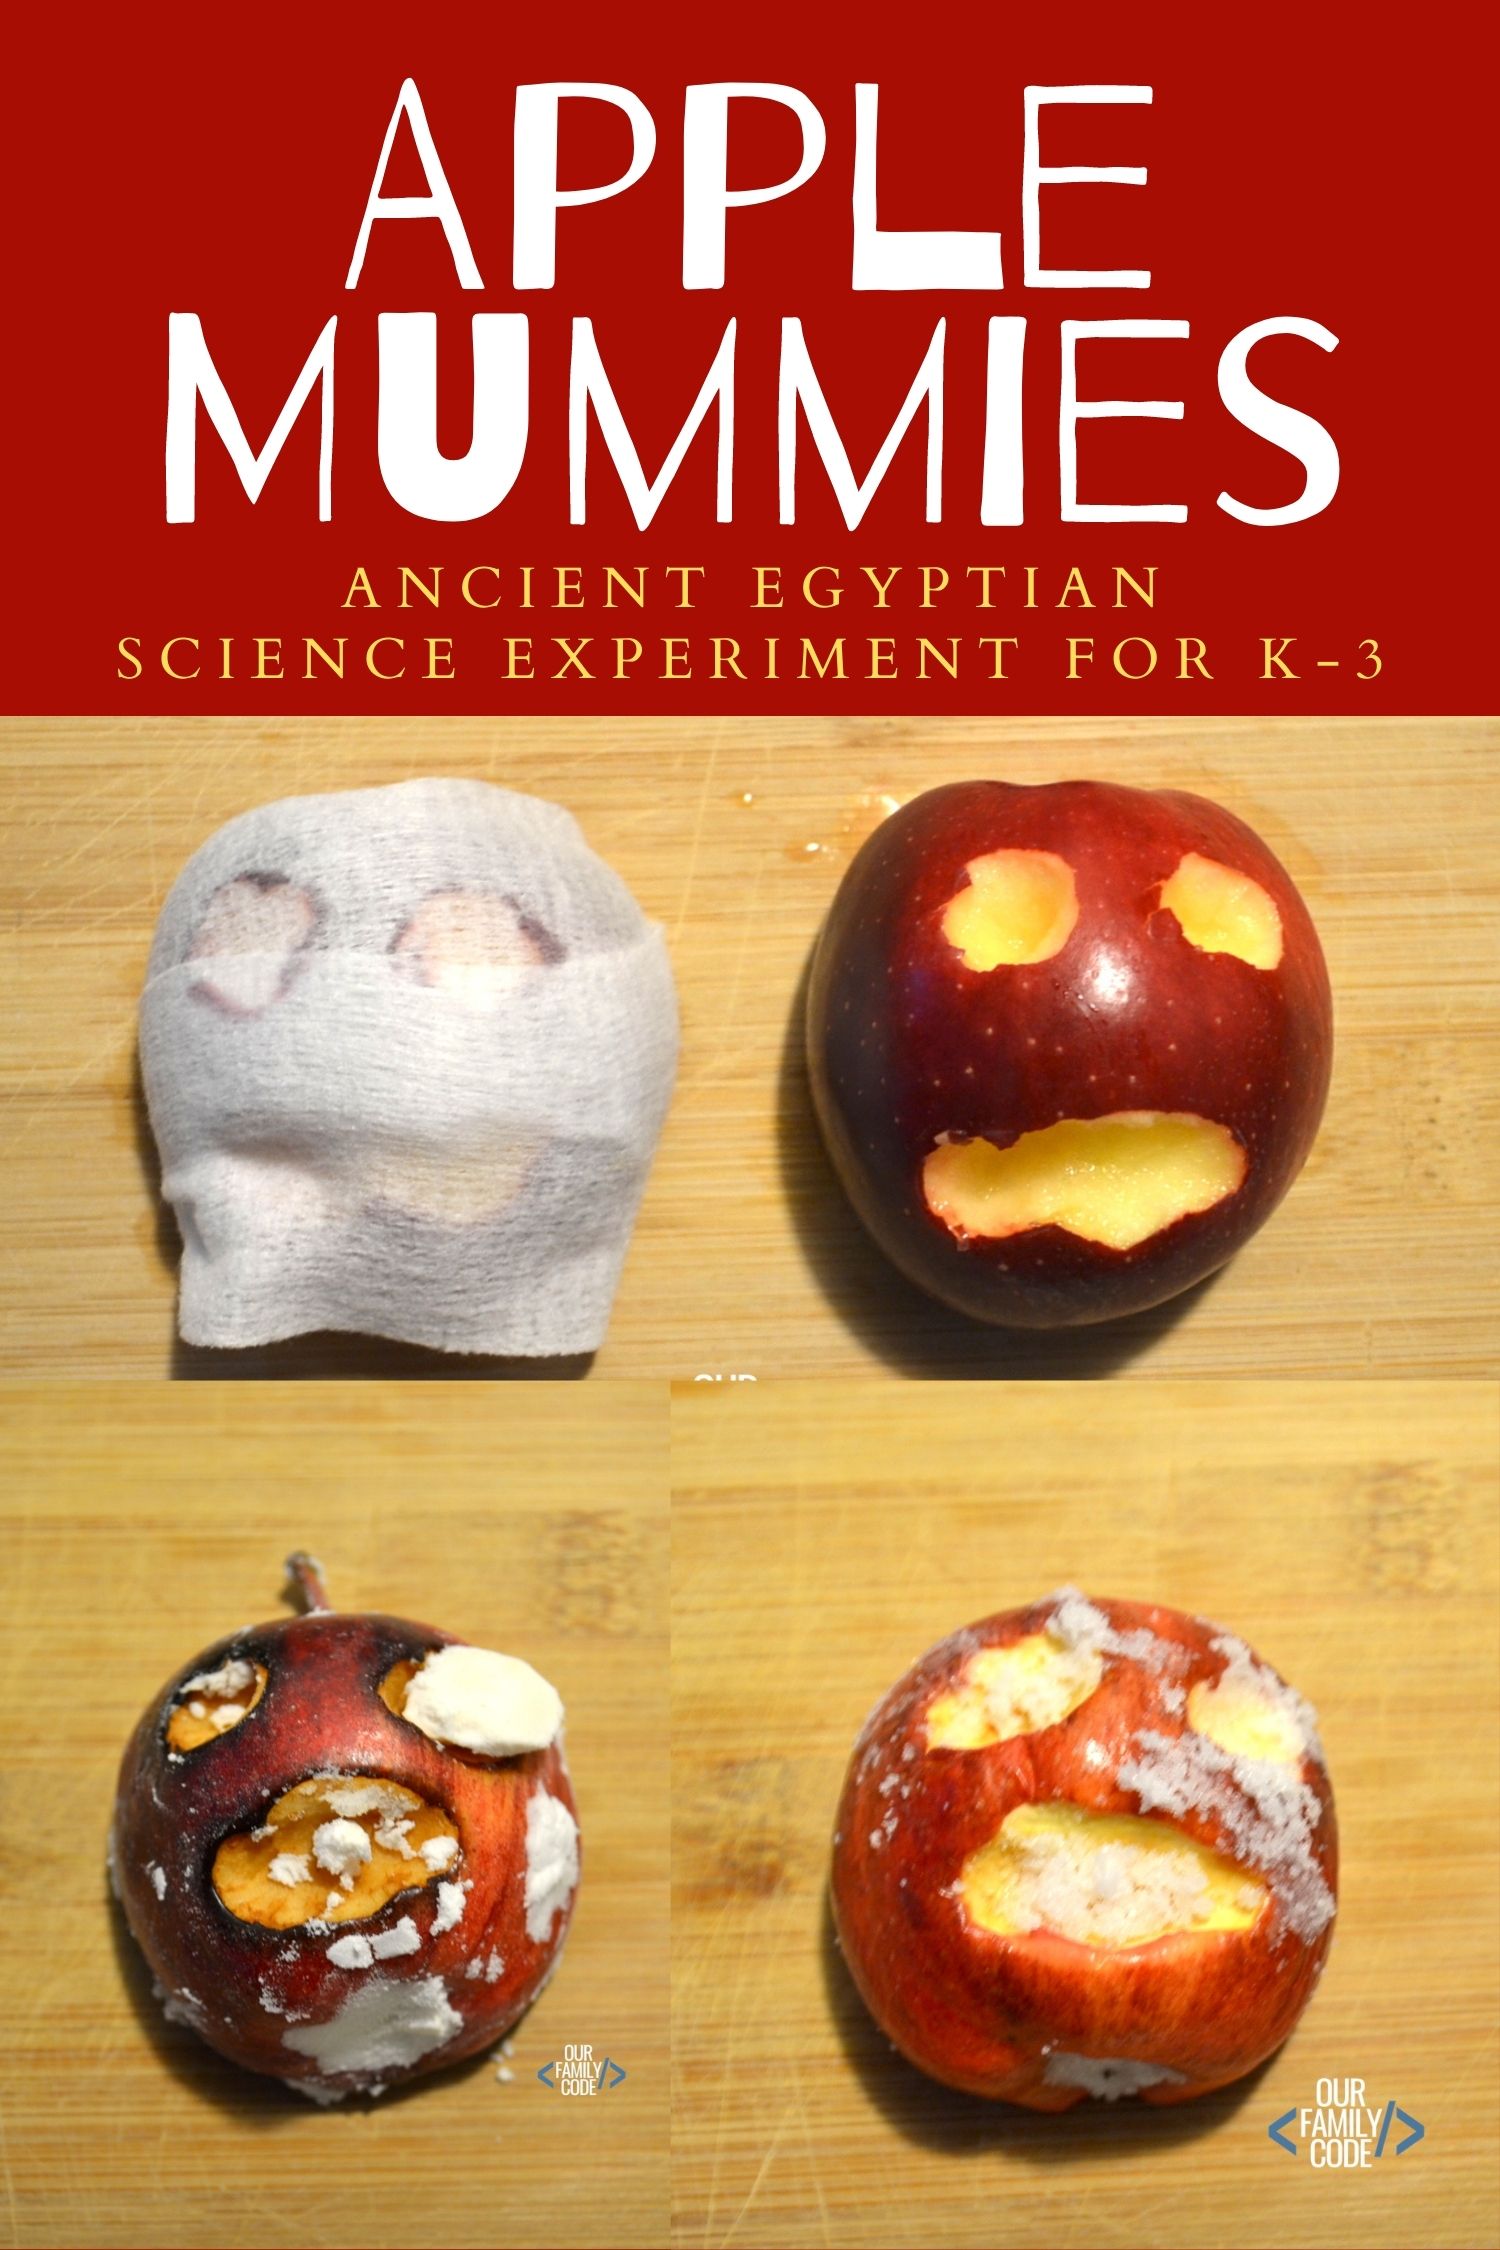
PIN THIS IMAGE TO SAVE THIS ACTIVITY!
Food Science Activities
Find more activities that use food to explore Science, Technology, Engineering, Art, and Math!
STEAM Food Activities for Kids
You and your kids are going to love these STEAM food activities for kids! Kids loves to bake, which is why is makes sense to take their baking curiosity and explore food through hands-on science, technology, engineering, art, and math activities.
Pumpkin Balance Stack STEAM Challenge
This pumpkin balance activity is great for kids of all ages! Can you complete the Balancing Pumpkins STEAM Challenge? How many pumpkins can you stack?

Popcorn STEAM: Learn about Heat Transfer
This heat transfer popcorn STEAM activity explores conduction, convection, and radiation as well as physical change and ends with tasty popcorn!!
Exploding Pumpkin STEAM Challenge: 4 Explosive Pumpkin Activities
Take on the exploding pumpkin STEAM challenge with 4 different ways to explode a pumpkin with chemical reactions and force! These activities are sure to inspire some fall STEAM fun!

Explore the 5 Senses with this Preschool Pumpkin Science Activity
This 5 senses preschool pumpkin science activity introduces scientific inquiry to young learners and helps get everyone excited about Fall!

Is Sour Candy Acidic? Candy pH Science Activity for Kids
In this yummy experiment, we are testing to see if sour candy is acidic with a simple acid-base reaction.

Dancing Cranberries Fall Preschool Science Experiment
Experiment with dancing cranberries with this super simple preschool science activity while observing concepts like floating and sinking.

Salt Water Density STEAM Experiment: Can a Carrot Float?
Investigate & observe the density of a carrot, salt water, and regular water. Watch the magic carrot in action in this easy salt water density activity for kids !

How to Clean Pennies Chemistry Experiment
Can you turn a dull penny into a pretty penny? Learn how to clean pennies with this at home chemistry experiment!
Meet Toni, the Maker Mom behind Our Family Code

Hey there , I’m Toni! I’m a software engineer and Maker Mom that finds my joy in unleashing my children’s curiosity by exploring STEAM concepts with my fantastic five!
When I’m not chasing toddlers or raising tweens, you can find me tearing things up and putting them back together over here at Our Family Code .
I am the owner and content creator of multiple educational websites designed to increase access to STEAM & STEM education with a focus on teaching computer science and coding to kids of all ages!
You can also find out more about me by visiting ToniGardner.com !

This site uses Akismet to reduce spam. Learn how your comment data is processed .
Monday 27th of April 2020
Hi! I can't wait to try this experiment with my students this week! I am wondering how much you add to each baggie/apple - how much salt, baking soda, etc. I couldn't find that listed. Thanks for your help!
We used 1 cup for each baggie. For the 1/2 salt and 1/2 baking soda mixture, we used a 1/2 cup each so the total in the bag remained 1 cup. This experiment is so much fun! I hope your students enjoy it!

- Meet The Team
- Advertising/Media
- Disclosure & Privacy Policy
- 5 Steps to Start Homeschooling
- 100 Resources for the Newbie
- The Quick-Start Guide to Brave Homeschool Schedules
- The Brave Homeschool Planner
- Choosing Curriculum
- Day in the Life
- Homeschool Co-op
- Sneaky Learning
- What We're Reading
- Affording the Homeschool Lifestyle
- Natural Living
- Homeschool Bravely


Ancient Egypt: Mummified Apple Experiment

Mummified Apples

What we used:
- roll of gauze
- 10 plastic cups
- masking tape to make labels
- 4 different natural preservatives (We chose salt, sugar, vinegar, and baking soda.)

9 comments:

I have this very experiment pinned to do when we're ready for it (soon), but I hadn't actually seen anyone do it. I'm thankful for this post with all of the pics so that I can be better prepared! This looks like so much fun, and I know my boys will love it! http://ajoyfulmess.blogspot.com

It was tons of fun. Hope you enjoy it someday as much as we did.
This is wonderful what a fun experiment to do and can't wait to do it with my kids when we get to that point
Mummified apples?! It doesn't get much cooler than that. Another fabulous activity. Pinning this!!

Hi Jamie! This sounds like so much fun! We're studying Ancient Egypt (for the third year in a row.) We really enjoy learning about ancient civilization. And despite the discussion of many gods and such, I find it a great opportunity to discuss idolatry and false gods with my children. And they are in know way confused as to whether or not the many Egyptian gods were real or not. Thanks for sharing this ultra cool experiment! We are definitely going to add this into our studies!
I completely agree, Amber. It does present a great opportunity to speak truth about idol worship. I do that with much of it and skip over some that is just too dark...like child sacrifice. I love creating a "green house" of learning where I can introduce these difficult topics and steer the conversation to the truth. Just out of curiosity, do you use a particular history curriculum or do you just create your own unit studies. We use Truth Quest guides for title suggestions.

I love the mummified apple. That's always such a fun study!
Pinning :) Just in time, since I am preparing next years books and curriculum. Thanks for the ideas.
Dear Jamie, A HUGE BIG THANK YOU for having this awesome experiment on your blog! WOW we loved doing it and your other ideas about Ancient Egypt are tops also!!! WHat a blessing to be able to share and learn from each other!! Thanks again lovely, really appreciate it!! Smiles Sharnee :)

Mummified Apples Science Experiment
Can you stop an apple from decomposing.
In this science experiment, courtesy of The Kitchen Pantry Scientist , you'll make your own mummy and find out!
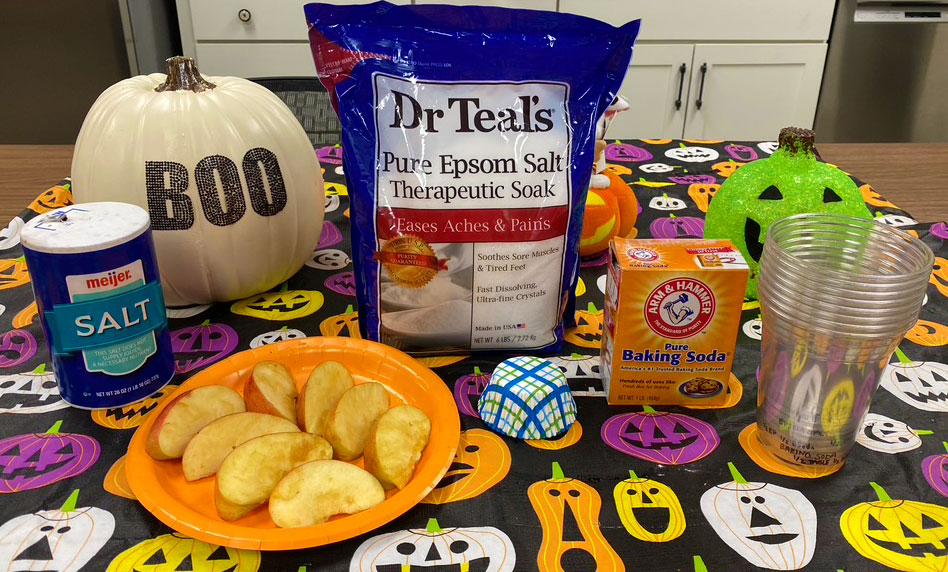
- Baking soda
- An apple
- Paring knife
- 8 plastic cups
- Cupcake cups (or other means to cover cups)
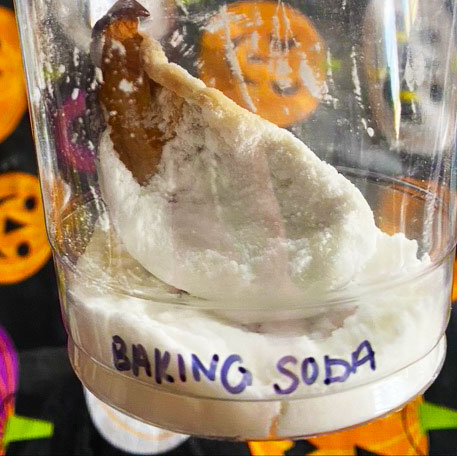
- Decorate some of the plastic cups with markers, since every mummy should have a fancy sarcophagus (even an apple).
- Label the cups as follows: Control Table salt Epsom salt Baking soda Half table salt & half Epsom salt Half table salt & half baking soda Half Epsom salt & half baking soda Equal parts: table salt, baking soda and Epsom salt
- Cut an apple into 8 equal pieces
- Add an apple to each cup.
- Cover the apples with the appropriate salt mixture (based on the label of the cup).
- Add a loose top to the cups such as foil cupcake holders.
- Let them sit for a week.
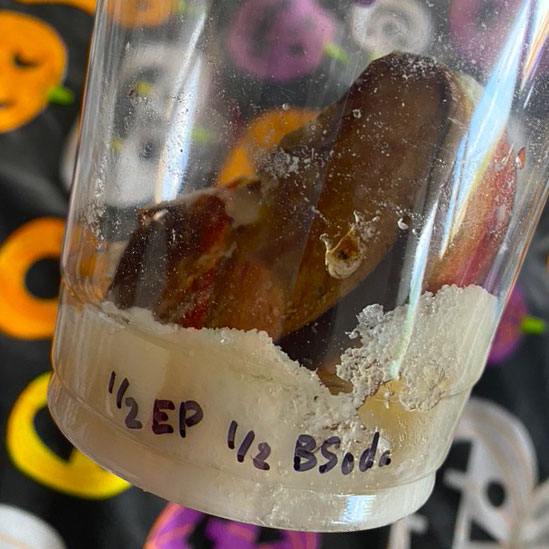
- Exhume them after a week and observe their differences.
- If you'd like, return them to the cups with some of the appropriate dry salt mixture to let them go for another week.
Extend the Experiment
- You can weigh your apples before drying them to see how much water they lose.
- Try the experiment with whole apples too: peel and core one, core another, and leave one intact before covering them with salt mixture.
- Consider the questions: What keeps mold from growing? What preserves the apple’s color best? Which salt mixture keeps the apples from smelling bad?
Natron, which was used in ancient Egypt to preserve mummies, is a natural salt mixture containing sodium carbonate decahydrate (soda ash), sodium bicarbonate (baking soda), sodium chloride (table salt), and another salt called sodium sulfate. The Egyptians would dry their mummies with Natron in windy tents in the dry desert air for 40 days before wrapping them for their final burial. Salt is a desiccant, which is a chemical that removes water from things. It also has anti-microbial properties, which means it kills bacteria and fungi. When you remove water and microbes from the picture, mummies bodies’ don’t decompose.
Want more Saturday Science? See all of our at-home activities on the blog or on Pinterest .
- Buy Tickets
- Privacy Policy
- Internships
- Accessibility
Official Partners
- Plan Your Visit

3000 North Meridian Street Indianapolis, IN 46208-4716
317-334-4000
Sign Up for Email
By signing up I agree that I am 13 years or older, or I have my parent or guardian's consent.
Mummy Experiment
Have you ever wondered why every time you eat salty foods, you get thirsty? Or why fresh vegetables tend to shrivel up when you sprinkle salt on them? The answer is simple. Salt is a desiccant - it helps remove water from things, including human bodies. Which is why the Ancient Egyptians used salts when they were mummifying bodies.
In this experiment, you can test different salt compounds and to find out which makes the best mummified apple.
2 fresh apples large box of table salt large box of Epsom salts large box of baking soda knife eight 12-oz disposable plastic cups measuring cup large mixing bowl pen masking tape sensitive balance or food scale (optional) paper and pencil
- Slice the two apples into quarters so that you have eight slices similar in size. Place a piece of tape on each cup and write the words "starting weight." Select one slice, weigh it, and record the weight on the outside of cup 1. Follow the same procedure with the other seven apple slices until each cup has been labeled with the appropriate starting weight. If you don't have a scale, try to cut all the apple pieces to the same size.
- Put 1/2 cup of baking soda into cup 1, making sure to completely cover the apple. Write the words "baking soda only" on the outside label.
- Fill cup 2 with 1/2 cup Epsom salts and label.
- Fill cup 3 with 1/2 cup table salt and label.
- Fill cup 4 with 50:50 mix of Epsom and table salt then label.
- Fill cup 5 with 50:50 mix of table salt and baking soda and label.
- Fill cup 6 with 50:50 mix of baking soda and Epsom salts and label.
- Fill cup 7 with a mixture of 1/3 baking soda, 1/3 Epsom salts, and 1/3 table salt and label.
- At this point, seven cups should have an apple piece and 1/2 cup of salt mixture. Cup 8 should have just a piece of apple as control for the experiment.
- Place the cups on a shelf out of direct sunlight and let them sit for seven days.
- After a week has gone by, take out each apple slice, brush off as much salt as possible, and reweigh. (Do not rinse the apple off because that will rehydrate it.).
- Compare the starting and ending weights of each slice and calculate the percentage of weight which is moisture lost for each by dividing the difference in weight by the starting weight.
- If you don't have a weigh scale, put the apple pieces in order of size (make sure to keep track of which piece was in which cup!
- Which salt would seem to work best at making an apple mummy?
- Would you have achieved the same results if you used a whole, un-peeled apple? Try it and find out.
- What was the point of leaving one of the apple slices in a cup without any salt at all?
- Where did the moisture in the slices go? How could you confirm this?
This idea comes from the Newton's Apple website.
Looking for gift ideas for someone who is fascinated by Ancient Egypt .
Notes to Parents:
- Every parent must use their own judgment in choosing which activities are safe for their own children. While Science Kids at Home makes every effort to provide activity ideas that are safe and fun for children it is your responsibility to choose the activities that are safe in your own home.
- Science Kids at Home has checked the external web links on this page that we created. We believe these links provide interesting information that is appropriate for kids. However, the internet is a constantly changing place and these links may not work or the external web site may have changed. We also have no control over the "Ads by Google" links, but these should be related to kids science and crafts. You are responsible for supervising your own children. If you ever find a link that you feel is inappropriate, please let us know.
Kids Science Gifts Science Experiments Science Fair Projects Science Topics Creative Kids Blog
Kids Crafts Privacy Policy Copyright © 2016 Science Kids at Home, all rights reserved.

- Science & STEM
- Arts & Crafts
How to Make a Mummy STEM Activity

How to Make a Mummy Directions
- baking soda
- sandwich bag
- optional: silica gel packs
- Book List: Six Children's Books About Egyptian Mummies
- Book + STEM: Pumpkin Life Cycle STEM Activity
- STEM: Pepper and Soap STEM Experiment
- Fun Facts: Fun Facts About Camels
- Book + STEM: The Night Before St. Patrick's Day by Natasha Wing + Leprechaun Traps
- Book + STEM: It Came from Under the High Chair: A Mystery by Karl Beckstrand
No comments:
Post a comment.

How To Mummify Apples | Apple Mummification Science Experiment
We are making Apple Mummies as part of our Ancient Egypt studies! We are going to experiment to find out which material is the best at pulling the moisture out of an apple. Read on to learn more!
Nylon knife to cut into apples (Adult Supervision required)
White linen (we got ours from the dollar store. A cotton shirt will be fine to cut up and use as well)
Baking Soda
large Ziploc bag
4 jars (we used recycled glass yogurt jars)

Directions:
- Cut an apple into four slices. (Adult supervision required).
- The first slice of apple is the control. Wrap it in white linen only. Place in glass jar. Label the jar “Control”
- Cover the second slice of apple in baking soda only and then wrap it with the white linen. Place in jar. Label the jar “Baking Soda”
- Cover the third apple slice half with baking soda and half with salt. Wrap it with the white linen. Place in the jar. Label the jar “Baking soda/salt”
- Cover the fourth apple slice with salt only. Wrap it with the white linen. Label the jar “salt”
- Place all of the jars into a large ziploc bag and seal.
- It’s going to take a few days for the moisture to be drawn out. So just set it to the side.
- After 4 days, take out the apple slices to see what they look like. Check out the results below!

Results : Immediately we can see the differing amounts of moisture that were pulled out from the apples inside of the glasses. We then opened each wrap to expose the apples. The kids wore gloves to touch each apple as mold had already grew on some of them. After we documented our findings, we wrapped up the apples for another few days. However, they were so moldy, I just couldn’t bring myself to open them up and my kids were pretty grossed out. But we probably could infer what they looked like.
Give this experiment a try and tag me @playinquiremakelearn on Facebook or Instagram. I’d love to see how yours came out!

Latest Posts:

Top Ten Projects
- Candle Race
- Home-Made Glue #1
- Soil Erosion
- Volcanic Gas
- Accelerate Rusting
- Vibrating Coin
- Mentos Soda Volcano
- Musical Bottles
- Human Battery Power
Latest Projects
- Sweet Erosion
- Your Planetary Age
- Exploding Ziploc
- Dehydrated Potato
- Homemade Windmill
Want to contribute?
Apple mummy.
To create a mummified apple by removing the moisture from the apple and preventing bacteria from growing.
Additional information
Mummies of humans and animals have been found throughout the world, some as a result of natural preservation and some as the result of human-assisted preservation. The most famous and well known culture for preserving the dead through mummification were the ancient Egyptians. Although mummification existed before the Egyptians with the Chinchorro mummies from northern Chile, the Egyptians were focused on the prospect of eternal life, which meant preserving the body for eternity. The earliest process of mummification took place as early as 3000 BC. Organs were removed from the body, with the exception of the heart, and stored in canopic jars. The skulls of the dead would then be filled with a thick plant-resin or plant-resin sawdust. It wasn't until the Middle Kingdom that the process began to take on a more advanced form. After removing organs and the brain (often pulled from the nostrils with hooks), embalmers would use natural salts to remove moisture from the bodies of the dead, drying out flesh and bone. The emptied bodies were then covered in natron to speed up the dehydration process and prevent decomposition. They were then wrapped with white linen and finally wrapped with a sheet of canvas for extra protection before being laid to rest.
Sponsored Links
Required materials.
- 1 Popsicle stick
- 1 Plastic bag (preferably a zip-lock freezer bag)
- 1/4 cup of salt
- 1/2 cup of sodium carbonate (powdered bleach)
- 1/2 cup bicarbonate of soda (sodium bicarbonate, which is used as a raising agent in baking)
Estimated Experiment Time
About 10 minutes to conduct, and a few days for the apple to become mummified.
Step-By-Step Procedure
- 1. Mix the salt, sodium carbonate, and bicarbonate of soda into the plastic bag.
- 2. Cut a face into your apple using the popsicle stick. Do this by pushing the stick into the front of the apple to make eyes, a nose, and a mouth (be creative).
- 3. When finished with the face, push the popsicle stick into the top of the apple so it makes a handle.
- 4. Place the apple into the bag with the mixture and ensure that it's covered by the mixture
- 5. Leave the bag open in a warm dry place and watch what happens to the apple!
This apple is NOT meant to be eaten! Once you take a look at the final result you'll probably agree it isn't something you would consume. Besides, who would want to eat a mummy?
Observation
Why do you think the apple dried and shriveled as opposed to turning brown and decaying? Does the apple even resemble an apple once it's all dried up, or does it look more like a shriveled up prune? How is the process of mummifying the apply similar to the process used by ancient civilizations in mummifying their dead?
The powder mixture takes all the moisture out of the apple, which makes it difficult for bacteria to grow. Without the water and bacteria, the apple can't decay, so it just shrivels and dries up. Again... DO NOT EAT THIS APPLE!
Take a moment to visit our table of Periodic Elements page where you can get an in-depth view of all the elements, complete with the industry first side-by-side element comparisons!
All Projects List
All categories.
home | about us | support | link to us | usage agreement | privacy policy | sitemap article resources -->
Copyright 2007, Sciencefairadventure.com. All Rights Reserved.

COMMENTS
Apple Mummy Math. We decided to put more math into our activity and calculate the amount of apple weight lost during the experiment period in order to mathematically determine the most effective way to preserve our apple mummies. To calculate this, divide Day 14 by Day 7 and then subtract 1 to get the percentage lost.
Ancient Egypt: Mummified Apple Experiment When beginning a study of world history, it's always best to begin at the beginning...with ancient civilizations. For the next few weeks, I will be sharing an on-going unit study of one of the oldest known people groups of the world, the Ancient Egyptians. ... Before removing the apples from the "mummy ...
Cut an apple into 8 equal pieces; Add an apple to each cup. Cover the apples with the appropriate salt mixture (based on the label of the cup). Add a loose top to the cups such as foil cupcake holders. Let them sit for a week. Exhume them after a week and observe their differences.
Mummy Experiment. The earliest Egyptian mummies date back to around 3200 B.C. Hieroglyphics from tombs describe how the mummification process evolved over time. ... Cup 8 should have just a piece of apple as control for the experiment. Place the cups on a shelf out of direct sunlight and let them sit for seven days. After a week has gone by ...
Recreate the mummification process & make an apple mummy using apples, salt, baking soda. Enrichment activity for Ancient Egypt social studies units. Pages ... more weeks if you'd like. But I'm going to call it done for this blog post. Stay tuned for part two of this experiment in which I show what happens when an apple is ...
We are making Apple Mummies as part of our Ancient Egypt studies! We are going to experiment to find out which material is the best at pulling the moisture out of an apple. Read on to learn more! Supplies: 1 apple . Nylon knife to cut into apples (Adult Supervision required) White linen (we got ours from the dollar store.
Place apple into the bag, completely covering the apple with baking soda and salt mixture. 4. Keep plastic bag open, and check again in seven days. 5. If the apple is not dried, make a new mixture of baking soda and salt, place into another plastic bag, add the apple, and wait until it is completely dried. Observe the appearance of the apple.
Place one apple slice on the food scale and record its weight on a chart. Place that slice in a plastic container (no lid) and set it aside. Weigh each remaining apple slice on the food scale and record the weight on the chart. Place the remaining apple slice(s) in the second small plastic container and cover completely with the soda/salt mixture.
follow instructions to create an apple mummy. explain in their own words what the experiment taught them about the process of mummification. Keywords mummy, mummification, ancient, Egypt, apple, chicken. Materials Needed apples (one for every four students) plastic cups baking soda salt a bowl for mixing the baking soda and salt
Apple Mummy. Purpose. To create a mummified apple by removing the moisture from the apple and preventing bacteria from growing. Additional information. ... Estimated Experiment Time . About 10 minutes to conduct, and a few days for the apple to become mummified. Step-By-Step Procedure. 1.