- Skip to primary navigation
- Skip to main content
- Skip to primary sidebar

- FREE Experiments
- Kitchen Science
- Climate Change
- Egg Experiments
- Fairy Tale Science
- Edible Science
- Human Health
- Inspirational Women
- Forces and Motion
- Science Fair Projects
- STEM Challenges
- Science Sparks Books
- Contact Science Sparks
- Science Resources for Home and School

How Do Lungs Work? Make A Model Lung
August 12, 2018 By Emma Vanstone 36 Comments
The lungs are an essential organ for all mammals. Lungs have several features which make them perfect for exchanging gases.
- a very large surface area, thanks to a network of small tubes and tiny air sacs called alveoli.
- they are moist
- and have a good blood supply
Today, we’re going to find out how lungs work by making a lung model .
The lungs are part of our breathing system, which has two functions:
- ventilation – the movement of air into and out of the lungs
- gas exchange – gases are exchanged between tiny sacs called alveoli and the blood.
Under the lungs is the diaphragm, a muscular sheet separating the lungs from the abdomen. The diaphragm moves up and down to increase the space in the chest, like the balloon at the bottom of the model.
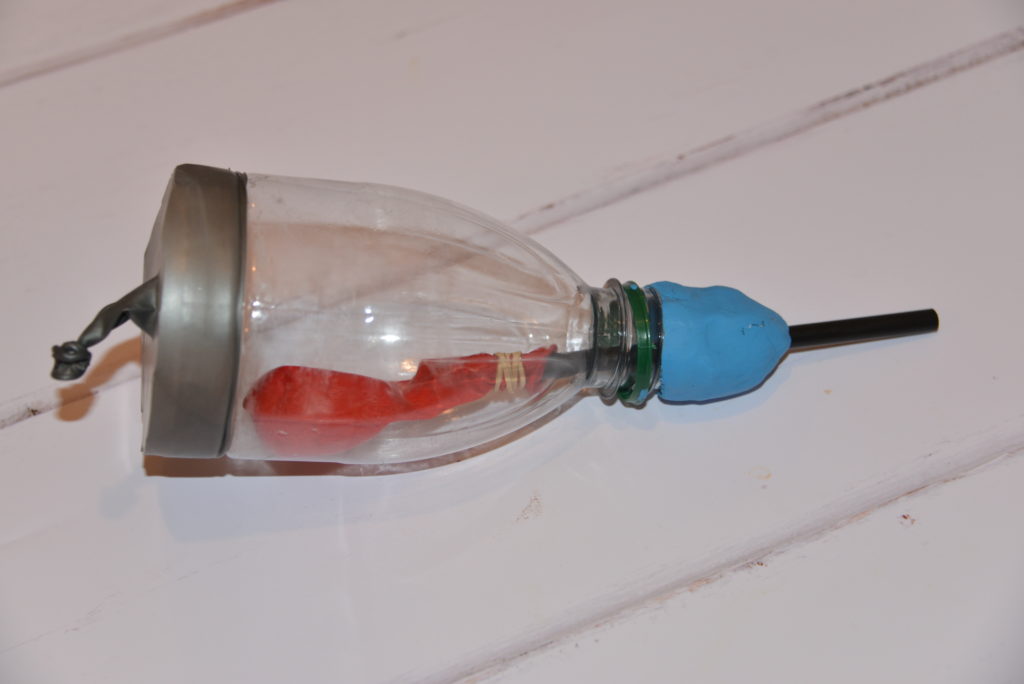
To make a model lung you’ll need
- A plastic bottle
- An elastic band
- Two balloons
The bottle acts like the chest cavity, the balloon at the bottom is like the diaphragm and the balloon in the centre is like a lung.
Instructions for making a model lung
- Carefully cut the bottle roughly in half. Ask an adult to help. Discard the bottom half.
2. Tie a knot in one end of one balloon and cut off the opposite end.
3. Stretch the balloon around the bottom of your plastic bottle.
4. Place a straw in the neck of the other balloon and secure it tightly with the elastic band but not so much that you crush the straw. The air must flow through, so test it with a little blow through the straw to see if the balloon inflates.
5. Put the straw and the balloon into the neck of the bottle and secure them with the play dough to make a seal around the bottle – make sure that again, you don’t crush the straw, but air can flow through.
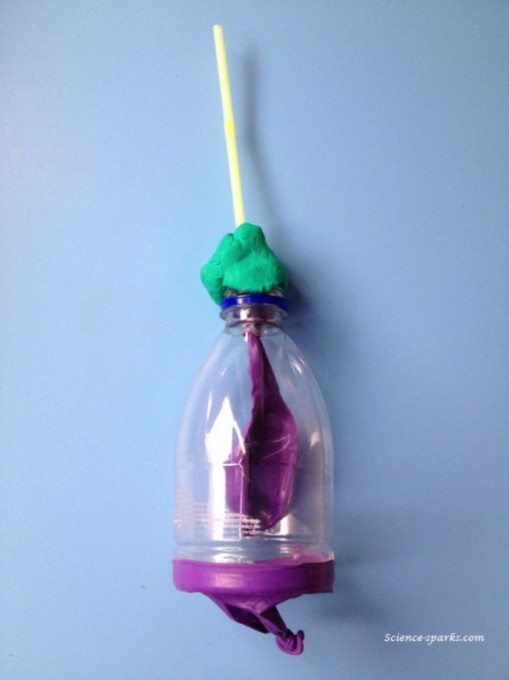
Hold the bottle and pull the knot of the balloon at the bottom. What happens?
You should find that the balloon inside the bottle inflates, and as you let go the balloon deflates.
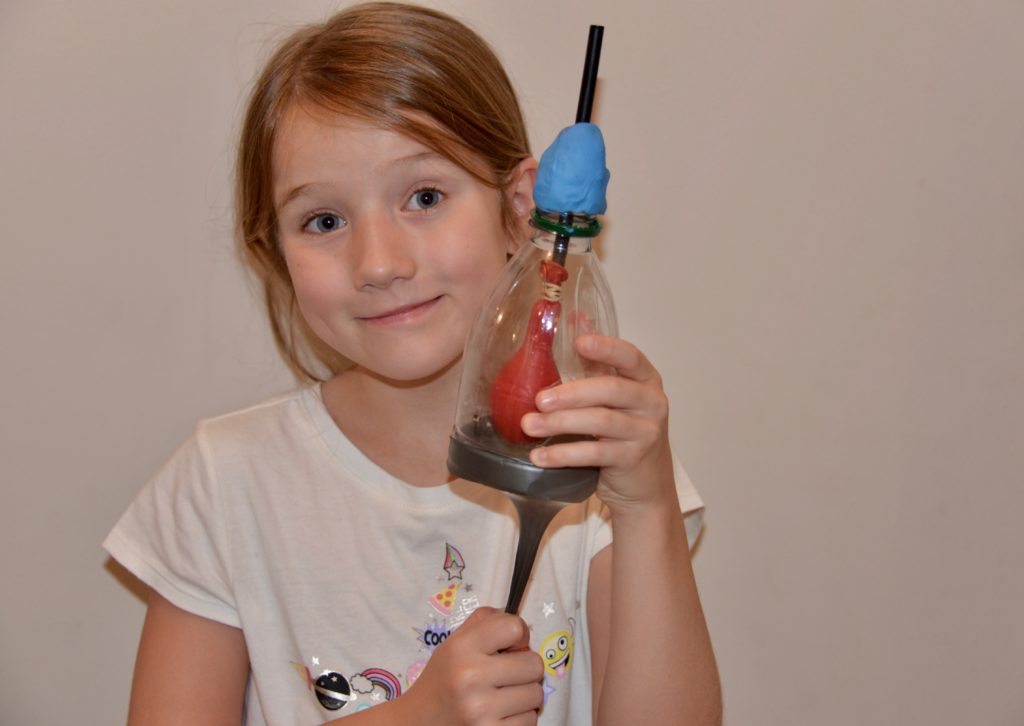
Why does this happen?
As the knotted balloon is pulled it creates more space inside the bottle. Air then comes down the straw and fills the balloon with air to fill the space! This is like breathing in.
When you let go of the knot the space no longer exists, so the air from the balloon is expelled making it deflate.
Inside the lungs is a network of tubes which allow air to pass through. Air is warmed, moistened and filtered as it travels through the mouth and nasal passages. It then passes through a network of tubes, eventually reaching tiny sacs called alveoli which is where gas exchange occurs.
How do lungs work?
This lung model demonstrates how the lungs work. Air is taken in through the mouth and nose, passes down the windpipe and into the lungs. The diaphragm at the bottom of our chest moves down to create more space. As we breathe out the diaphragm raises again. The knotted balloon represents the diaphragm and the balloon inside the container represents a lung. That’s how lungs work!!
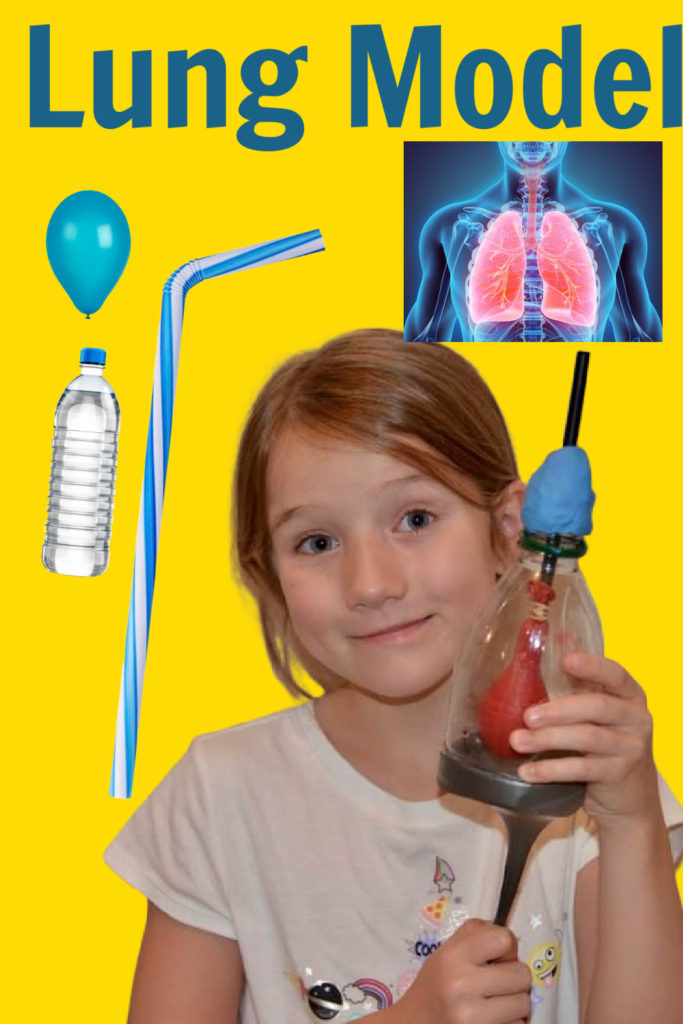
More ideas for learning about the lungs
Create a labelled diagram of the gas exchange system.
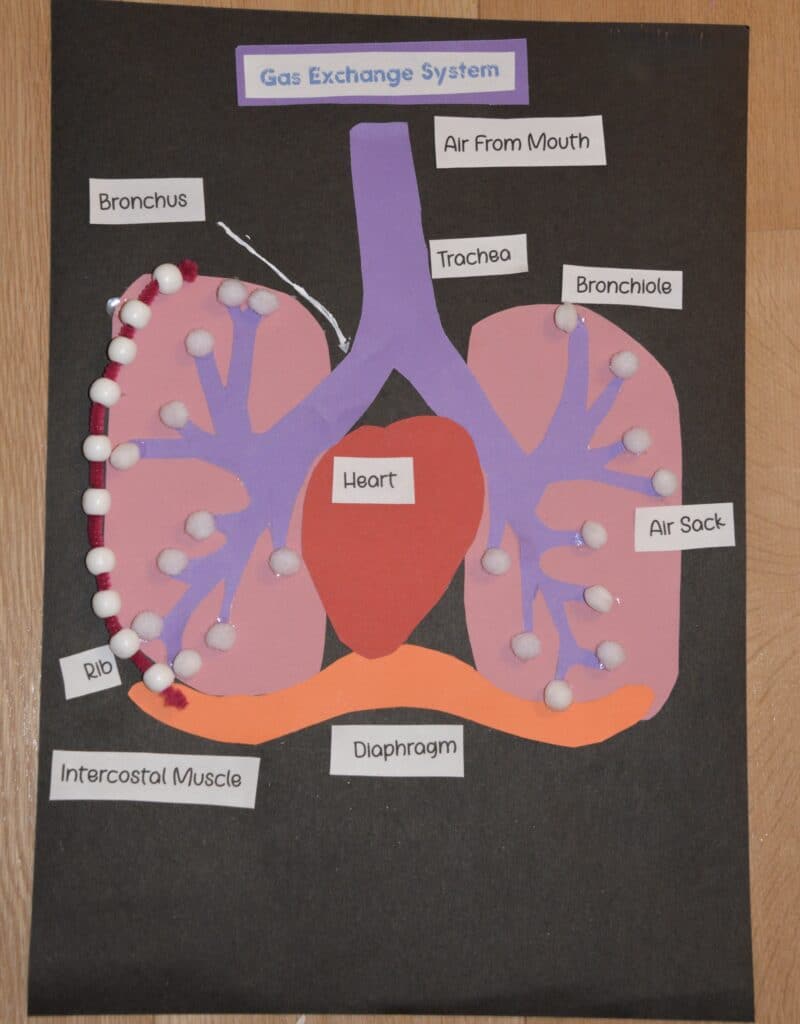
Use balloons to make a very simple model of the lungs.
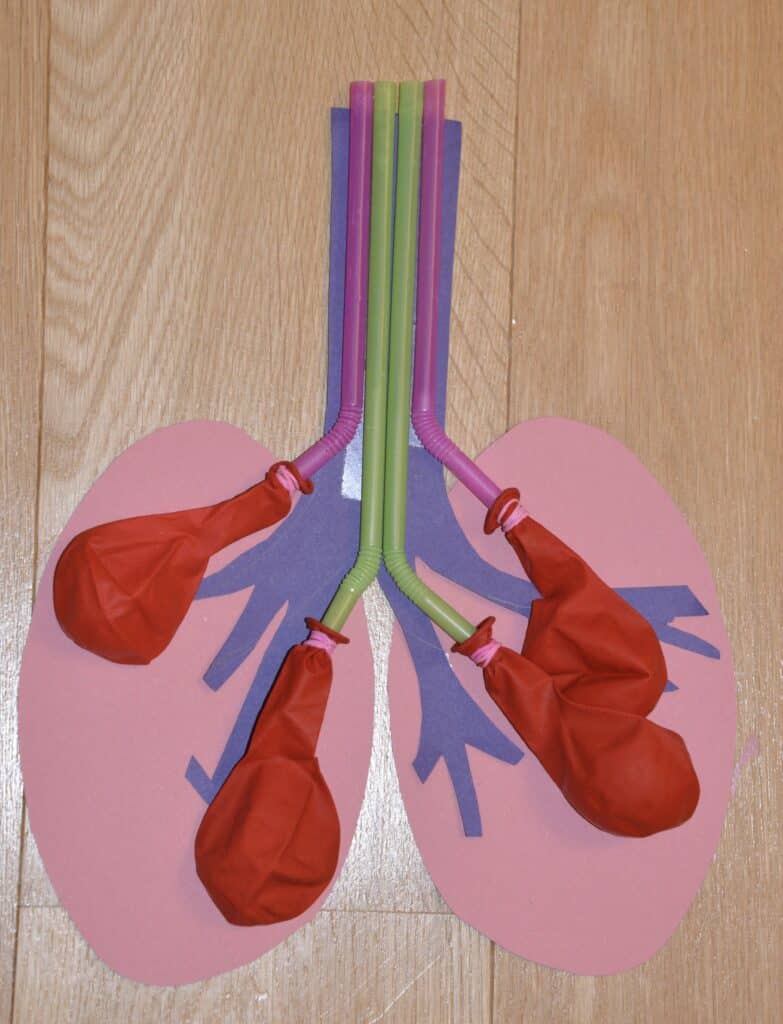
More human body science ideas
Create and build a DNA model from candy
Try this super simple heart rate investigation .
Make your own stethoscope with a cardboard tube, tape and a funnel.
If you liked this post, we’d love you to follow us on Facebook, where we post fun science ideas daily!
If you enjoyed this activity, do check out my other easy science investigations for kids of all ages.
Last Updated on September 17, 2024 by Emma Vanstone
Safety Notice
Science Sparks ( Wild Sparks Enterprises Ltd ) are not liable for the actions of activity of any person who uses the information in this resource or in any of the suggested further resources. Science Sparks assume no liability with regard to injuries or damage to property that may occur as a result of using the information and carrying out the practical activities contained in this resource or in any of the suggested further resources.
These activities are designed to be carried out by children working with a parent, guardian or other appropriate adult. The adult involved is fully responsible for ensuring that the activities are carried out safely.
Reader Interactions
April 13, 2012 at 11:39 am
Very cool – even if it does make me feel a bit queasy!
December 09, 2013 at 5:41 pm
I know how you feel.They could have chose a less effective colour.
January 17, 2014 at 8:57 pm
April 15, 2012 at 1:26 am
I have made this with my oldest son! It’s really neat; I plan to do it with all my kids when we study anatomy!
April 15, 2012 at 1:39 pm
I’m so glad you liked it!
April 16, 2012 at 10:10 pm
Very cool. Now to remember this when Bunny is a little older! My “No Time for Flashcards” post is a look at our week of playschool– http://www.notimeforflashcards.com/
April 17, 2012 at 7:05 pm
What a great demonstration!! Thank you for sharing at Sharing Saturday!! I hope you are having an amazing week!
April 18, 2012 at 9:59 am
That is seriously impressive. My get my husband to make one with our 8 yr old.
April 19, 2012 at 11:16 am
This is excellent, thank you. My son and I have just started exploring science at home and this site is wonderful. I’m so glad you link up to Sharing Saturday, thank you.
April 19, 2012 at 1:51 pm
Great way to teach science! Thanks for linking up to Kids Co-op.
April 20, 2012 at 1:28 pm
So Cool! This is the first time I’ve understood how a lung works. Thank you for giving me my weekly science lesson 🙂 Nominated you for a MAD award, btw. Thanks for sharing on Kids Get Crafty! ~Alissa and Maggy
April 21, 2012 at 1:11 am
I am new to your site and really like it! I pinned the how to make a lung idea to my learning ideas board – what a great idea…can be used in so many ways! Thank you!
April 22, 2012 at 9:48 pm
Thank you for pinning. xx
April 21, 2012 at 2:13 am
I just wanted to stop by to tell you that this is so awesome it is being featured this week on the The Sunday Showcase Have a wonderful week-
Aimee & Bern
Thank you so much. xx
July 23, 2012 at 3:24 am
This is a great idea! And it would work well to show the effects of smoking too. Use a wide straw (like one from McDonald’s) to fill the lung, then feel the difference in how fast or easily the lung fills using a narrow straw (like a tiny one for stirring coffee). I will for sure be doing this demo with kids! Thanks!
July 23, 2012 at 6:48 am
Fab. I’m glad you liked it.
January 13, 2023 at 2:24 pm
Thanks for sharing this video. This really helped in my school science fair. Thank you so much.
January 28, 2013 at 11:58 pm
You have to use a very sturdy water bottle for this project. My son and I went through many balloons trying to make it fit over a standard water bottle…..we ended up using a Snapple drink bottle because the plastic is stronger.
October 21, 2013 at 2:30 am
This looks great! We’ll be trying it this year when we learn about the respiratory system in our homeschool! Thanks for sharing!
December 09, 2013 at 5:44 pm
I’m making this for a science project and I hope that I do it right!How clever!It must have taken a while to think of that.GREAT IDEA!
January 24, 2014 at 8:45 am
It is so nise but we have two lungs.but you have shown only one.
March 24, 2014 at 11:40 pm
Great demonstration, I just wanted to correct the following statement:
“This demonstrates how our lungs work. Air is taken in through the mouth and nose, passes down the windpipe and into our lungs. The diaphragm at the bottom of our chest moves down dot create more space.”
The diaphragm is the muscle that makes breathing happen. As it contracts and spreads flat in the abdomen, it creates a vacuum that draws air into the body. This model demonstrates how a vacuum works.
August 29, 2014 at 2:02 pm
This is so great. I teach flute and was looking for some kind of demo – this is perfect – if I can get mine to work as well as yours does 🙂
March 12, 2015 at 3:48 pm
Awesome experiment! Did it with my school and didn’t understand the science bit…l thank you!!
March 12, 2015 at 3:50 pm
Suggestions: Instead of using a balloon as the lung, you can cut off the fingers of a doctors glove and Sellotape it to a y tube. It’s much more accurate
April 26, 2015 at 12:15 pm
It can be difficult to find plastic bottles that hold up to having a balloon stretched across the bottom. They all seem too thin. Can anyone suggest brands?
April 29, 2015 at 10:28 am
I’ve redone this recently and used a diet coke bottle, but I did reinforce it with some masking tape.
July 19, 2019 at 9:20 pm
Use a strong plastic clear cup with a lip at the bottom. The balloon fits nicely over it.
June 07, 2015 at 2:09 am
it is very easy to understand how they have discribe their eperiment i thank science aparks for this
May 13, 2016 at 8:19 pm
November 23, 2016 at 5:36 pm
This s a great experiment, we did it with 10 year olds and really got them thinking – easy and clear – thanks for the clear instructions 🙂 Just in case you want to know – few spelilng errors noticed – of not off and ballon and bow not blow.. x
November 25, 2018 at 8:22 pm
This looks like an absolutely perfect model for some school activities. I’ll definitely use it with my kids.
November 28, 2018 at 6:09 pm
Must have a strong 2 liter bottle. Many are too bendable
January 28, 2019 at 1:24 pm
This project is so cool I’m doing one for my project
October 23, 2019 at 1:33 pm
Wow! Thank you for sharing such a great activity! I’ll share it on my facebook page.
Leave a Reply Cancel reply
Your email address will not be published. Required fields are marked *
Make a Human Lung Model

Introduction: Make a Human Lung Model

Air! It is what keeps us alive, keeps us breathing! Some of you may know that plants help make oxygen, and oxygen is the air we breathe, but how do we breathe? How do our cells get oxygen? Part of the reason is our respiratory system, and our lungs! For this project we will be learning about how our lungs work by making a model of the lungs that include the diaphragm.
How do our lungs work?
When we breathe, our lungs bring in fresh oxygen for our body and remove carbon and dioxide and other waste gases our bodies don’t need.
When we inhale, or breathe in, we use the muscles in our rib cage, especially the muscle called the diaphragm.
To get the oxygen your body needs, you inhale air through your mouth and nose and air passes through the throat into the trachea. Also called the windpipe.
The trachea divides into the left and right bronchi, like a branch, each bronchus divides again and again, becoming narrower and narrower. Kind of like tree branches.
Your smallest airways end in the alveoli, al·vee·uh·lai, small, thin air sacs that are arranged in clusters. Alveoli are an important part of the respiratory system. It is their job to exchange oxygen and carbon dioxide molecules to and from the bloodstream and thus to and from our cells!
● Plastic bottle with screw top cap
● Straws x 2-3
● Rubber Bands x 2
● Balloons x 2
● Plastic Wrap
● Exacto Knife (ONLY AN ADULT SHOULD USE THE EXACTO KNIFE)
Step 1: Cut the Bottom Off Your Plastic Bottle

When you choose your bottle, make sure it is big enough to hold the size of balloons you have, and that the bottle is somewhat sturdy. I used a 2 liter soda bottle, it was just sturdy enough and as I had bigger balloons, it was better to be wider than a smaller bottle.
Pierce your plastic bottle. I used an exacto knife for the initial pierce. Then you can cut around the bottom of your bottle with either your scissors or continue using an exacto knife (ONLY AN ADULT SHOULD USE THE EXACTO KNIFE).
Remember, you only need to cut off the bottom, to make sure you will have enough room length wise for the straw as well.
Step 2: Carefully Cut/screw a Hole in Your Bottle Cap

Carefully using your exacto knife (ONLY AN ADULT SHOULD USE THE EXACTO KNIFE), cut a hold roughly the size of your straw. This can be accomplished by cutting an X engraving on the bottom and on the top, then finding the center of your X pierce with your knife in a screw-like motion until it goes through the cap. Repeat this until you have a nice small circle.
(If this ends up being too challenging, feel free to avoid using a twist cap and use modeling clay or playdough on the future step, when adhering the cap to the straw.
Step 3: Cut Your Straws to Be Your Windpipe

Use 2 or 3 straws for this step. First, if you have bending straws, cut them slightly after the bend in the straw, so you are still able to bend it. If not cut the about 3 inches off one side. Keep one of the longer lengths of the straws to do the following: Take your scissors and cut so you cut the straw at an angle on both sides to create a point. Once you have the point use your scissors and put one blade inside the staw and cut about 1 to 1.5 inch up. Repeat for the other side.
You should now have a slit to place the smaller straw pieces into. Make sure the smaller pieces fit the way you want and that air can be blown through one and go out of both ends.
Finally lightly tape the pieces together so there is no excess air able to go through the slits. Remember not too tight, or it will constrict air flow.
This structure will be our trachea, or windpipe, that brings air into the body. It divides into the left and right bronchi continuing the air travel into our lungs.
Step 4: Prepare Your Balloons to Be Your Lungs (optional)

Take your two balloons and use your scissors to cut the top of the ballow off. This is an optional step, I found it easier to attach the balloon this way, and more air was able to flow into them this way as well.
The balloons are the part of the model that make up the outer part of your lungs
Step 5: Attach Your Lungs to Your Windpipe

Next, take one balloon and put one side of your windpipe (straw) into the balloon and, using tape, lightly wrap the balloon around the straw making sure there is no obstruction to air flow. Repeat with the other balloon and side of the windpipe.
This way air will be able to travel safely though each bronchus and into the alveoli sacs.
Step 6: Put Your Lungs Into Your Bottle

Now you are ready to insert your lungs into your bottle. You will want to do so by inserting your lungs straw side up into the bottle. Now take your lid and put the top of your windpipe (straw) through the hole. If you have difficulty, try folding the top of the straw to squeeze it into the lid. Once your straw is through the lid screw the lid back onto the bottle and lightly tape around the hole so there isn’t excess air.
(If you choose to not make a hole in your lid, instead of using a lid, cover the straw and mouth of the bottle with clay or playdough so it is airtight.)
This will make something similar to a vacuum chamber.
Step 7: Prepare Your Plastic Wrap to Be Your Diaphragm

your plastic wrap to be your diaphragm
Cut a square of plastic wrap large enough to cover the bottom of your bottle. Then, using your rubber bands, secure the plastic wrap around your bottle. I used two rubber bands, one when to initially secure and the other to secure the excess plastic.
In our model this plastic wrap represents the diaphragm. Our diaphragm tightness and flattens allowing us to suck air into our lungs. To breath out, or exhale, our diaphragm and rib cage muscles relax, letting the air out of our lungs.
Step 8: Attach a Tab to Help Control Your Diaphragm

Use extra tape or an extra rubber band and tape to create a pull tab for your diaphragm. Simply, fold the tape over on itself, so it creates a rope. Then tape then rope to the bottom of your model.
Step 9: Make and Observe Your Lungs Inhale and Exhale!

Pull your plastic wrap down to contract the diaphragm and make your lungs inhale the air. Relax the plastic wrap quickly or slowly and see what happens!
The air is exhaled!
You made a model of the lungs with a diaphragm!

How to Make a Lung Model in 6 Easy Steps
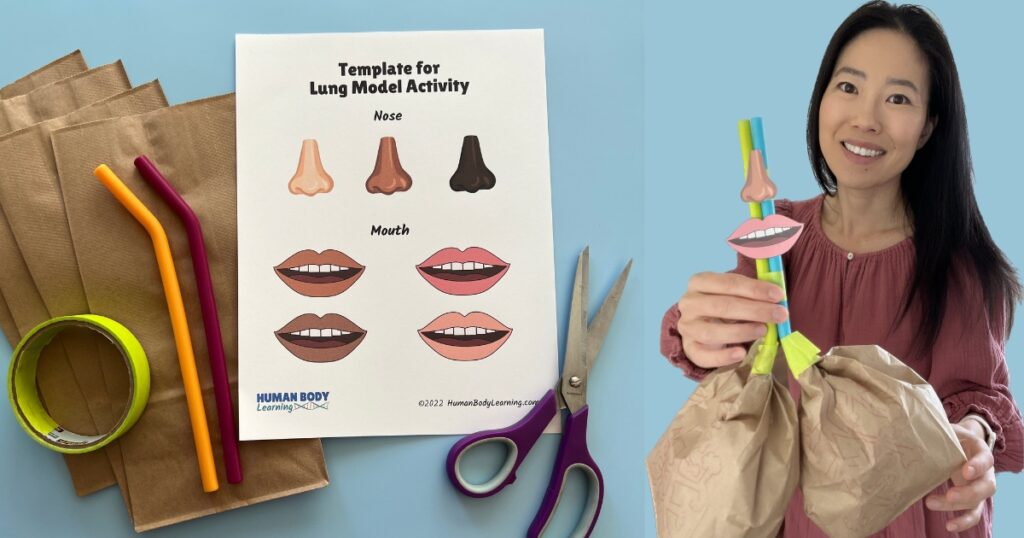
How does air flow into your lungs? What happens when a person has trouble breathing? These are common questions about the human body . Thankfully, kids can make a simple DIY model to learn how lungs work. With a DIY lung model, kids can see lung anatomy in action.
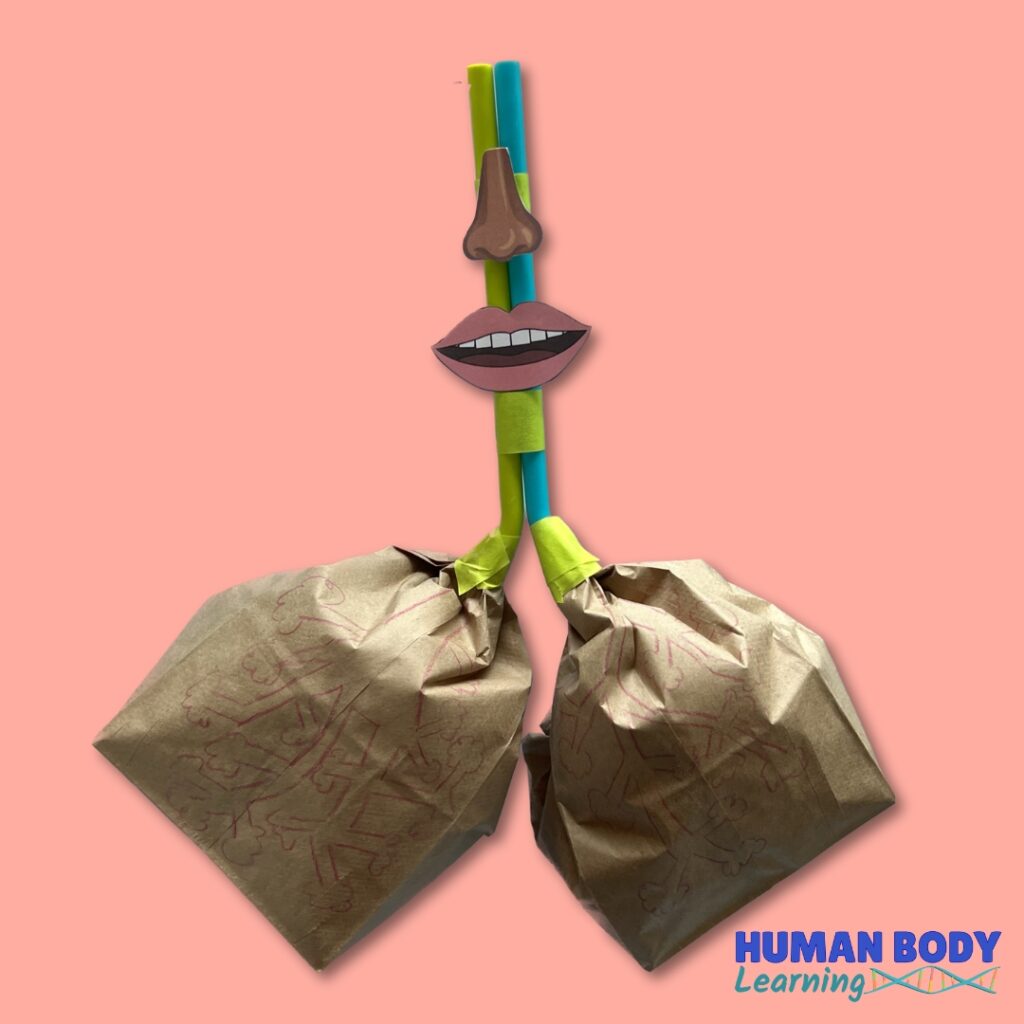
Although the lung model is a classic craft for preschools and elementary schools, it’s easy to make at home with materials you already have.
Get ready to see why the lungs are important for breathing in oxygen and breathing out carbon dioxide!
Parts of the respiratory system in the DIY lung model
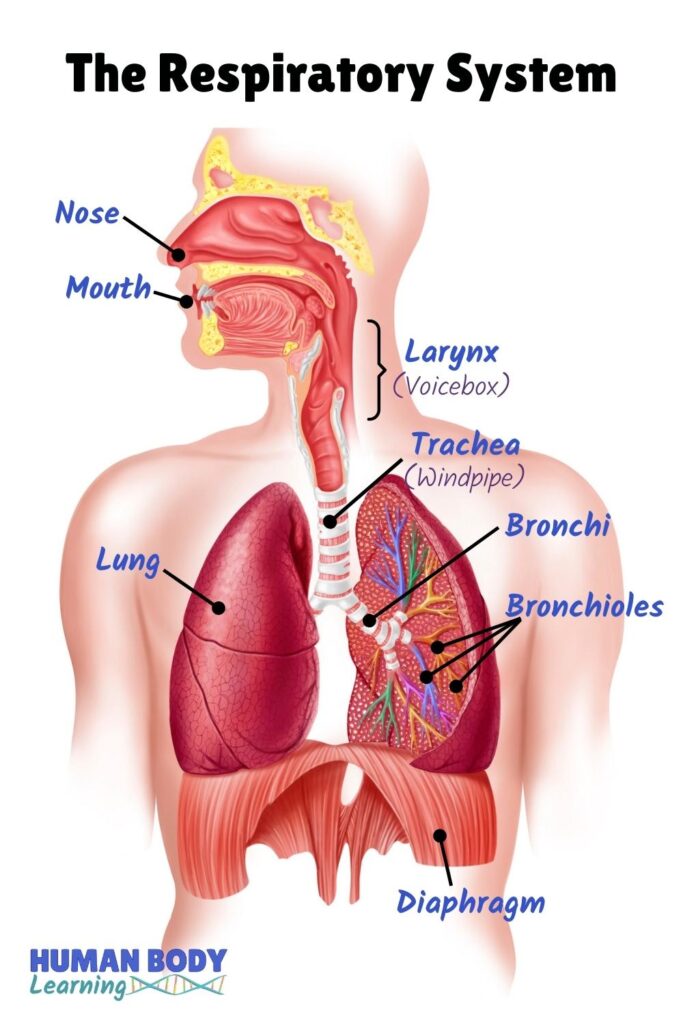
Did you know your breathing team hangs out in your face, neck, and chest? The main members are these body parts:
- Larynx (voicebox)
- Trachea (windpipe)
- Bronchioles
First, air enters the body through the nose and mouth.
Then, it flows down your throat through your larynx (voice box), trachea (windpipe), and bronchi.
Finally, air makes its way through tree-branch-like tunnels — the bronchioles — and the alveoli (air sacs) in your lungs!
How to make a lung model with kids
After looking at the picture of the respiratory system, it’s time to bring amazing lung facts to life!
When kids make a DIY lung model, the science of breathing will make a lot more sense.
Human Body Learning is reader-supported. Some links are affiliate links. When you buy something through an affiliate link, Human Body Learning may earn a small commission that supports this website at no additional cost to you. Please see the disclosure policy for details.
Tip: Instead of getting brand-new supplies, see what things you can reuse and recycle from your home.
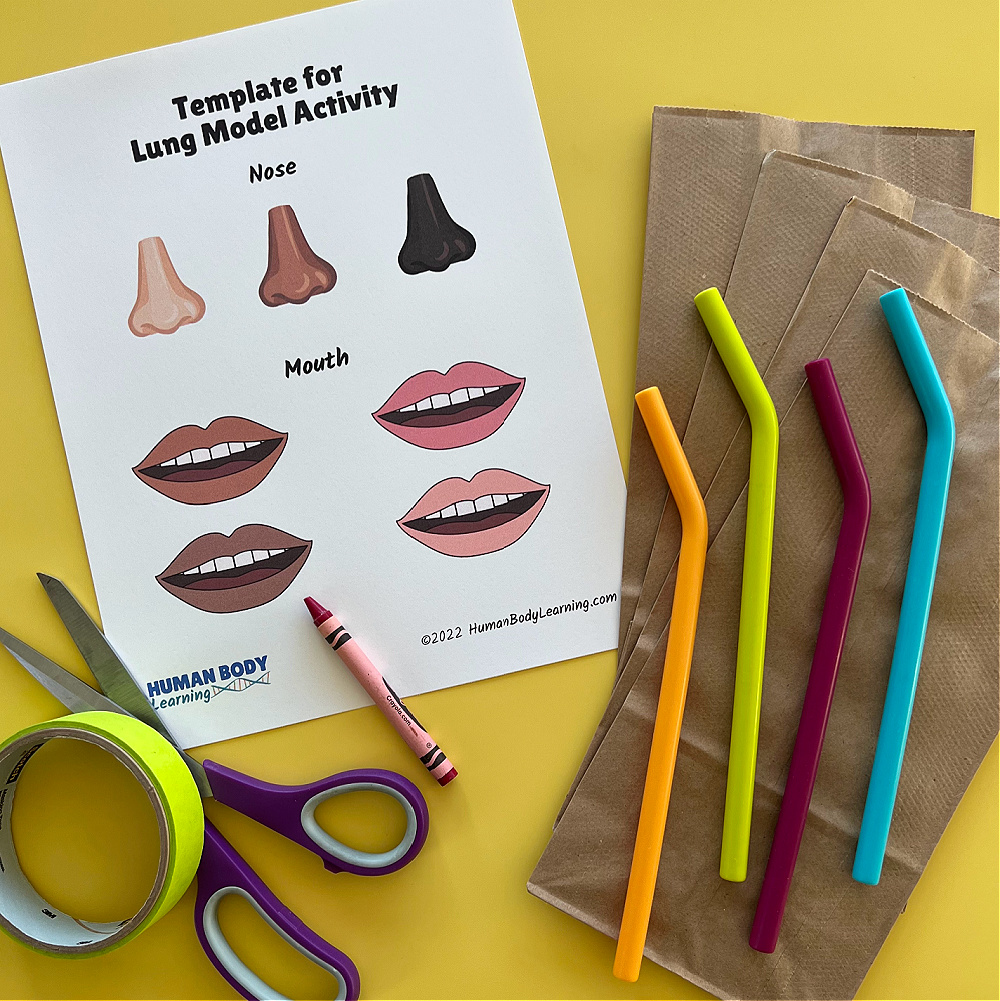
- 4 silicone straws
- 4 small brown paper bags
- Masking tape
- Marker or crayon
- Nose and mouth template: Sign up for Human Body Learning updates in the form below to instantly receive the printable!
After you hit subscribe, a copy of the lung model template will be sent to your email. Then, you can download the template onto your computer and print it out.
Instructions for making a healthy lung model
Kids can make a DIY lung model in just six steps!
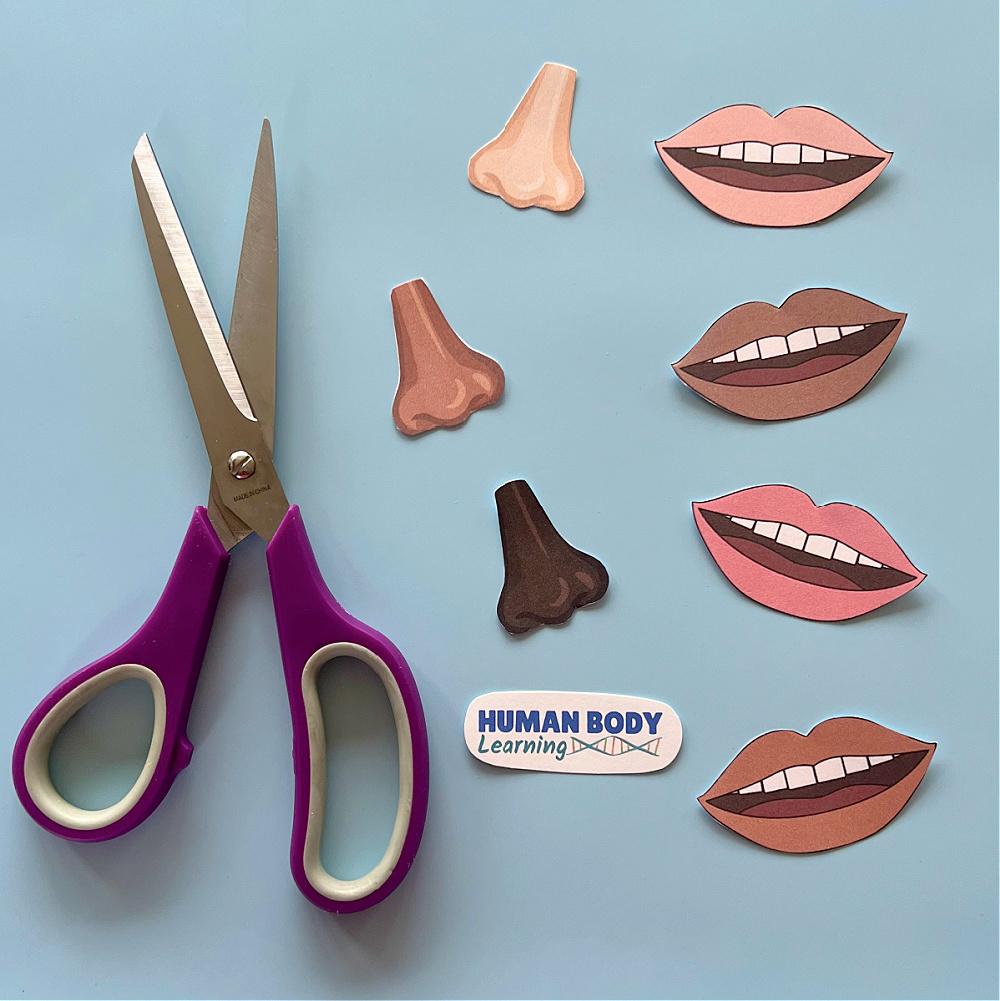
Print the template and cut out one nose and mouth.
(Cut out more if you want to make more lung models!)
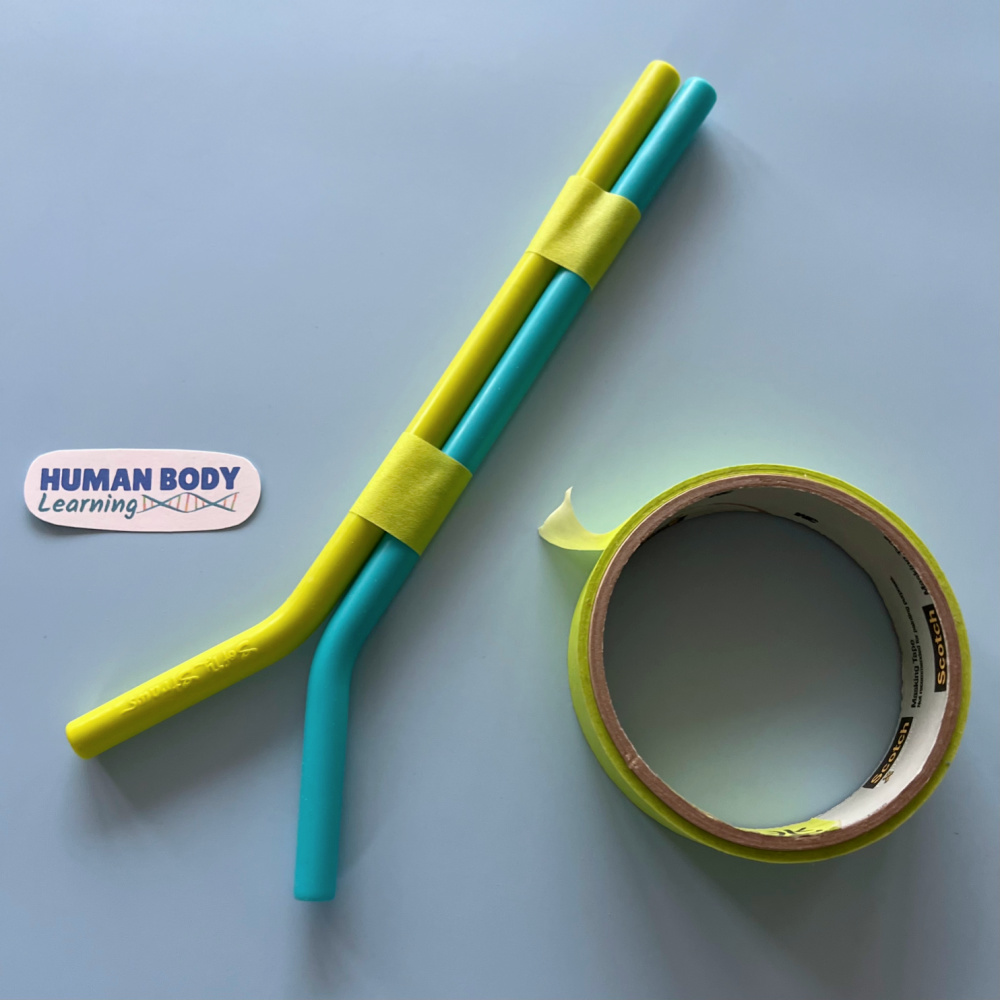
Put the straws together to make an upside-down “Y” shape.
Tape the long part of the straws together.
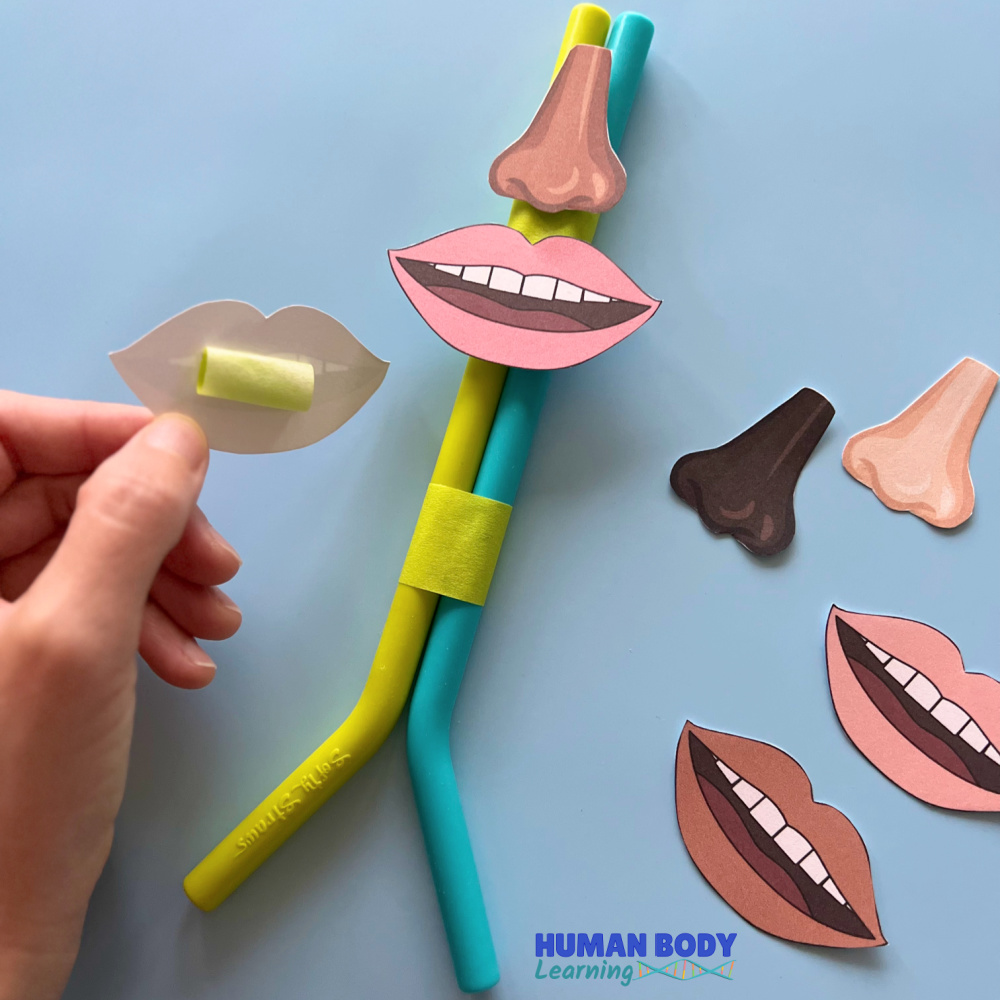
Tape the nose and mouth to the straws.
This is where air first enters the human body.
Doctors call this area the “upper airway” or the “upper respiratory tract.”
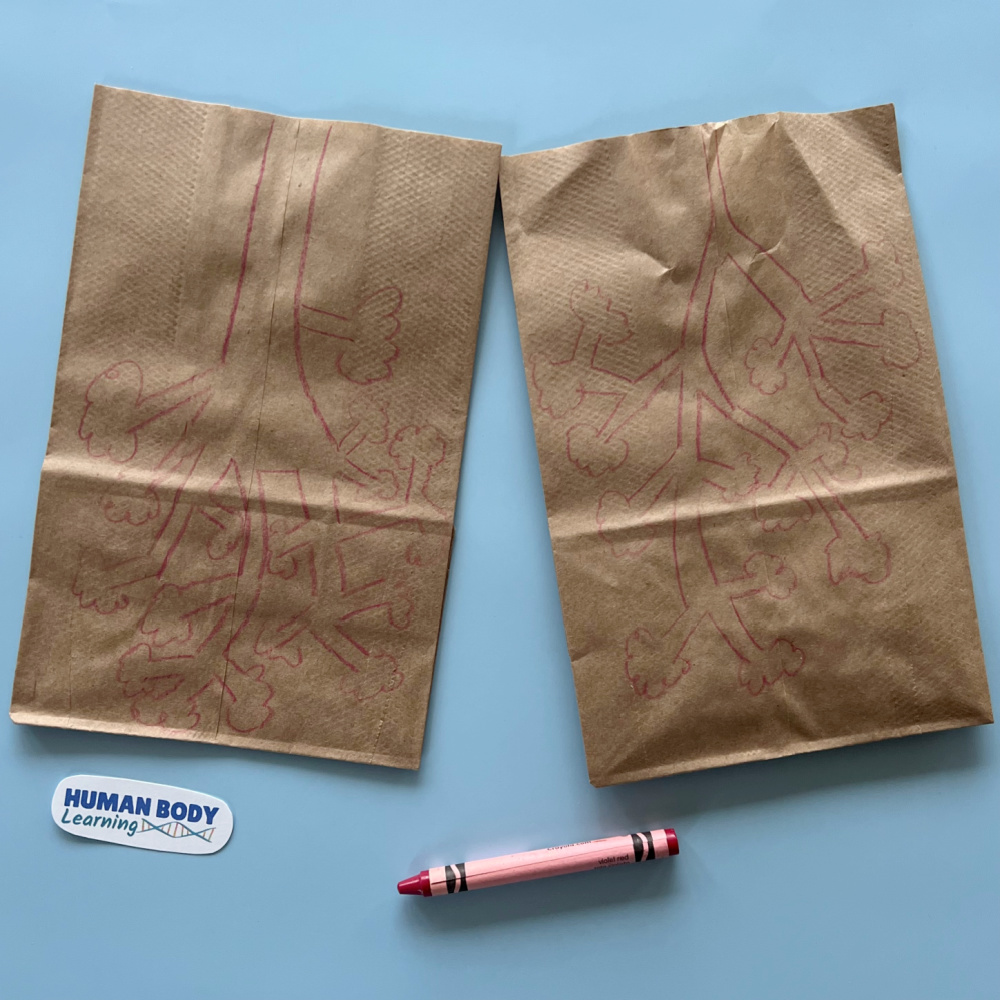
Draw bronchioles and alveoli with a crayon or marker on the brown paper bags “lungs.”
(Tip: If you have long bags, cut them shorter. “Smaller” lungs will be easier for kids to blow into.)
Your lungs have lots of little bronchioles and alveoli. Bronchioles are the smallest airways in the respiratory system. Alveoli are the small bags of air at the end of each bronchiole.
Doctors call this area the “lower airways” or the “lower respiratory tract.”
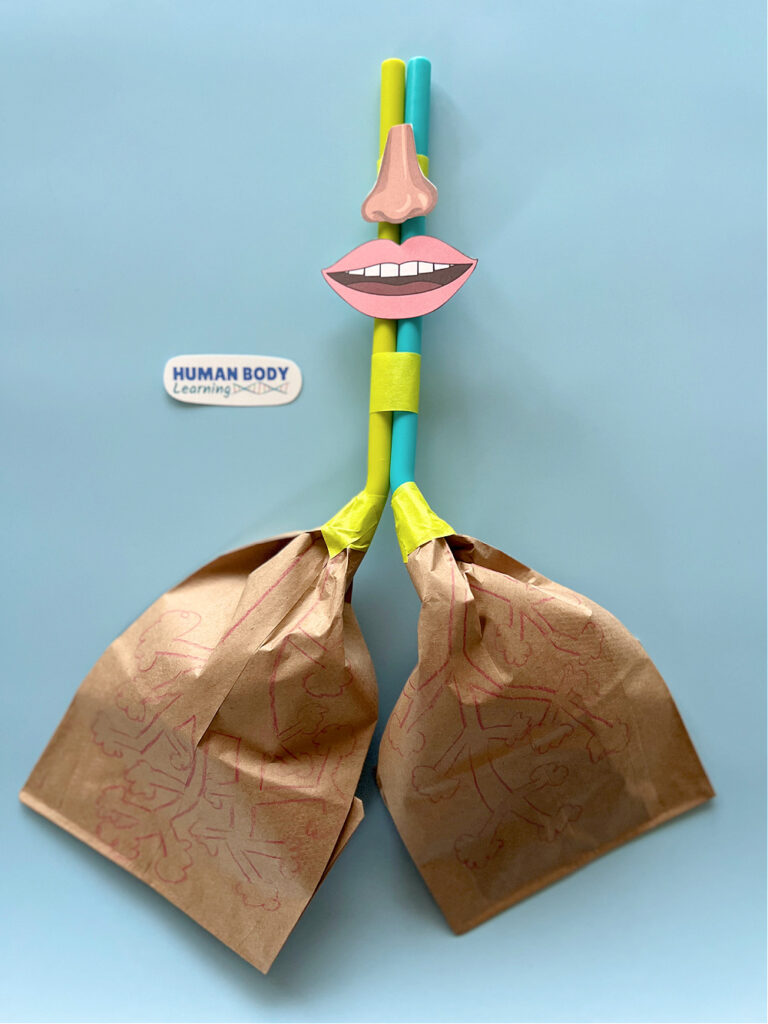
Tape a brown paper bag around each straw end. The paper bags are the lungs of the DIY lung model.
Make sure there are no gaps for air to leak out!
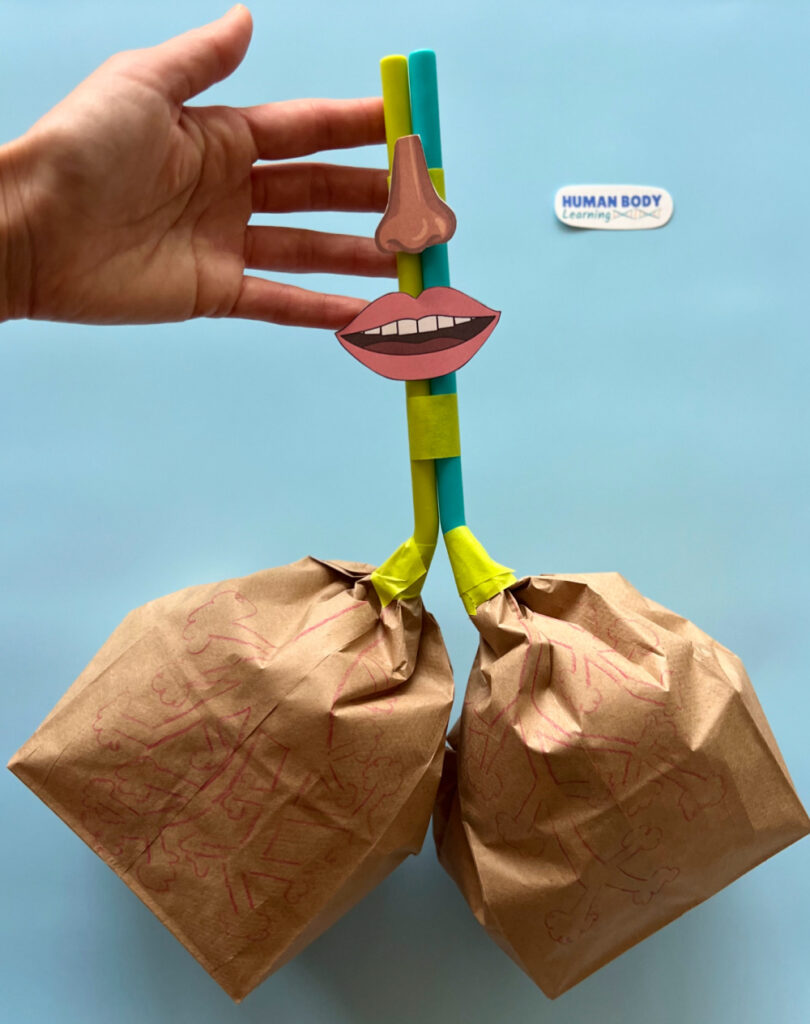
Experiment!
Blow slowly into the straws. What do you see? Are you able to blow air into the paper bag lungs?
Notice how both lungs fill up with air. Because the straw “airways” are open, the lungs can breathe in fresh air.
Now try squeezing the air out of the paper bag lungs. What do you notice? Did the paper bag lungs get smaller? Did you feel the air rush out of the open end of the straws?
What happens if air can’t get into the lungs?
This DIY lung model can show you where airflow sometimes gets blocked.
How to make a blocked windpipe (trachea)
With your fingers, squeeze the straws under the mouth in the “trachea” part of the lung model.
Now, try blowing air through the straws.
What do you notice? Are you able to blow air into the lungs?
How do you think someone would feel if their trachea was blocked?
How to make an unhealthy lung model
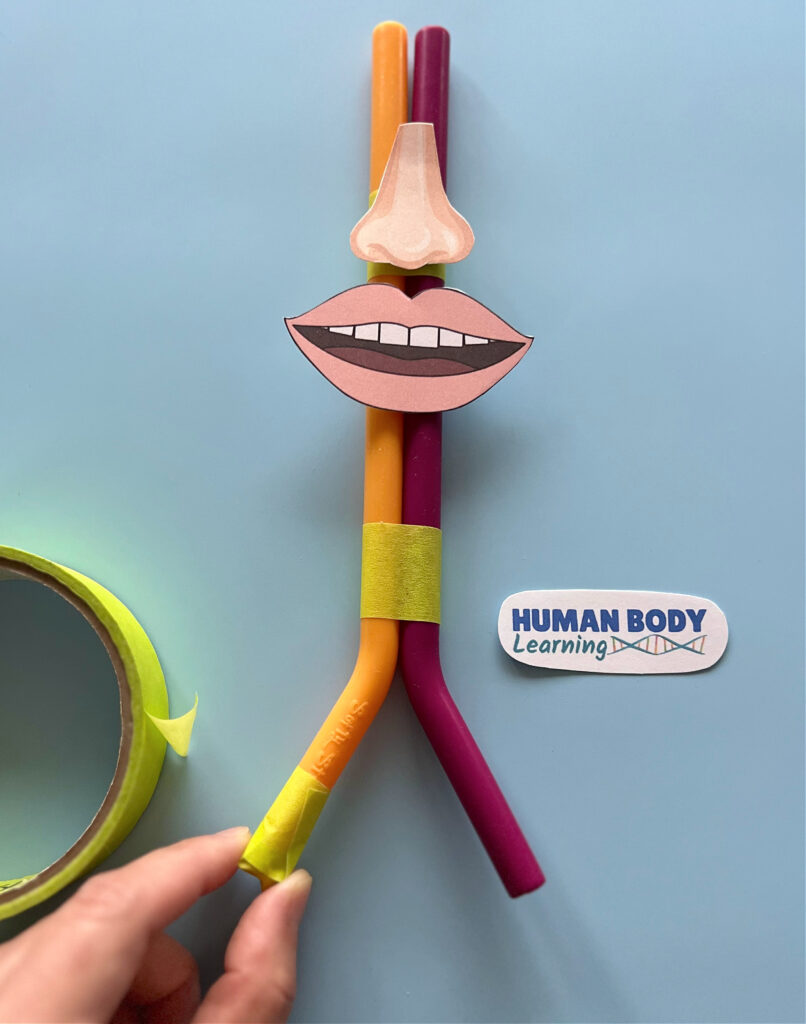
Repeat steps 1 through 4 described above.
Then, cover the end of a straw with tape to block the hole.
Return to step 5 and tape a brown paper bag around each straw end. Make sure there are no gaps for air to leak out.
When you get to step 6, what do you notice? Are you able to blow air into both lungs or only one lung?
When the straw “airways” are blocked, the lungs cannot breathe fresh air.
In real life, when airways are blocked with snot and swelling, a person would have trouble breathing.
Video tutorial: how to make a lung model
Pediatrician Dr. Betty Choi explains how to make a lung model and how air gets into the lungs.
Transcript:
“How do lungs work? And what happens when airways get blocked?
This classic DIY lung model shows how air goes through the nose or mouth, down the windpipe (trachea) and bronchi, and into the small airways (bronchioles) in the lungs.
If you get a stuffy nose, you can breathe through your mouth as backup. It might feel uncomfortable, but air can still get into your lungs.
If a child has croup, this top part of the windpipe near the voicebox gets swollen and filled with mucus.
The good news is that it usually doesn’t get fully blocked, so air can still make its way into the lungs.
Sometimes, other infections can plug up the small airways with mucus and swelling. This can block airflow.
Now, this lung needs help filling up with air.”
What happens if the DIY lung model has a hole?
Cut a small hole in the brown paper bag of your lung model. See what happens when you try to blow air in and suck air out.
Sometimes, the lung can get a hole when the chest gets hit or poked with a lot of force. When a person has a hole in a lung, doctors call this a “pneumothorax” because air from the lungs can leak out into the chest. “Pneumo” means “air,” and “thorax” means” chest.
This can be very painful! Because the lungs cannot inhale and exhale properly, someone with a hole in the lung would have trouble breathing and getting oxygen.

Other ways to make a lung model with kids
- What if you don’t have paper bags? Instead of paper bag lungs, use small plastic sandwich bags for this science project. Try to reuse and upcycle plastic bags to minimize waste!
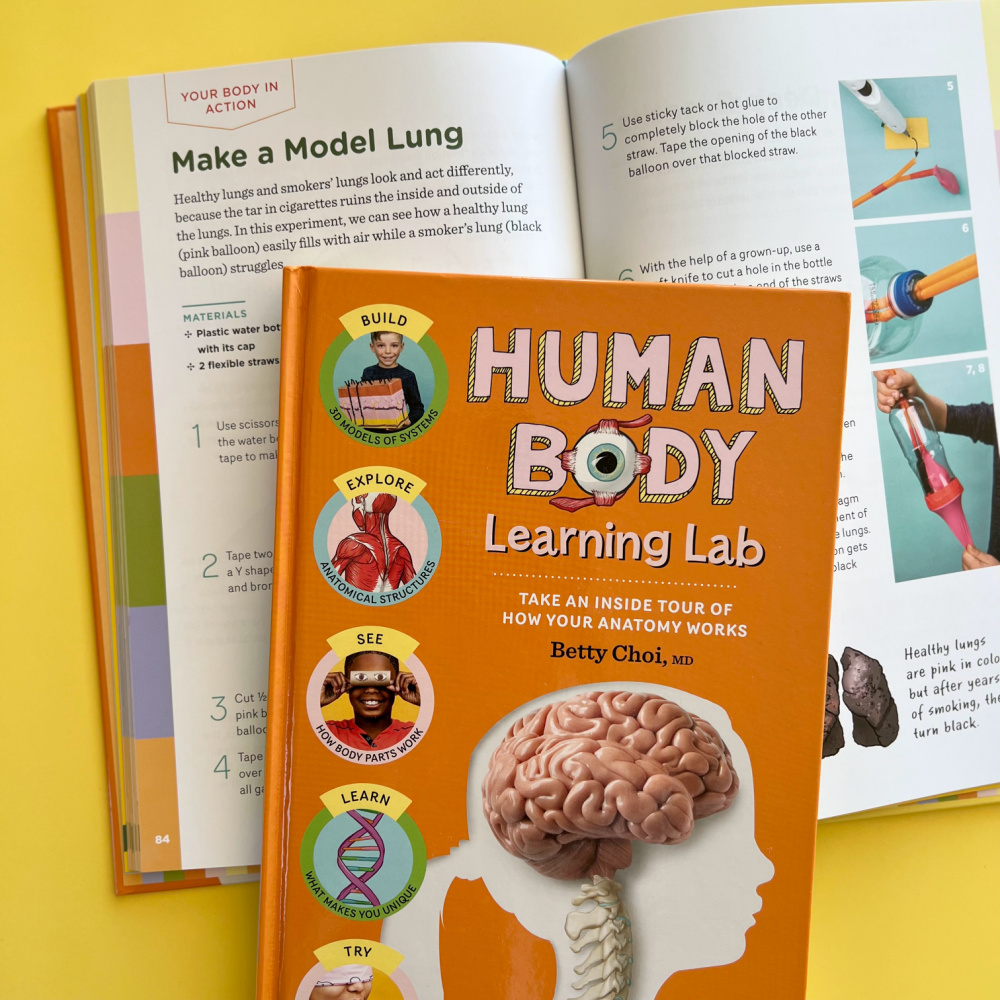
- Check out Human Body Learning Lab , pages 84 to 85, for another cool way to make a lung model with recycled materials. The lung model activity from the book shows kids how the diaphragm muscle works to help you breathe.
Learn more about the amazing human lungs!

EXPLORE : What Causes Hiccups and How to Get Rid of Them?

DISCOVER : Which is Better? Breathing Through the Nose or Mouth?

LEARN : How to Blow Your Nose in 3 Steps
ENJOY : Printable Anatomy Bookmarks
Human Body Learning has strict sourcing guidelines and relies on information from peer-reviewed research studies, academic institutions, and medical associations.
- Anatomy, Thorax, Lungs (StatPearls)
- Croup: Diagnosis and Management (American Family Physician)
- Physiology, Lung (StatPearls)
- Primary Spontaneous Pneumothorax Outcomes in Children: A National Analysis (Innovations)
- Three-Dimensional Models of the Lung: Past, Present, and Future (Biochemical Society Transactions)
Published on September 7, 2022. Updated on January 23, 2024 by Betty Choi, MD

Betty Choi, MD
Dr. Betty Choi is a Harvard-trained pediatrician who makes learning fun and doable. She created the kids’ anatomy book Human Body Learning Lab , which Science Magazine recommends as a “notable standout in the genre.”
The Connecticut Science Center is currently CLOSED to the public due to public health concerns about COVID-19. For more information about COVID-19 and FAQs, please follow this link. Learn More
- Hartford, Connecticut
- Buy Tickets
Science At Play: Make Your Own Lung Model
The lungs are respiratory organs that are vital to the breathing process and necessary to acquire life-giving oxygen. Learn how your lungs work by using simple materials from around your house to build a model lung. Your family and friends are bound to be amazed by this awesome model and your knowledge of how lungs work!
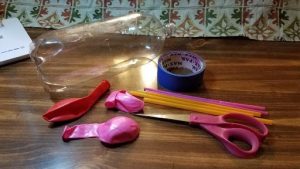
Materials to Collect
- Clear plastic drink bottle (A Gatorade bottle is a good size)
- Two balloons
- Tape (masking tape or duct tape)
Build/Make Your Own/Try it Out
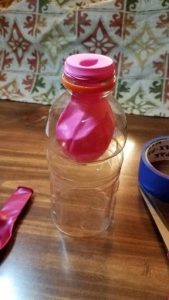
- Take one balloon and put it inside the bottle. Then fold the bottom of the balloon around the rim of the bottle so the balloon hangs from the top. Wrap tape around the top if the balloon doesn’t seem snug around the bottle opening. You don’t want any air escaping, so make sure it is nice and tight!
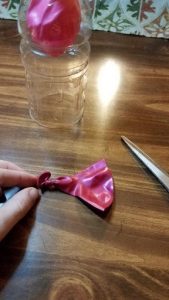
- Using the balloon half with the knot, stretch the open end over the bottom of the bottle. Again, this should be a tight fit. Use tape to secure if necessary.
- Gently pull down on the balloon from the knot. This should cause air to flow into the balloons within your lung model.
- Release the balloon with the knot and watch as the air is expelled from your lung model.
What is the Science?
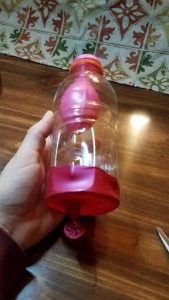
This model is showing us how our lungs work! The balloon at the bottom works like your diaphragm—a strong muscle that expands and contracts to cause your lungs to fill with air and then empty out again. The movement of the balloon matches your breathing – when you breathe in, your lungs fill with air just like the balloon inside the bottle did. That’s because the diaphragm expanded making room for air inside the lung. When you breathe out, your diaphragm contracts (or squeezes in) pushing all the air out of your lungs.
The same thing happened in your model! When you pulled down on the knot, the balloon inflated slightly and when let go the balloon deflated! Inside your body, you have two lungs that work together, and the diaphragm is below them. Air goes in and out of both of your lungs at the same time. This model just represents one lung.
Ask Your Young Scientists
- Put your hand on your stomach. What do you notice? When you breathe in you should feel your stomach expand. Why do you think your stomach expands when you breathe in?
- What are some things you can do to keep your lungs healthy?
- Try doing the experiment with a larger bottle and larger balloons. Does it change how the inside balloon reacts?
- Try pushing the membrane (the balloon) in. What happens to the balloon inside the bottle?
More to Explore
We want to see what you try at home. Share your creation with us on social media by using the #ScienceAtPlay and tagging @CTScienceCenter.

Kaila Ringgard is a Public Programs Educator at the Connecticut Science Center. She holds a degree from University of Massachusetts Amherst in Geology and Liberal Sciences. In her role at the Science Center, she creates and performs demonstrations for visitors that highlight many different fields in science and STEM careers. She is also responsible for taking care of the many reptiles and insects we have onsite, including our butterflies. You can usually find her in our galleries wearing a tie-dye lab coat with fun experiments and often an interesting animal you can meet.
PLEASE SHARE THIS
You might also like:.

Science Sunday: Glowing Fish

Science Sunday: Fun with Chemistry

Dear Science: Meteors

Build a Lung Model
What happens when we blow up a balloon? As you blow, the air from your mouth fills the balloon, inflating it. When you let it go, the air leaves the balloon, and the balloon deflates. A very similar process takes place inside our bodies too. In this interesting project, you will learn about the human respiratory system and build a lung model that demonstrates how the lungs work. This is a fantastic project for biology class or as a science fair project.
BUILD A BALLOON LUNG MODEL
Table of Contents
Disclaimer: This article may contain commission or affiliate links. As an Amazon Influencer I earn from qualifying purchases. Not seeing our videos? Turn off any adblockers to ensure our video feed can be seen. Or visit our YouTube channel to see if the video has been uploaded there. We are slowly uploading our archives. Thanks!
How does the Human Respiratory System work?
The body is made up of many different organs. A few of these organs are used in the process of respiration or breathing. These organs make up the human respiratory system.
The respiration process takes place in the lungs. Inhalation is the process of taking in air and this air provides oxygen to our body. Exhalation is the process of breathing the air out of our bodies. This air leaves our bodies as carbon dioxide. The process of inhalation and exhalation together is known as breathing.
Let’s look closely at the parts of the respiratory system and how it works.
The nose and the mouth
The nose and mouth are lined with mucous membranes that keep the nose and mouth moist. These membranes help make the inhaled air moist and warm.
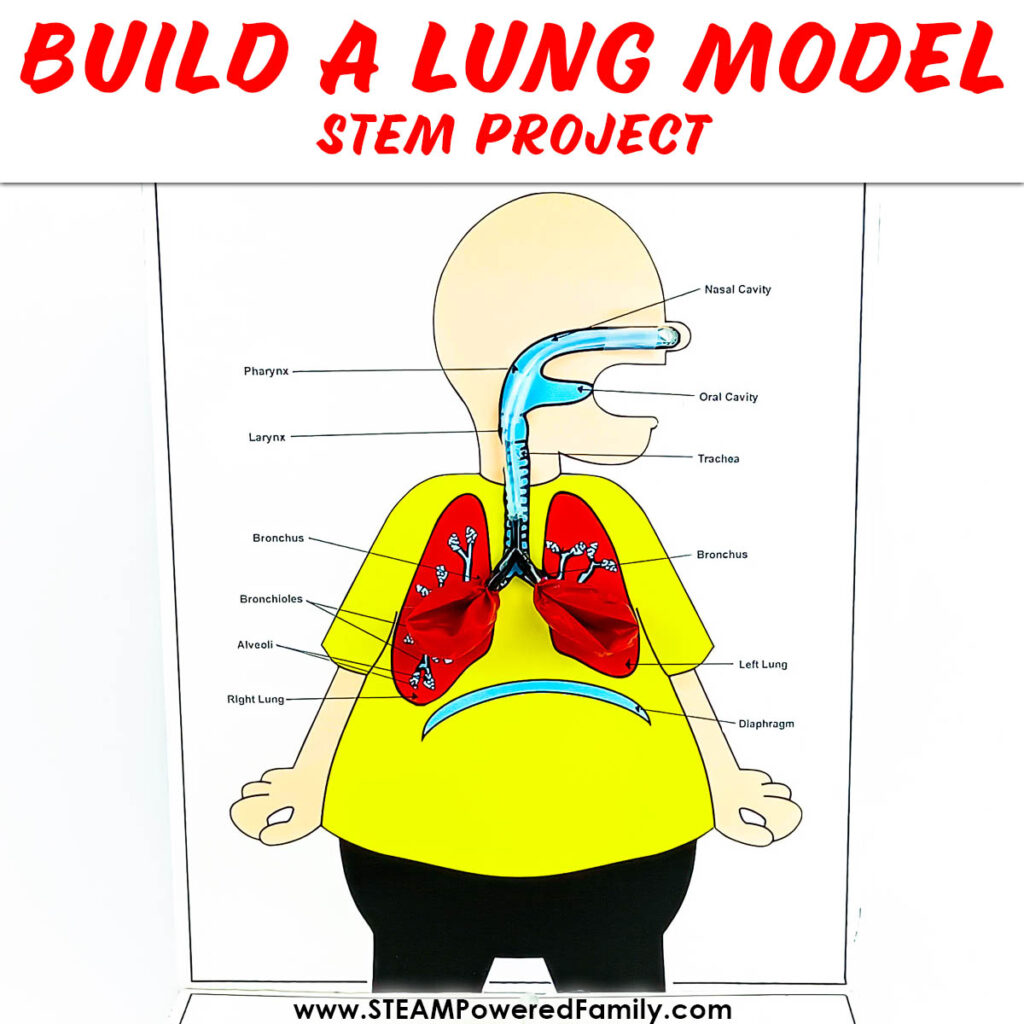
When we breathe in, the air enters our body through the nostrils and moves through the nasal cavity and travels down the pharynx which is at the back of the nasal cavity and then down into larynx.
Traveling to the lungs
The pharynx regulates the passage of the air from the nasal cavity to the lungs during the breathing process.
The larynx is situated between the pharynx and the trachea and is approximately 13cm/5 inch long. It is also known as the voice box because it regulates the pitch and volume of your voice via vocal folds.
The air then travels down the trachea, which is a long tube also known as the windpipe. It is also approximately 13cm/5 inch long.
The air makes its way down to the lungs through the two bronchi or bronchial passages, which connect the trachea to the lungs. Bronchial tubes are lined with mucus and cilia, which are like tiny hairs, together they filter the air of things like dust before it enters the lungs.
The two bronchi, branch off into smaller bronchioles, which almost resemble a tree-like structure. At the ends of the bronchioles are bunches of tiny air sacs called alveoli. Carbon dioxide from the body is stored in the capillaries of the alveoli. It is here that the air we breathe in, is exchanged with the carbon dioxide. When we breathe out the carbon dioxide travels back up the respiratory system and out of the mouth or nose.
The two lungs are not identical. The left lung is smaller and has two lobes while the right one has three lobes.
The muscles of respiration
Muscles of respiration allow us to inhale and exhale and the main muscles in the system are the diaphragm and the muscles of the rib cage.
The diaphragm is a strong muscle at the bottom of the thorax. The diaphragm contracts or squeezes in and moves up when we breathe out and moves down when we breathe in, helping our body inhale and exhale.
You can feel your diaphragm at work. Simply place a hand on your stomach and breathe in deeply. You should feel your stomach expand. This expansion is from your diaphragm working.
DIY Balloon Lung Model STEM Activity Video
Watch the video of this project to see how it is done. If you can’t see this video, please turn off your adblockers as they also block our video feed. You can also find this video on the STEAM Powered Family YouTube Channel .
How to make a Balloon Lung Model
Materials & tools.
Thin cardboard – a recycled box is perfect Glue gun Glue stick Super Glue Ruler Pencil Hobby knife Two medium sized balloons Fish tank “Y” connector or two bendable straws 1m/39inch length of clear fish tank or medical tubing 35ml/cc Syringe Wooden skewer Scissors Clear tape Sealing tape
Optional – If you don’t want to draw your own person and labels, you can get the templates to make your project look exactly like ours by joining the STEAM Powered Family mailing list. Simply enter your email into this form to unlock the printables.
Balloon Lung Model Directions
Getting your pieces ready.
Cut out all the pieces of cardboard as shown in the diagram below.
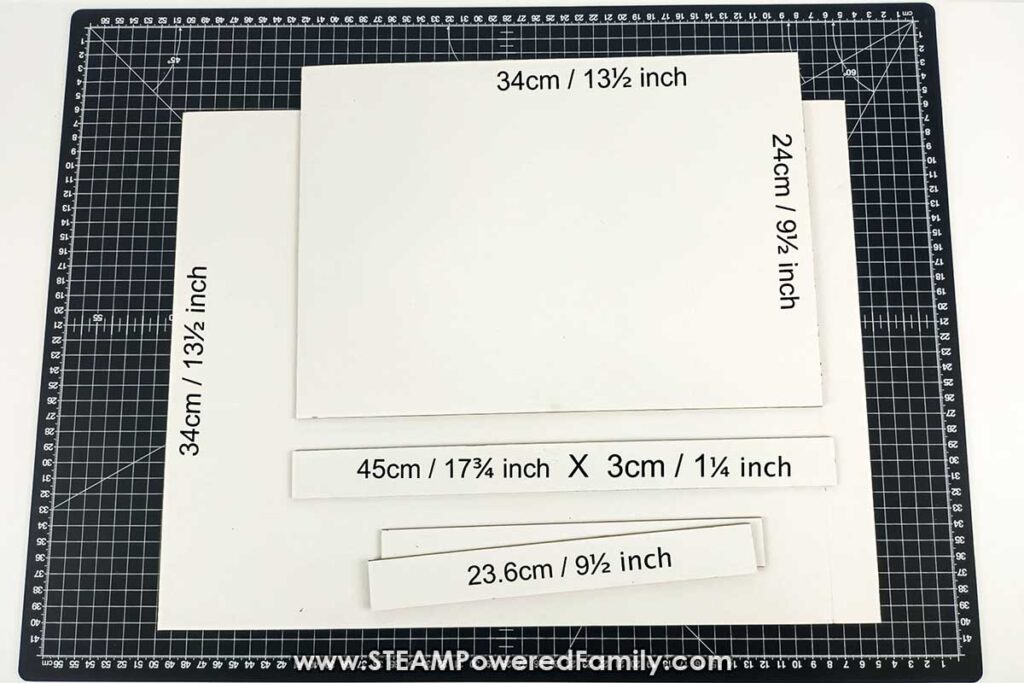
If you are using our templates, print, cut out and join the template pieces you choose to work with (either black & white or color). Or you can draw your own person if not using our templates.
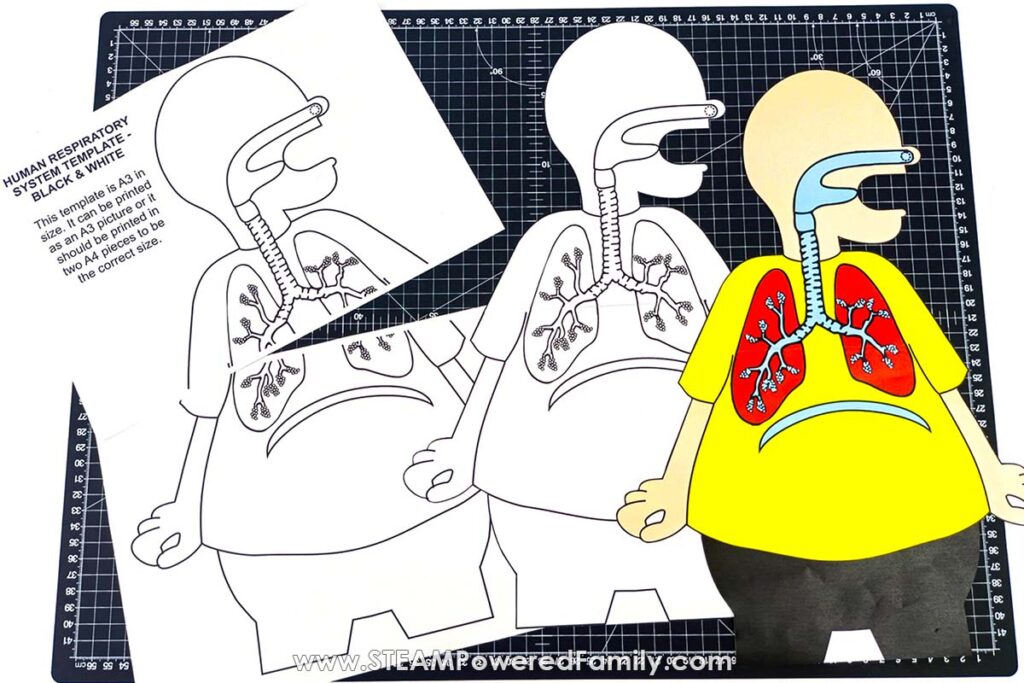
A Note on Paper Sizes
The templates are A3 in size which is close the tabloid size paper in North America. They can be printed as a single A3 picture if your printer is able to do that or you can print 2 X A4 pieces which are joined, to be the correct size for the project. A4 paper is approximately 8.5×11, the standard paper size in North America.
Preparing all the cardboard pieces
Measure 3cm/1½ inches up from the bottom of the short side of the largest piece of cardboard and make a line across. You will glue the bottom of body on this line.
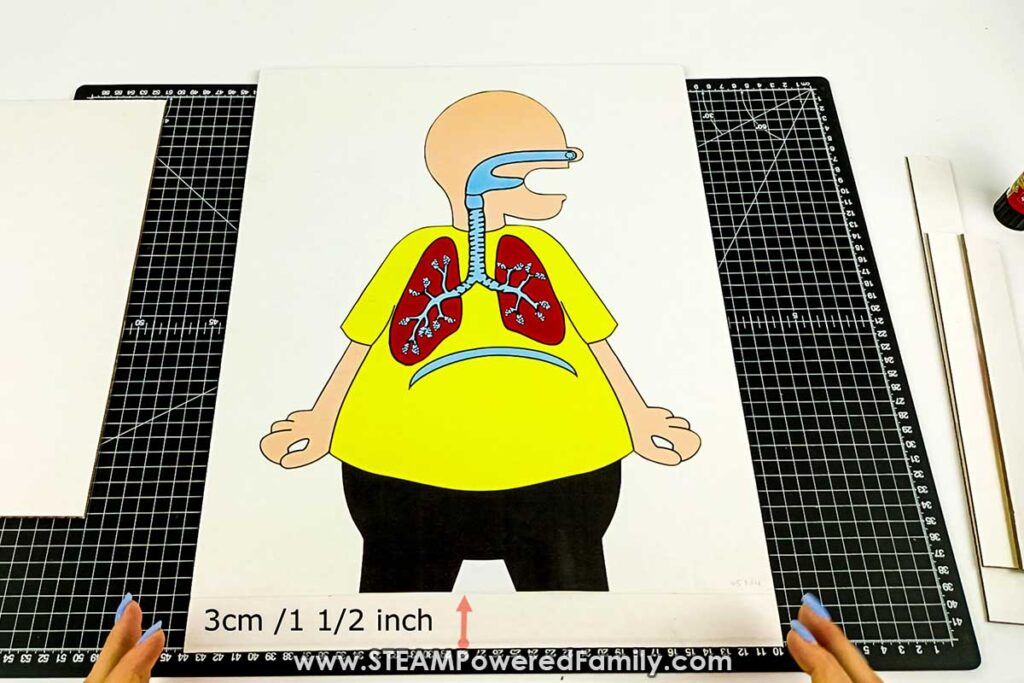
Using the glue gun, join the three thin strips of cardboard onto the underside of the smaller piece of cardboard, leaving one of the longest sides open. This is the base of the project where the syringe will be glued to.
Ensure appropriate adult supervision as the glue gun is very hot!
Join this base onto the bottom of the large cardboard where you drew a 3cm/1½ inch line from the bottom.
Adding all the other pieces to the lung model
Gather the syringe, balloons, insulation tape, the tube of Super Glue, the length of tubing, the “Y” connector (or straws), and a wooden skewer together.
Make a hole with the wooden skewer in the circle marked on the nose and then using a pencil, make the hole large enough to easily fit the tubing through it.
Do the same thing on the middle of the base, towards the back for the tubing to reach the syringe.
Cut about 2.5cm/1 inch off the neck of the two balloons.
Using a tiny drop of Super Glue, glue the balloon end onto the “Y” connector and tape in place using the insulation tape to create a seal. Do this with the other balloon as well. These will be placed inside the lungs.
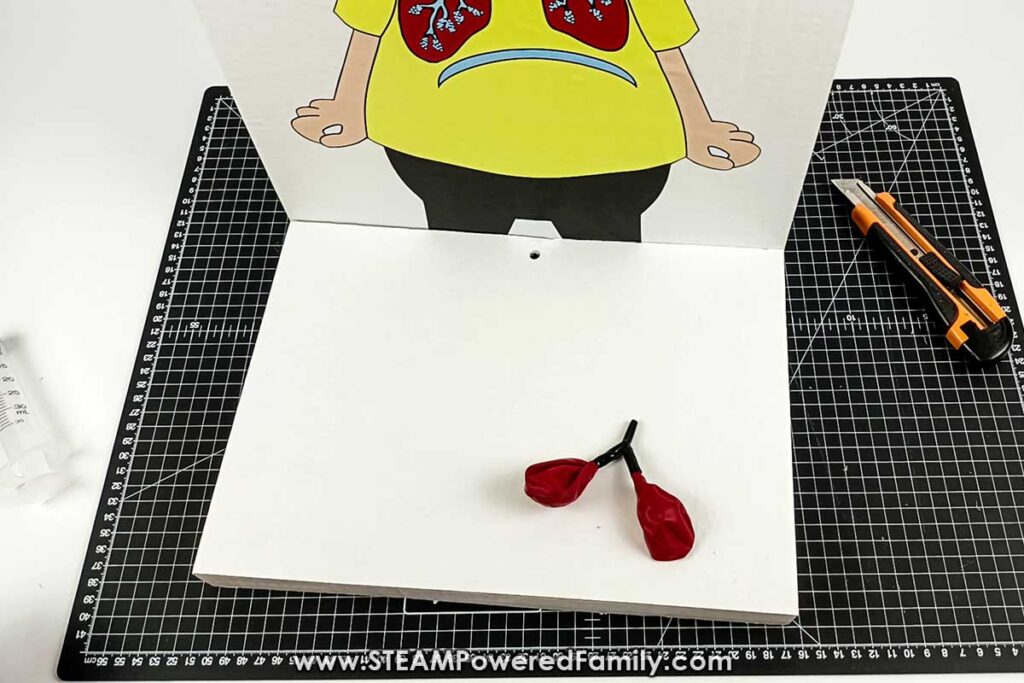
Join one end of the tubing onto the Y-connector and begin by gluing the Y-connector and the tubing all the way up to the hole in the nose, with the glue gun, a little bit at a time.
Tip – Use Straws instead of Y-connector
An alternative way of building the Bronchus if you don’t have a Y-connector is to use straws. You can also use clay or playdough to create the seals.
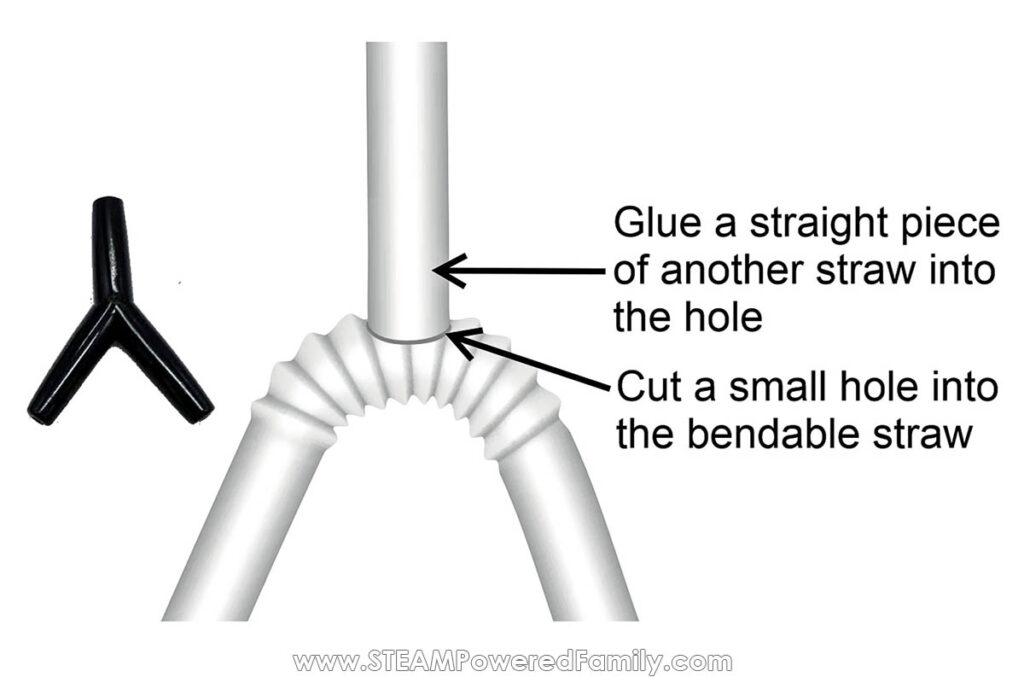
Test the Lungs
Blow through the Y-connector to see that the balloons are inflating and deflating. This movement of the balloon mimics the way the lungs work. If the balloons are not inflating and deflating, check that the tubing is not blocked, especially where you have threaded it through any of the holes.
Glue the balloons to either side of the lungs with a few drops of Super Glue.
You can use small strips of tape to hold the tubing down.
Run the Tubing
Carefully thread the other end of the tubing through the hole in the nose, to the back of the model.
Make another hole at the very bottom of the back of the model with the wooden skewer and pencil and thread the tubing through this new hole and up the hole (you made earlier) in the base, to the front of the model.
Find the middle of the base and glue the syringe down, with the glue gun, making sure that the plunger of the syringe can move in and out of the body of the syringe freely.
Pull the plunger outwards to the opening of the syringe and join the tubing onto the syringe, cutting off the excess tubing.
Label the Lung Model
Add all the labels onto the front of your model as shown below:
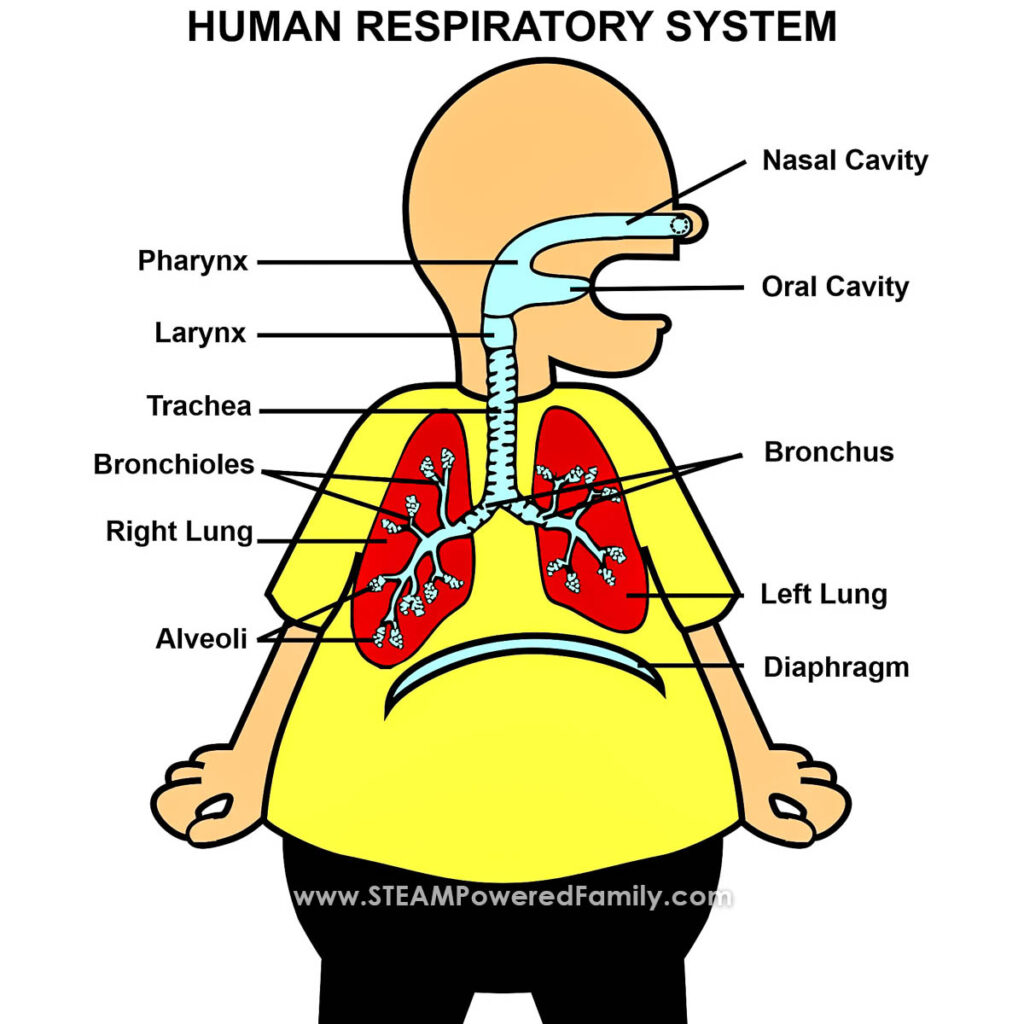
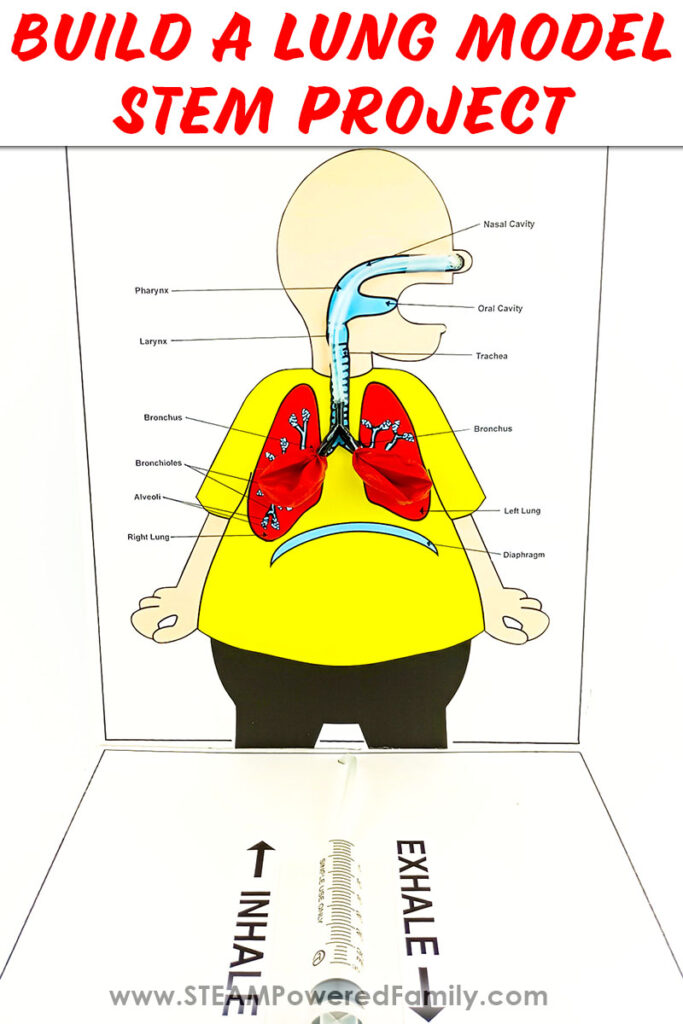
Your Human Respiratory System Model is ready to show off!
This is a fantastic project idea for the science fair or as part of a biology unit study to really show your understanding of the human respiratory system.
Respiratory System Unit Study Printable
Building a lung model is a fantastic way to learn how the human respiratory system works. For a printable unit study to go with this project, check out the STEAM Powered Family Shop .
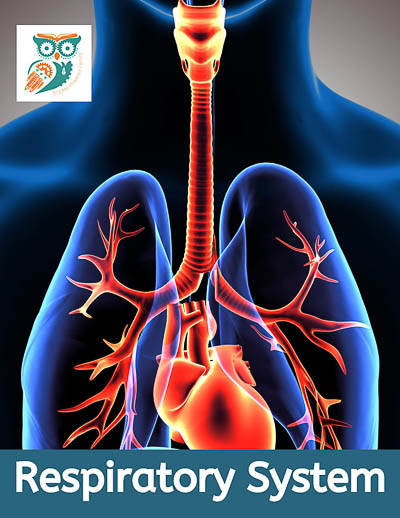
Have fun learning about the human respiratory system and the lungs!
5 Days of Smart STEM Ideas for Kids
Get started in STEM with easy, engaging activities.

IMAGES
COMMENTS
Aug 12, 2018 · The lungs are an essential organ for all mammals. Lungs have several features which make them perfect for exchanging gases. a very large surface area, thanks to a network of small tubes and tiny air sacs called alveoli. they are moist; and have a good blood supply; Today, we’re going to find out how lungs work by making a lung model.
In this activity you will make a model of a lung and use it to discover how air flows in and out of the lungs with ease. This activity is not recommended for use as a science fair project. Good science fair projects have a stronger focus on controlling variables, taking accurate measurements, and analyzing data.
Now you are ready to insert your lungs into your bottle. You will want to do so by inserting your lungs straw side up into the bottle. Now take your lid and put the top of your windpipe (straw) through the hole. If you have difficulty, try folding the top of the straw to squeeze it into the lid.
Sep 7, 2022 · Cut a small hole in the brown paper bag of your lung model. See what happens when you try to blow air in and suck air out. Sometimes, the lung can get a hole when the chest gets hit or poked with a lot of force. When a person has a hole in a lung, doctors call this a “pneumothorax” because air from the lungs can leak out into the chest.
Apr 30, 2020 · The lungs are respiratory organs that are vital to the breathing process and necessary to acquire life-giving oxygen. Learn how your lungs work by using simple materials from around your house to build a model lung. Your family and friends are bound to be amazed by this awesome model and your knowledge of how lungs work! Materials to Collect
Dec 11, 2023 · A very similar process takes place inside our bodies too. In this interesting project, you will learn about the human respiratory system and build a lung model that demonstrates how the lungs work. This is a fantastic project for biology class or as a science fair project. BUILD A BALLOON LUNG MODEL